Solar Auxilia Artillery Command

In 2025, I took the long road into a Horus Heresy army and committed to Solar Auxilia — specifically, a cohort of my own invention called the Wild Hunt of Hibernia. I decided early on that I would paint all the infantry first. Six squads of twenty soldiers. Post and photos coming someday.
Once that was finished, I moved on to tanks, specifically artillery. The Medusa and the Basilisk. With Horus Heresy 3.0, you need characters in play to unlock additional units. For Solar Auxilia, that means specific command units to unlock certain buffs. The further kick is that those “characters” are actually five-man units. More models.
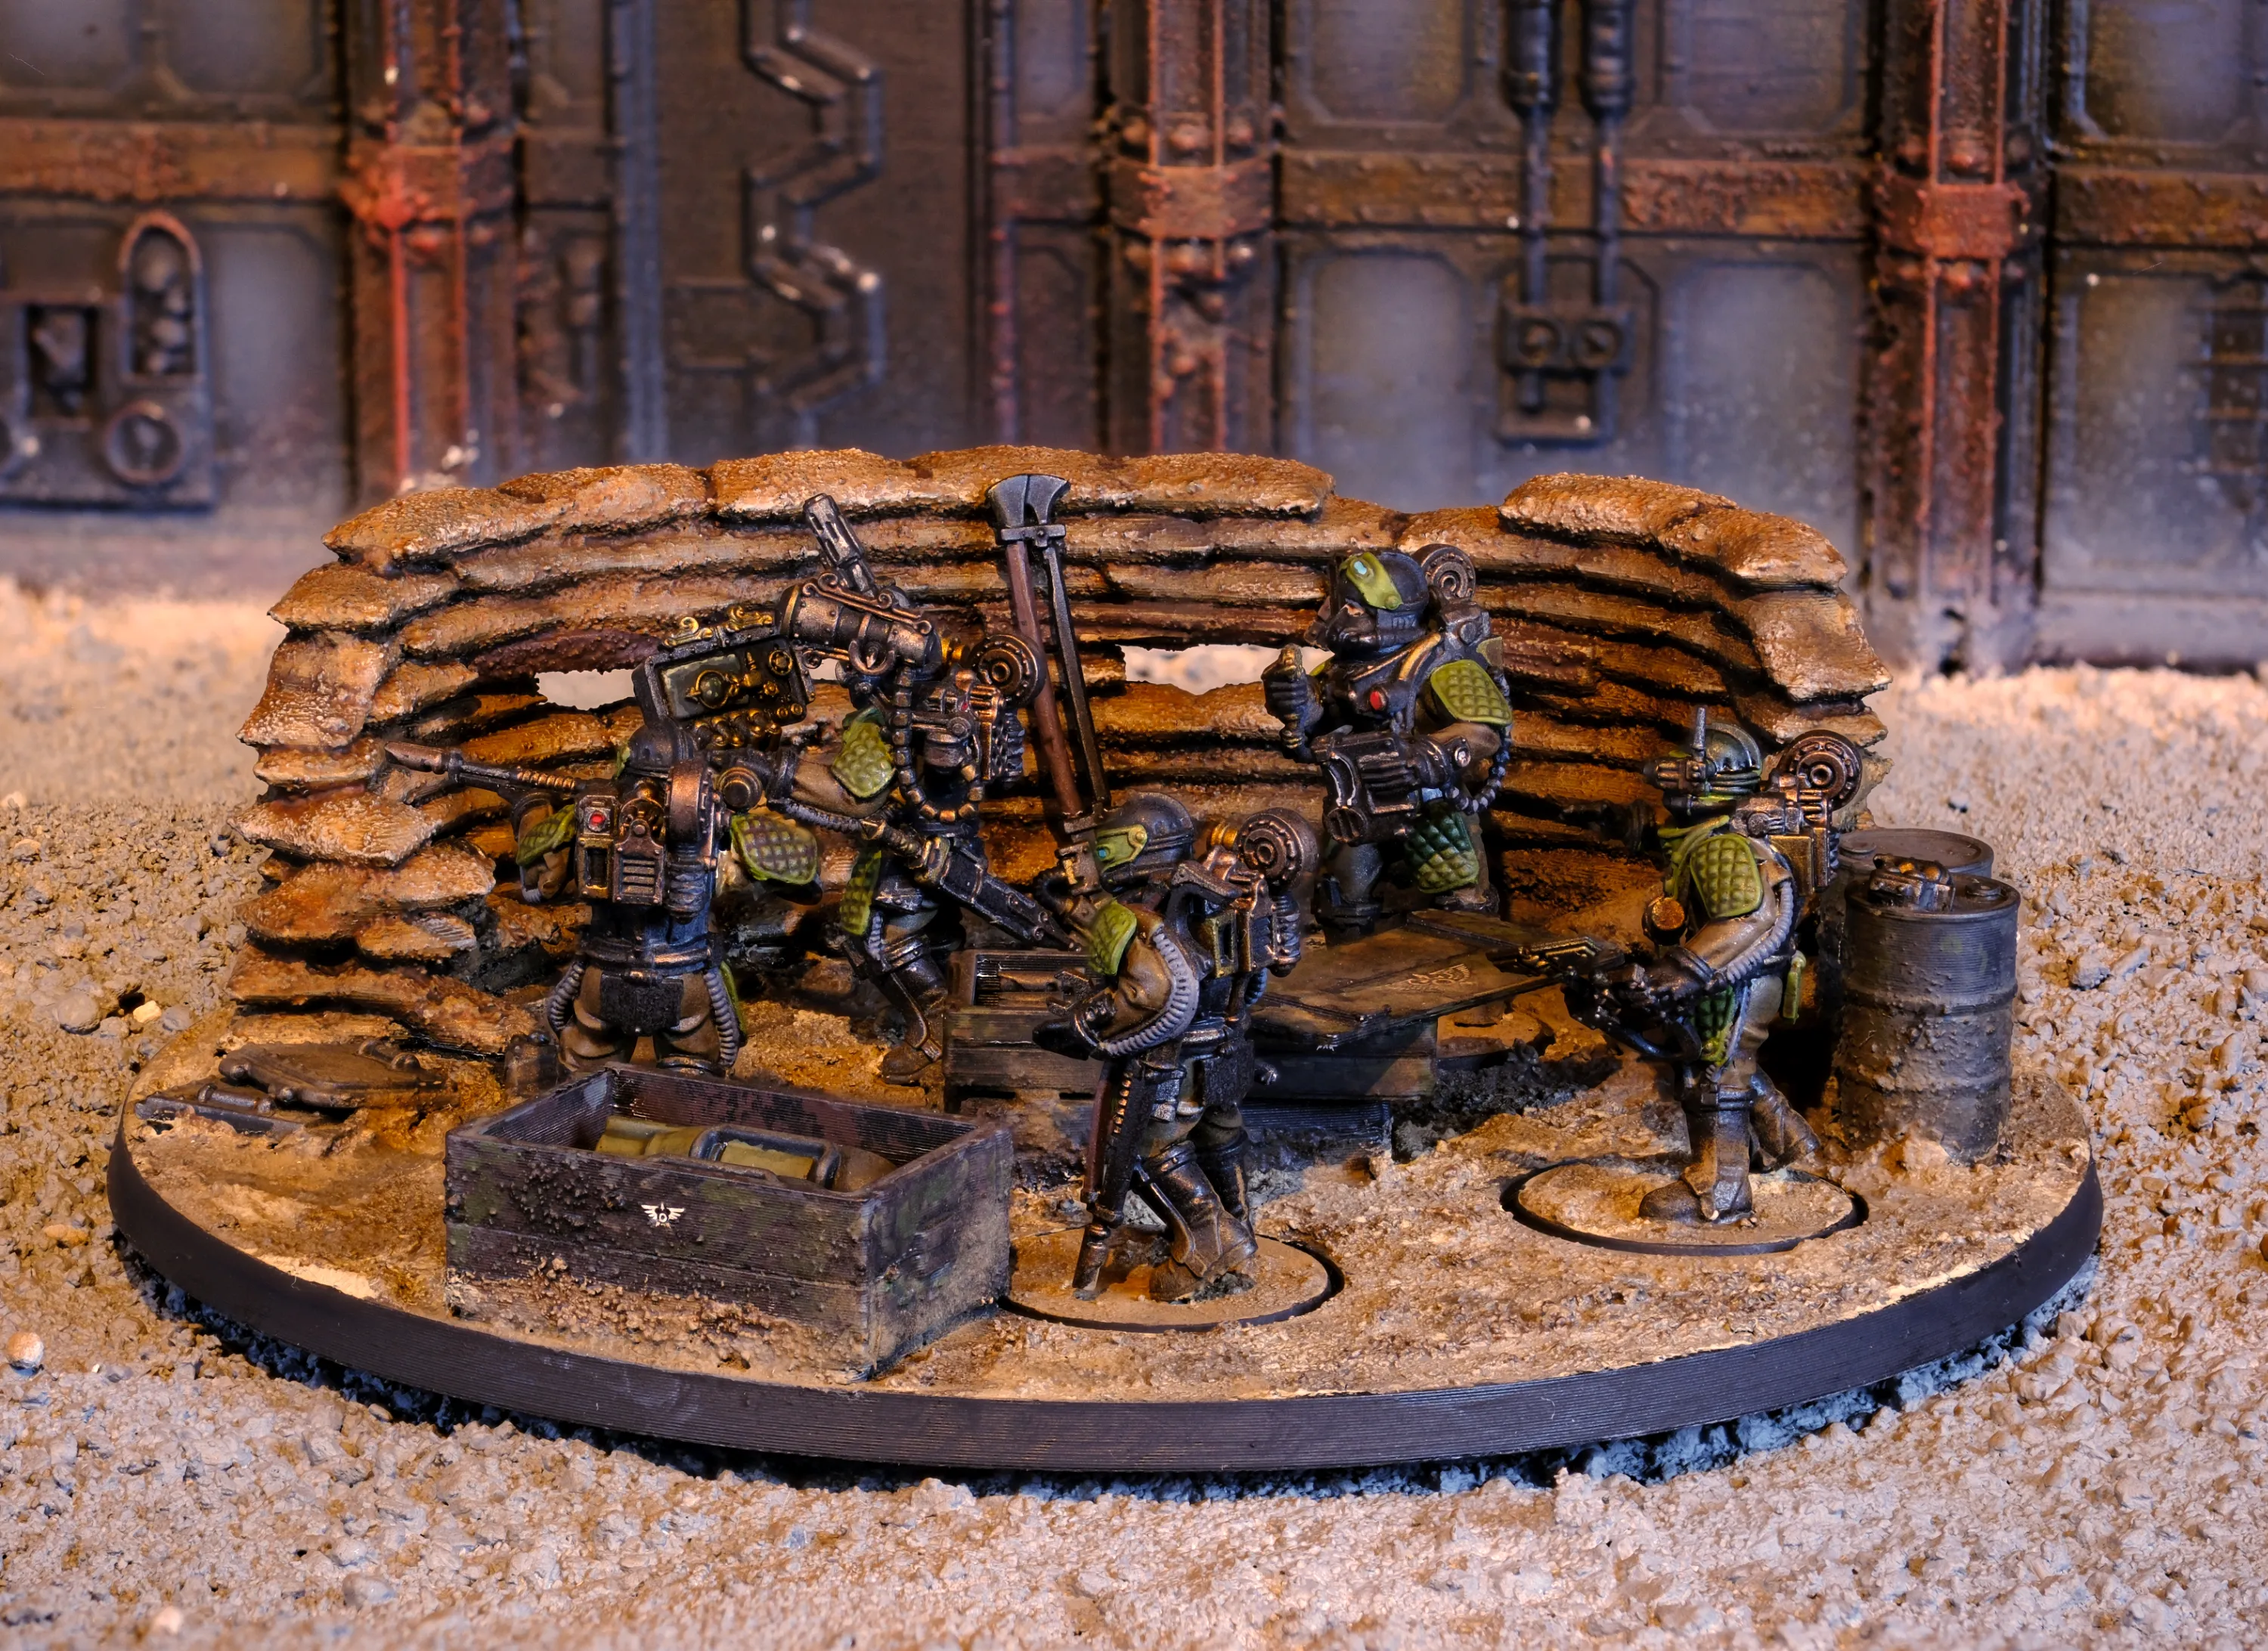
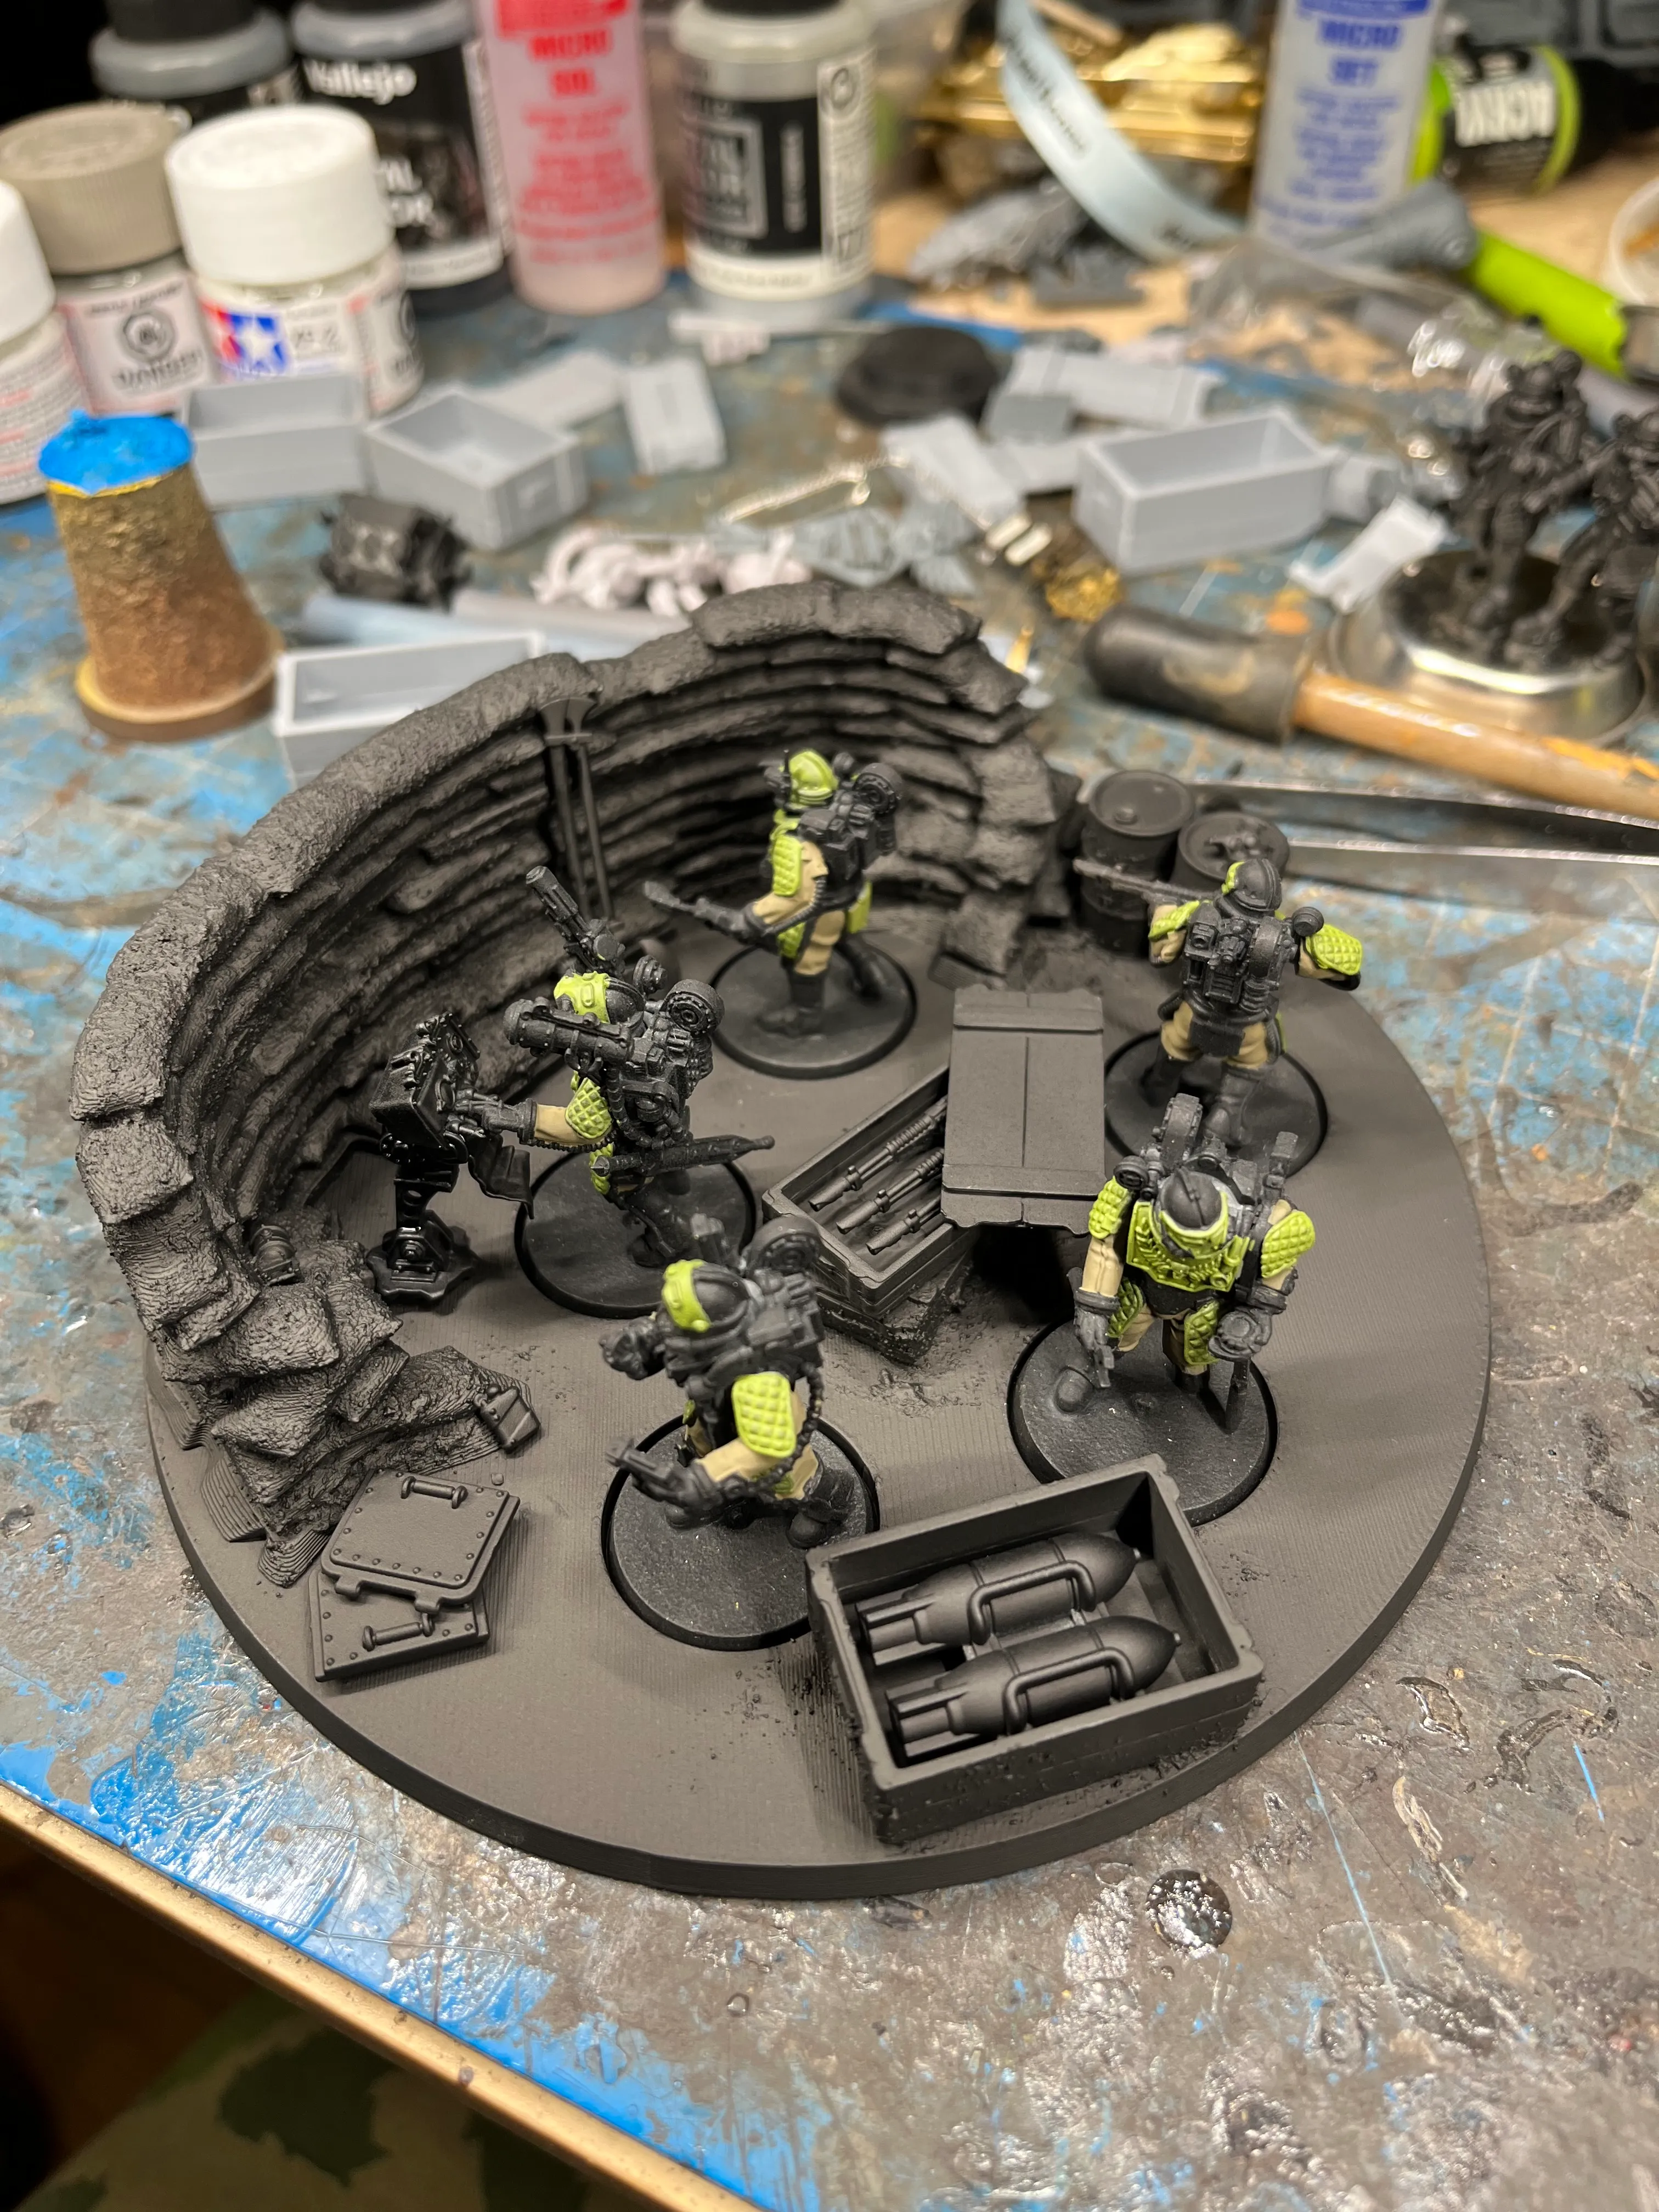
Command units do not do much beyond existing for those buffs. That made me want to do something different with them. Instead of five separate bases, I thought it would be more interesting to build a single base that told a small story.
Models
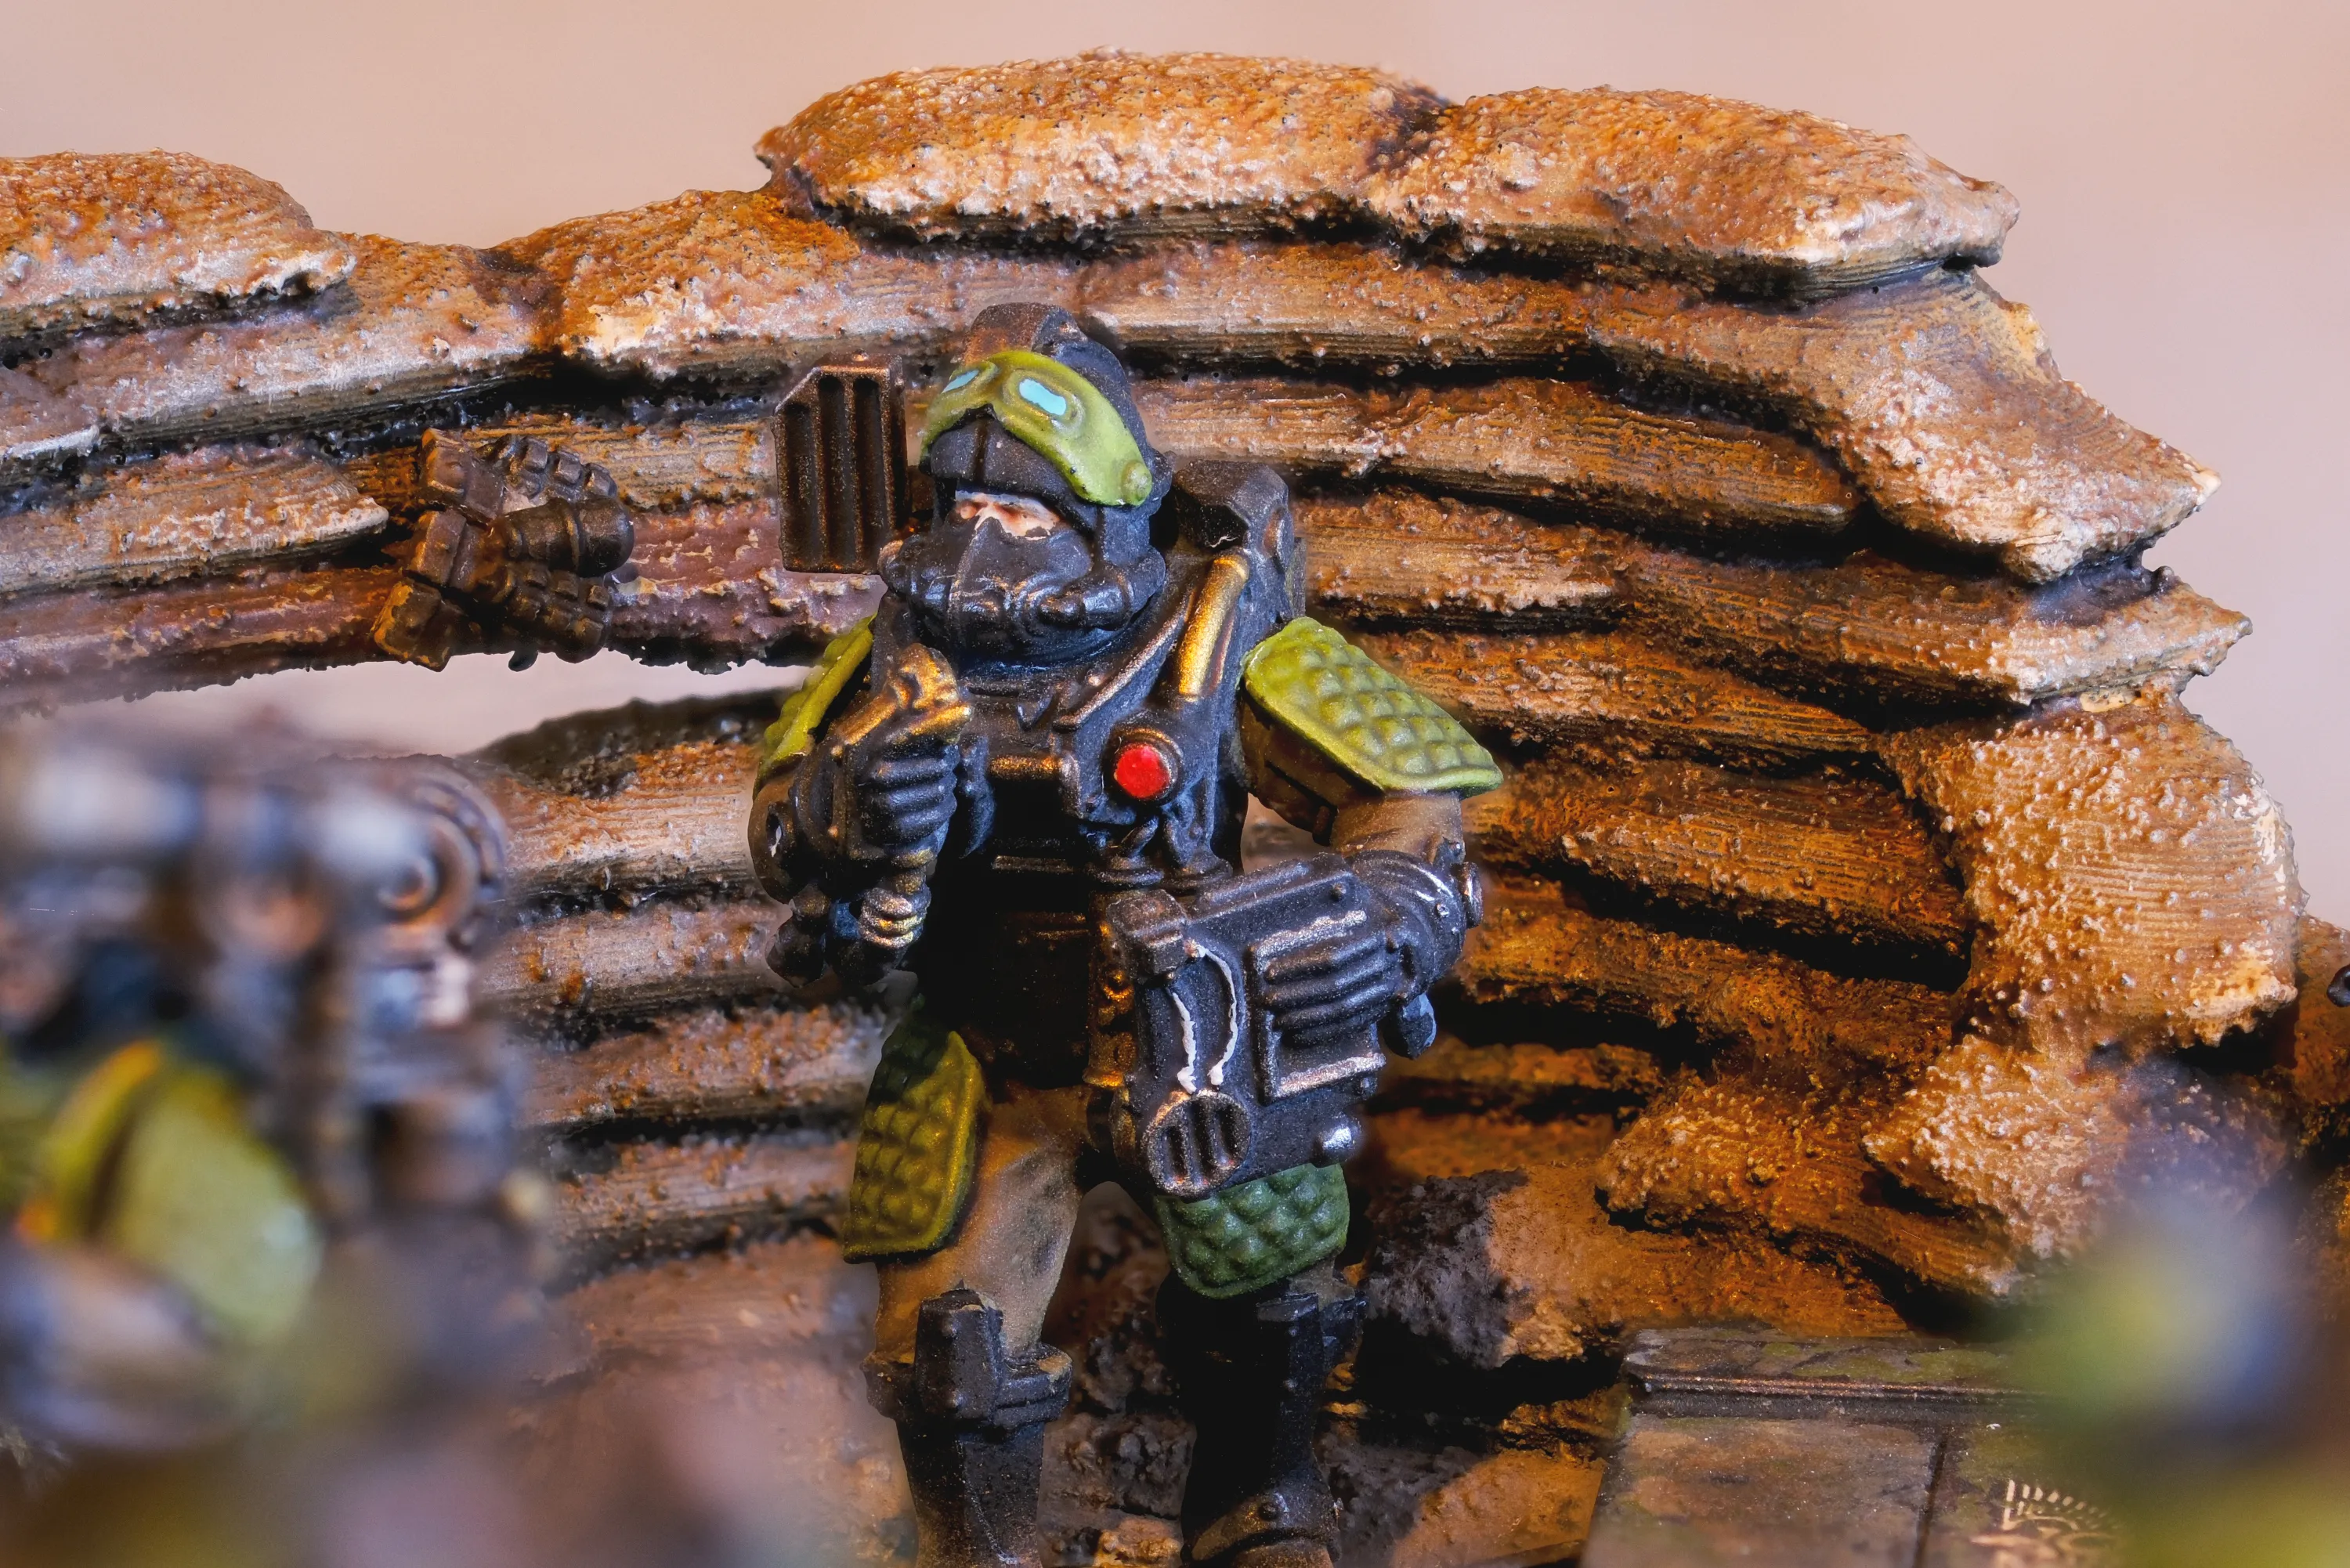
The Basilisk and Medusa kit includes the option for a fully modelled artillery compartment, along with some excellent crew. Instead of the usual hard plate armour on the shoulders and thighs, these crew have padded, quilted leather. Presumably to keep the clanking down.
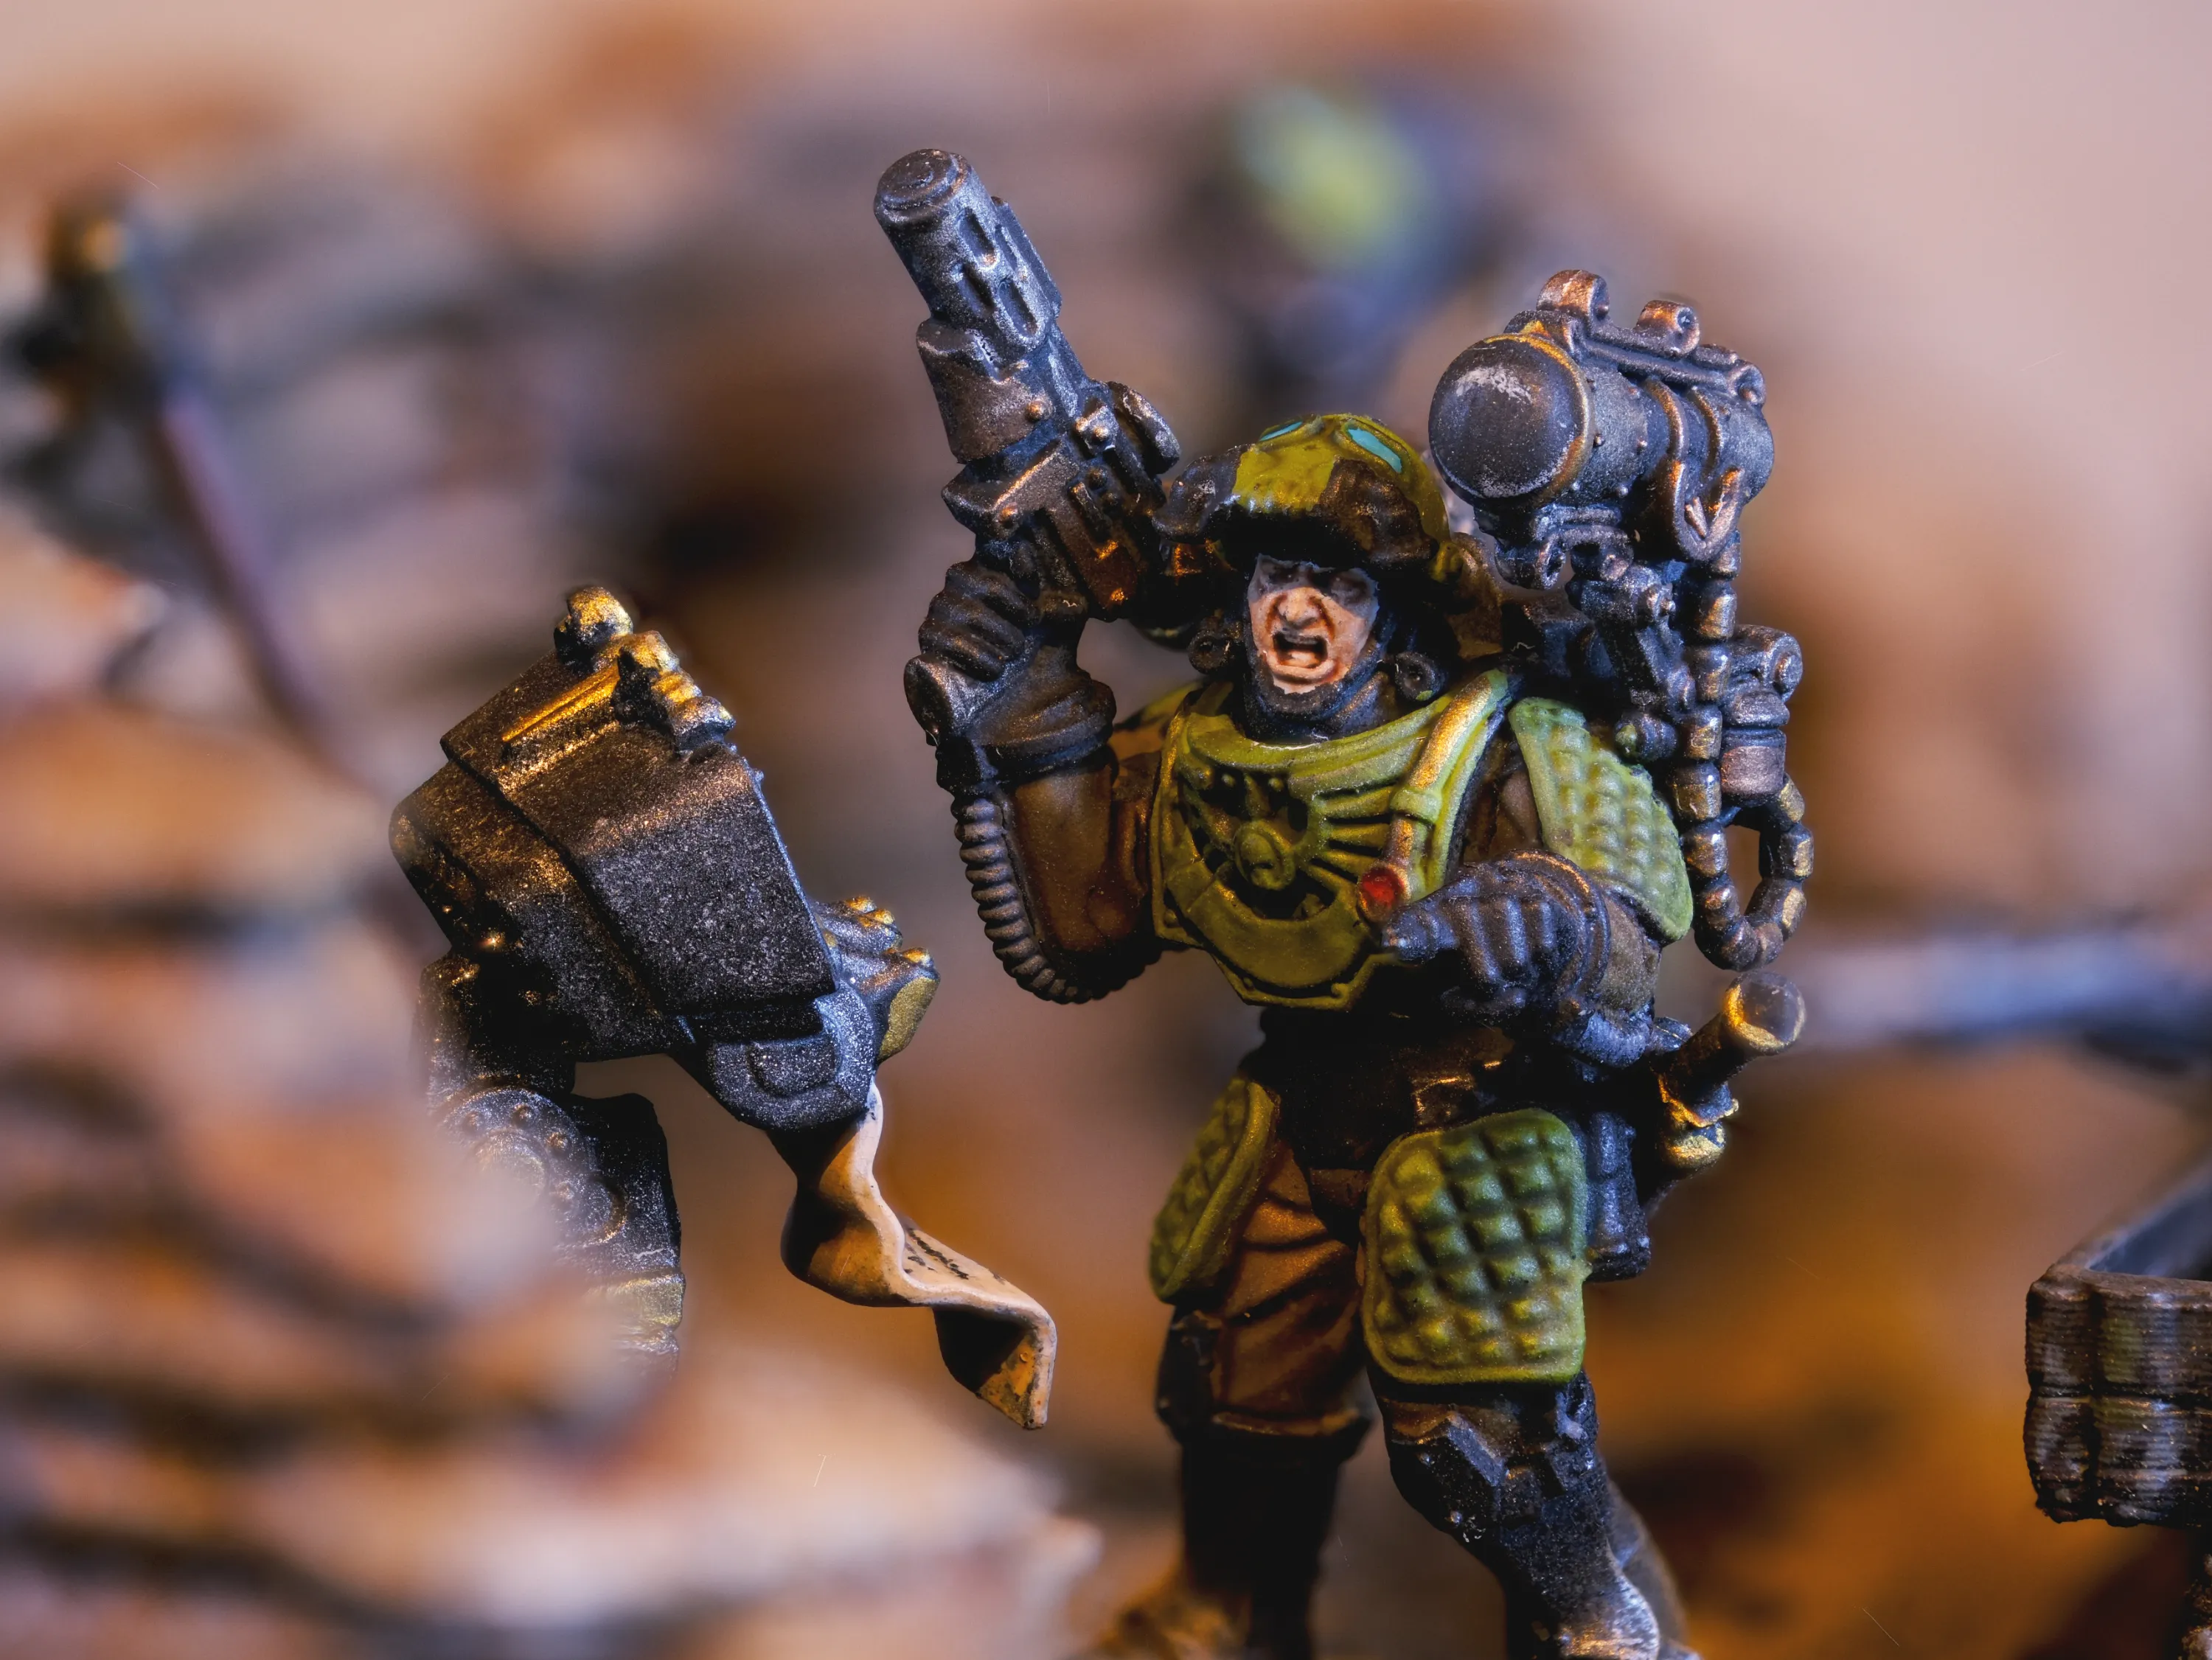
Because I had three kits, I used the extra legs and arms to build out part of the command squad. The Solar Auxilia tank sprue also includes a commander with the standard thigh and shoulder plates, which helped round out the unit.
For the commander, I added the targeting computer and shoulder scanner from the sprue as well.


Base
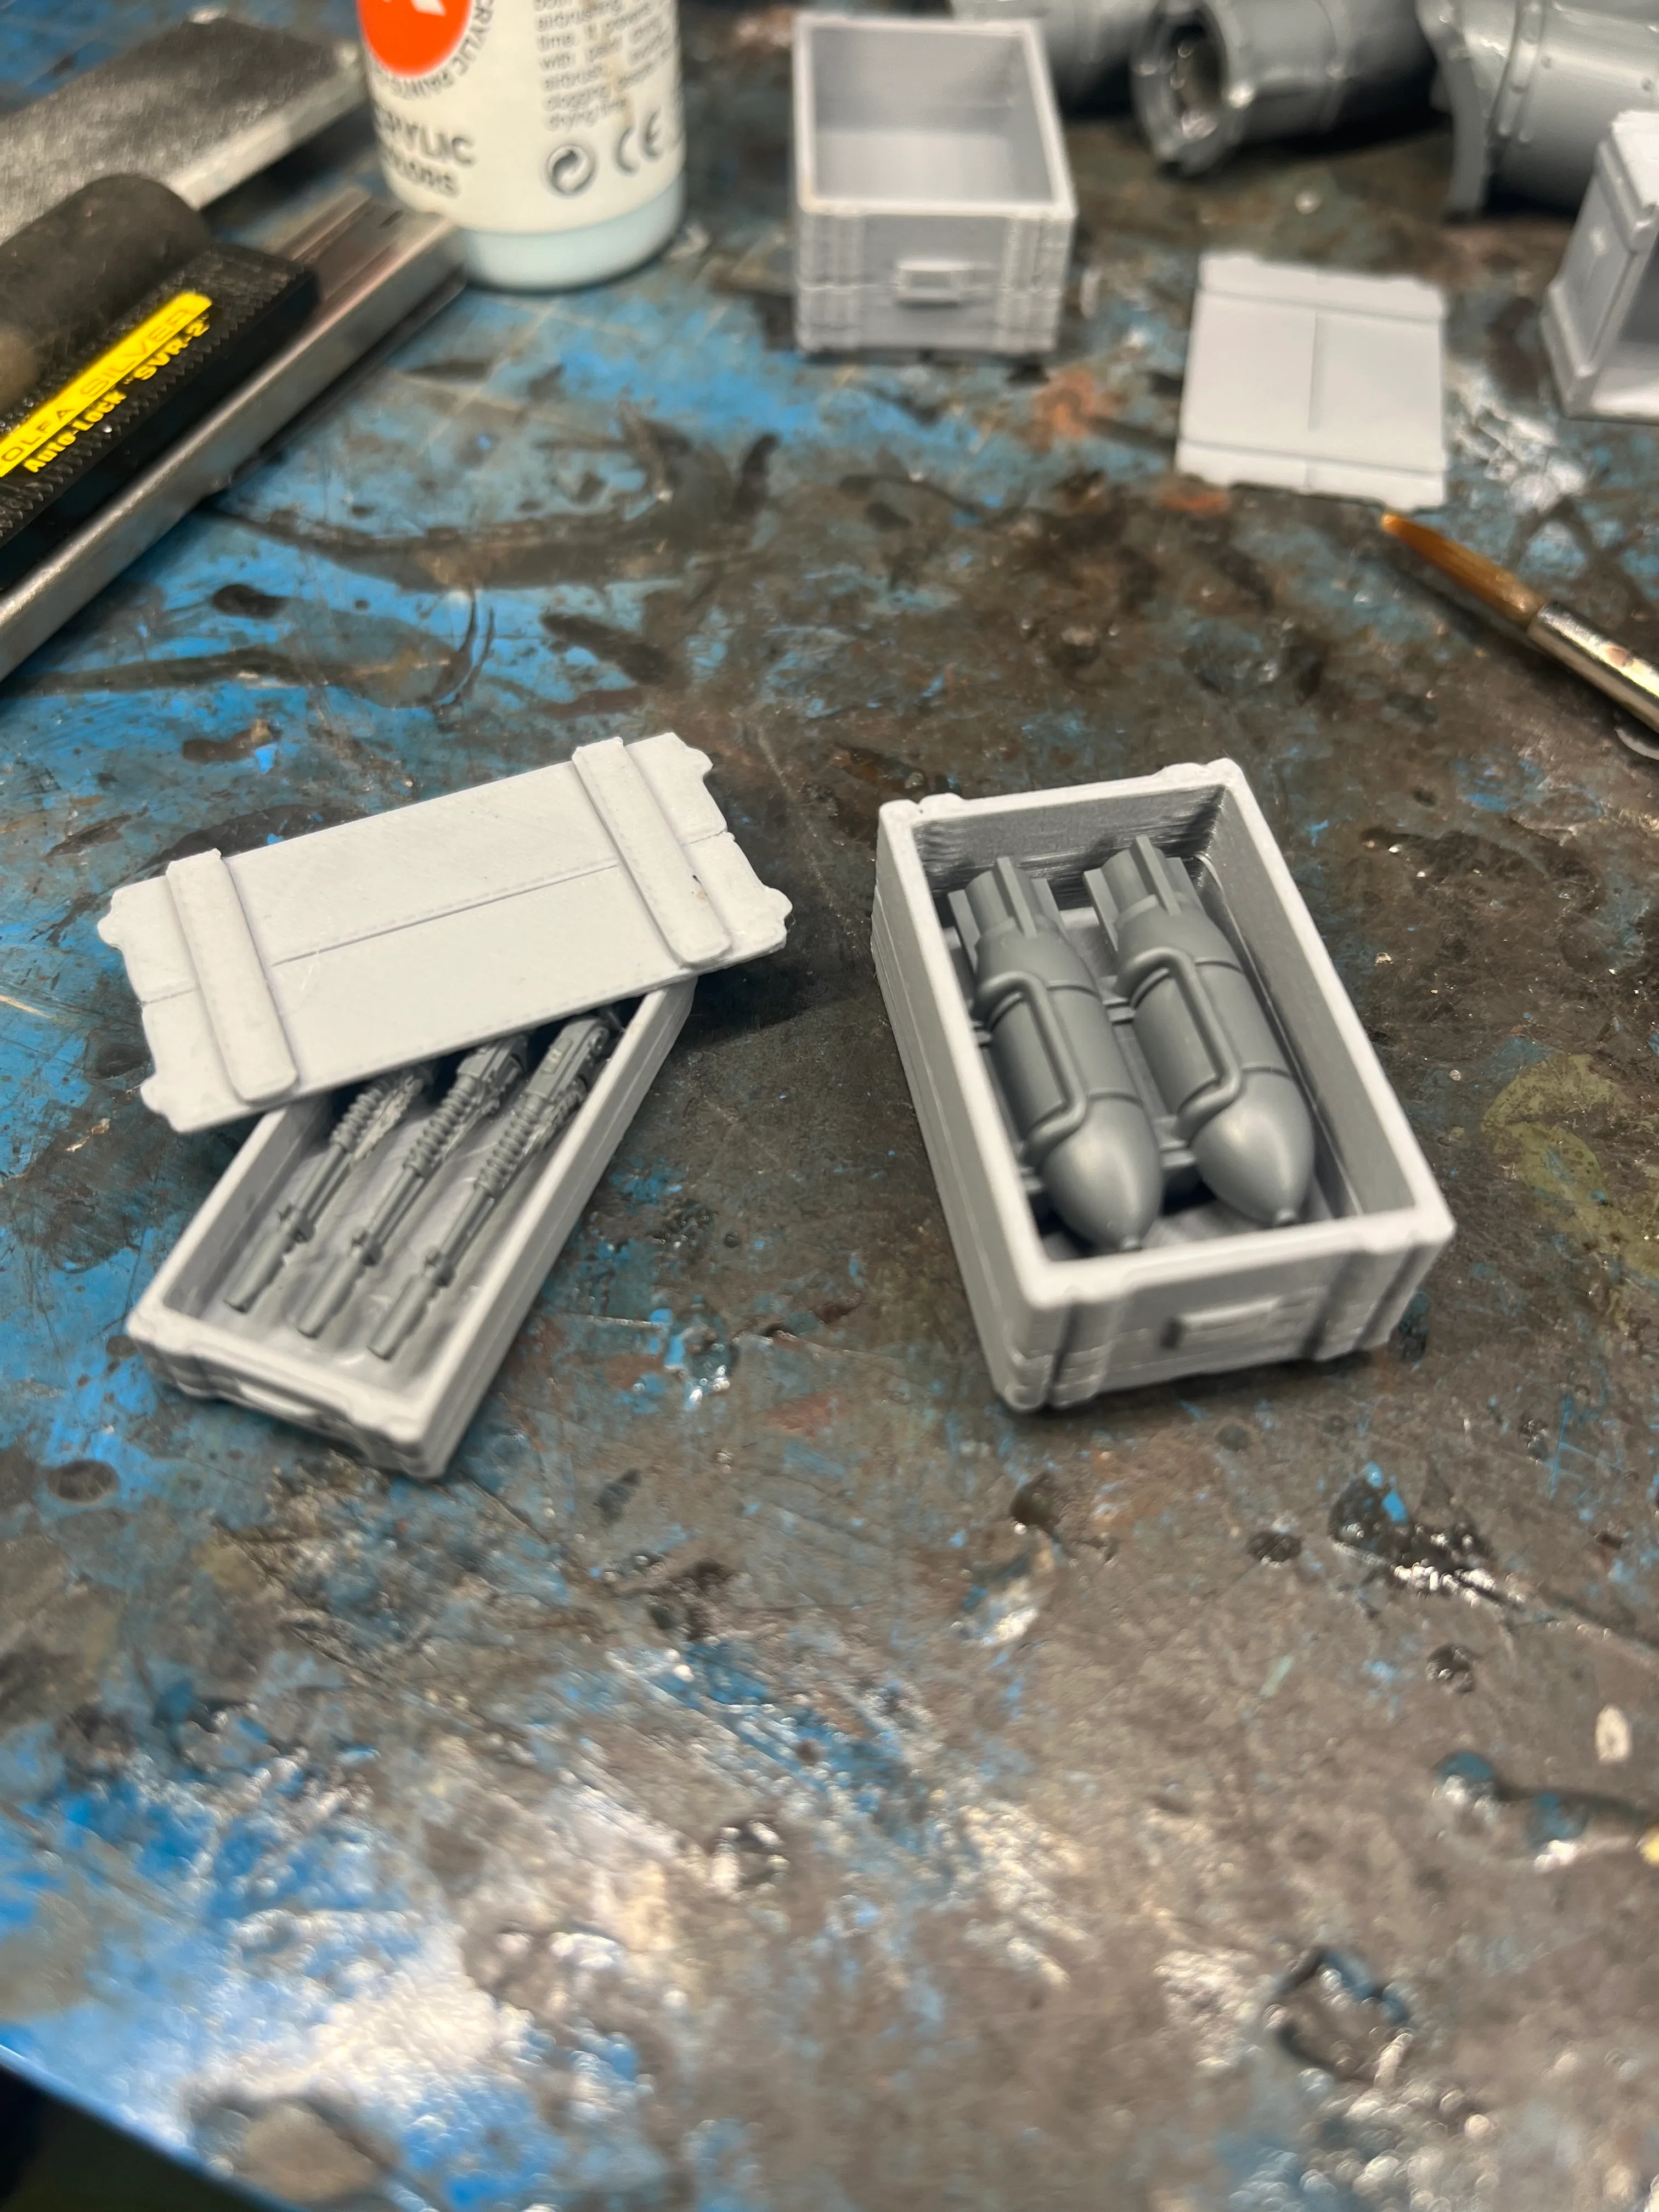
For the base, I 3D printed a tray with circular recesses to hold the individual models. The sandbags, barrels, and crates were sourced from Cults3D.
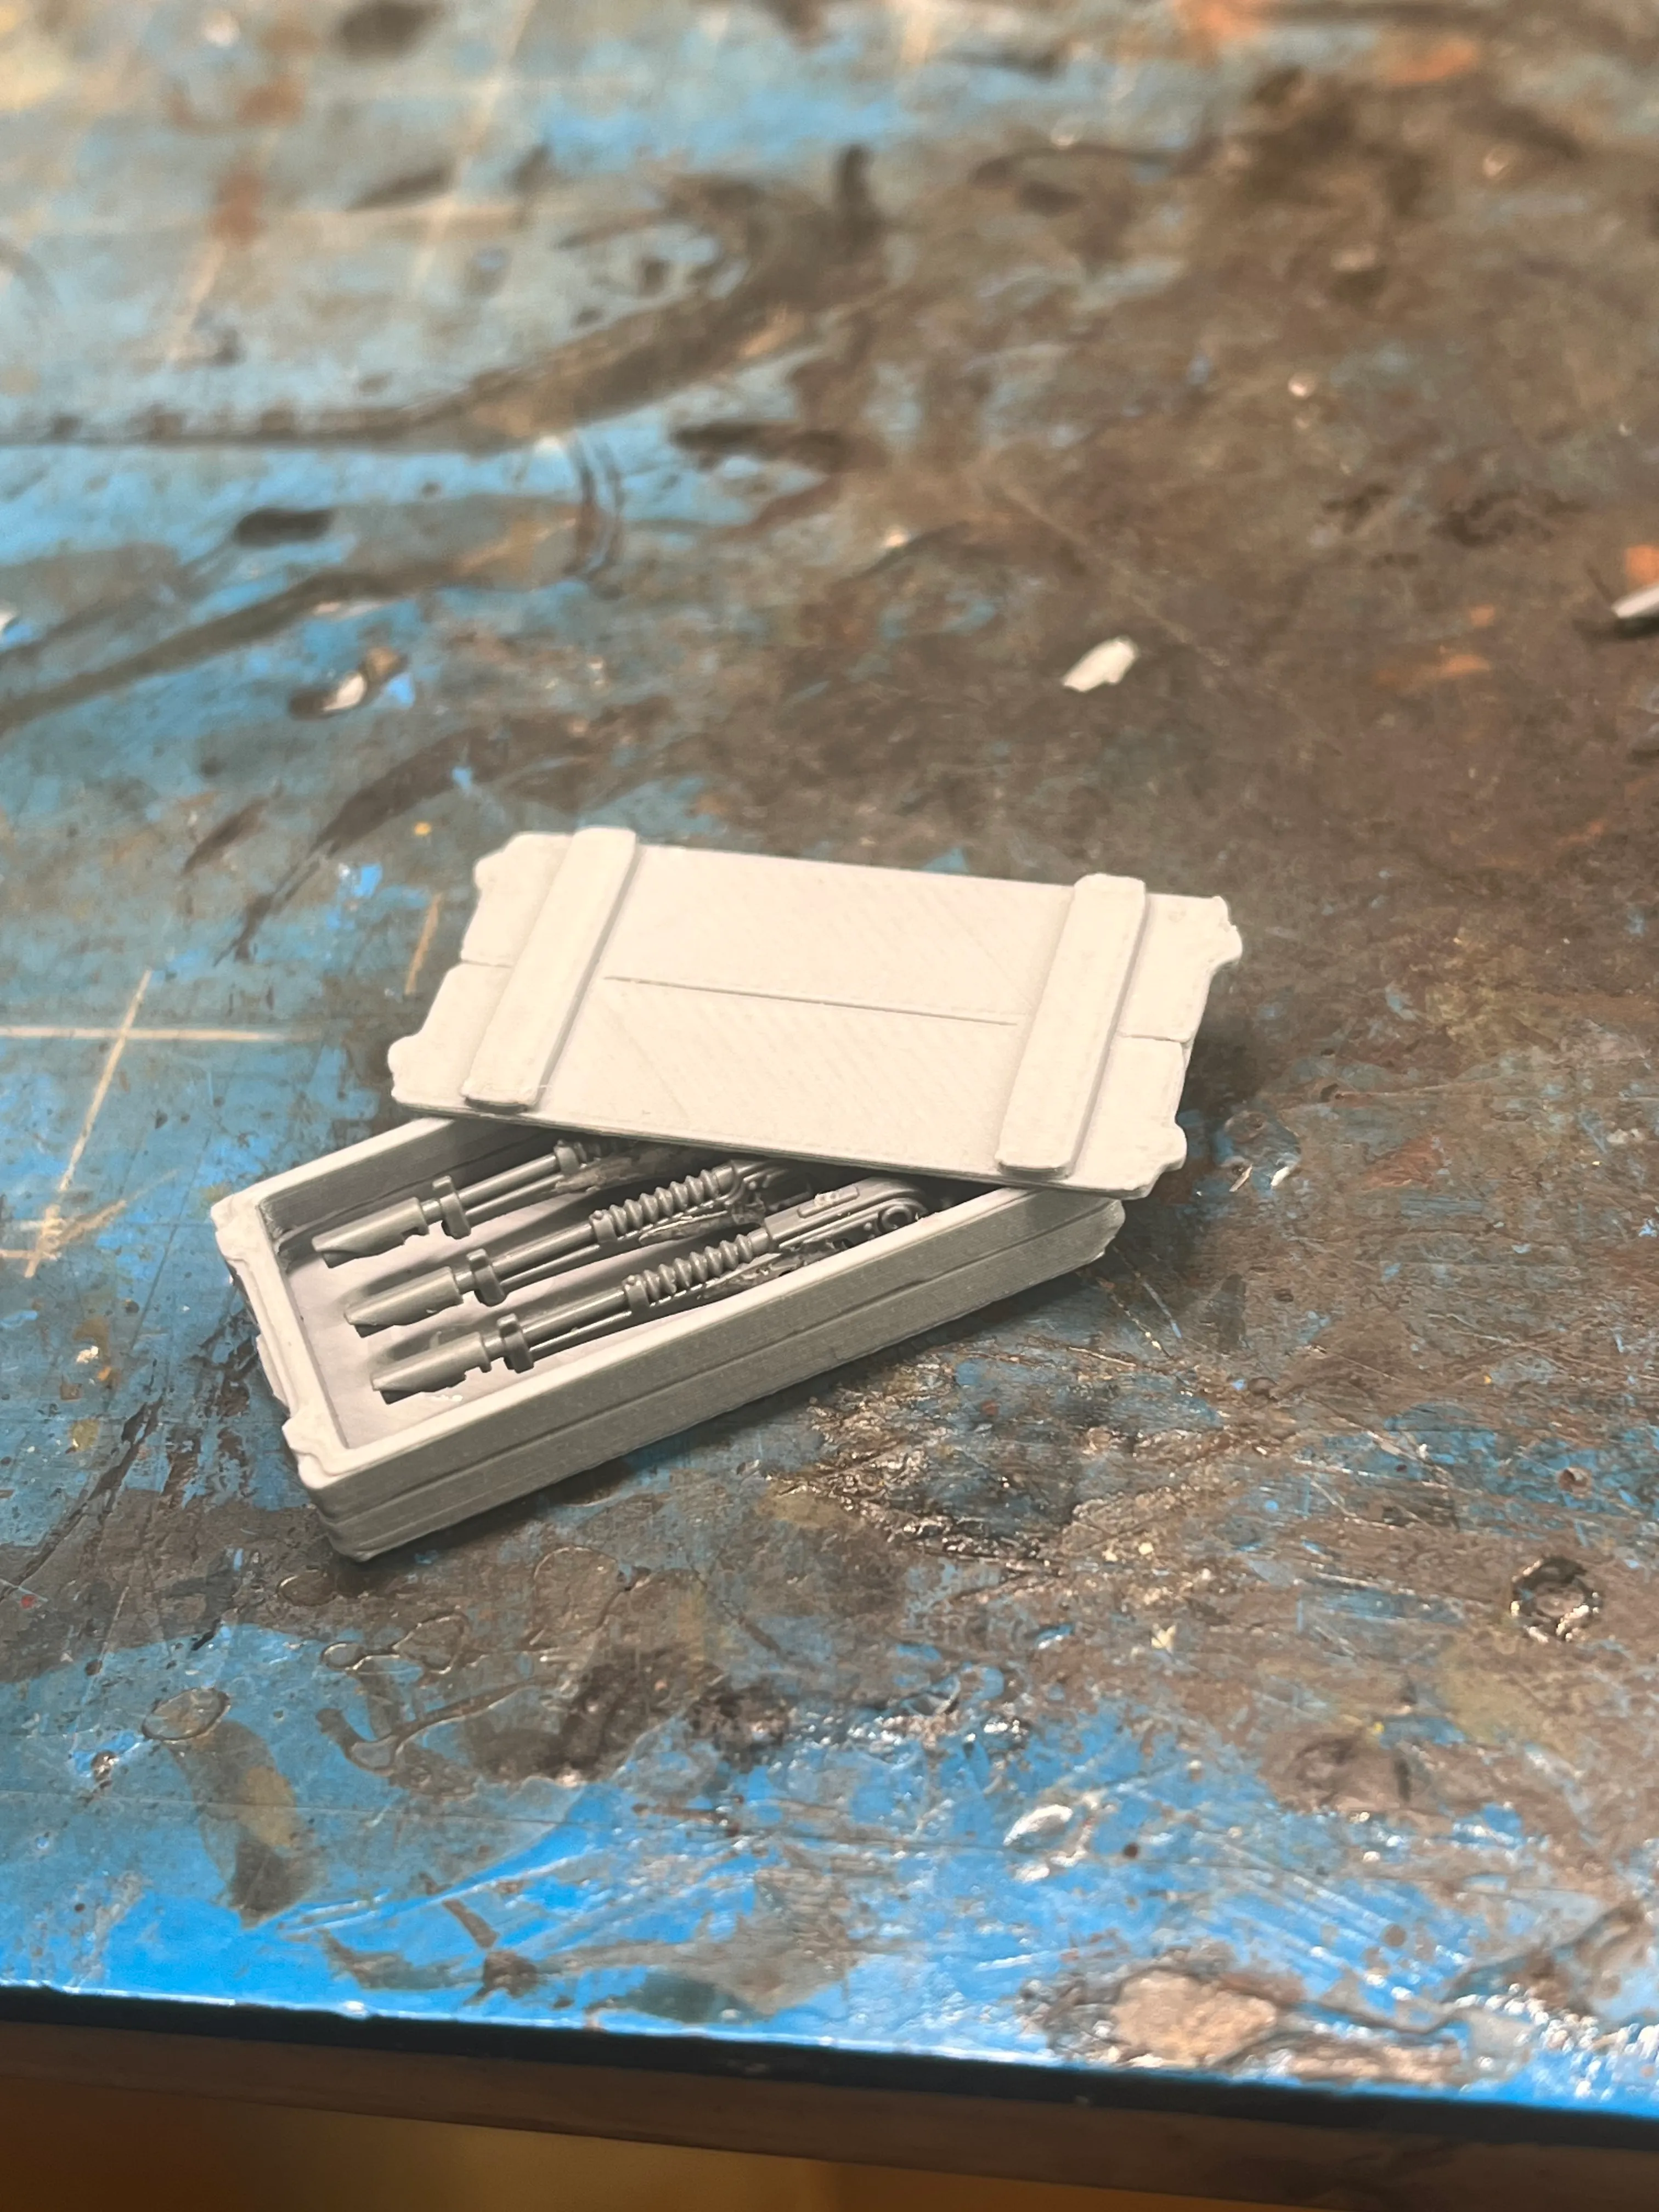
I had a pile of leftover lasrifles, so I trimmed the arms and hands away and set the rifles into open crates, letting the lids cover the gaps so they looked intact. A small cheat, but it works. I also added a pair of mortar shells in a crate and scattered in a few extra details like a power axe, grenades, and loose ammo belts.
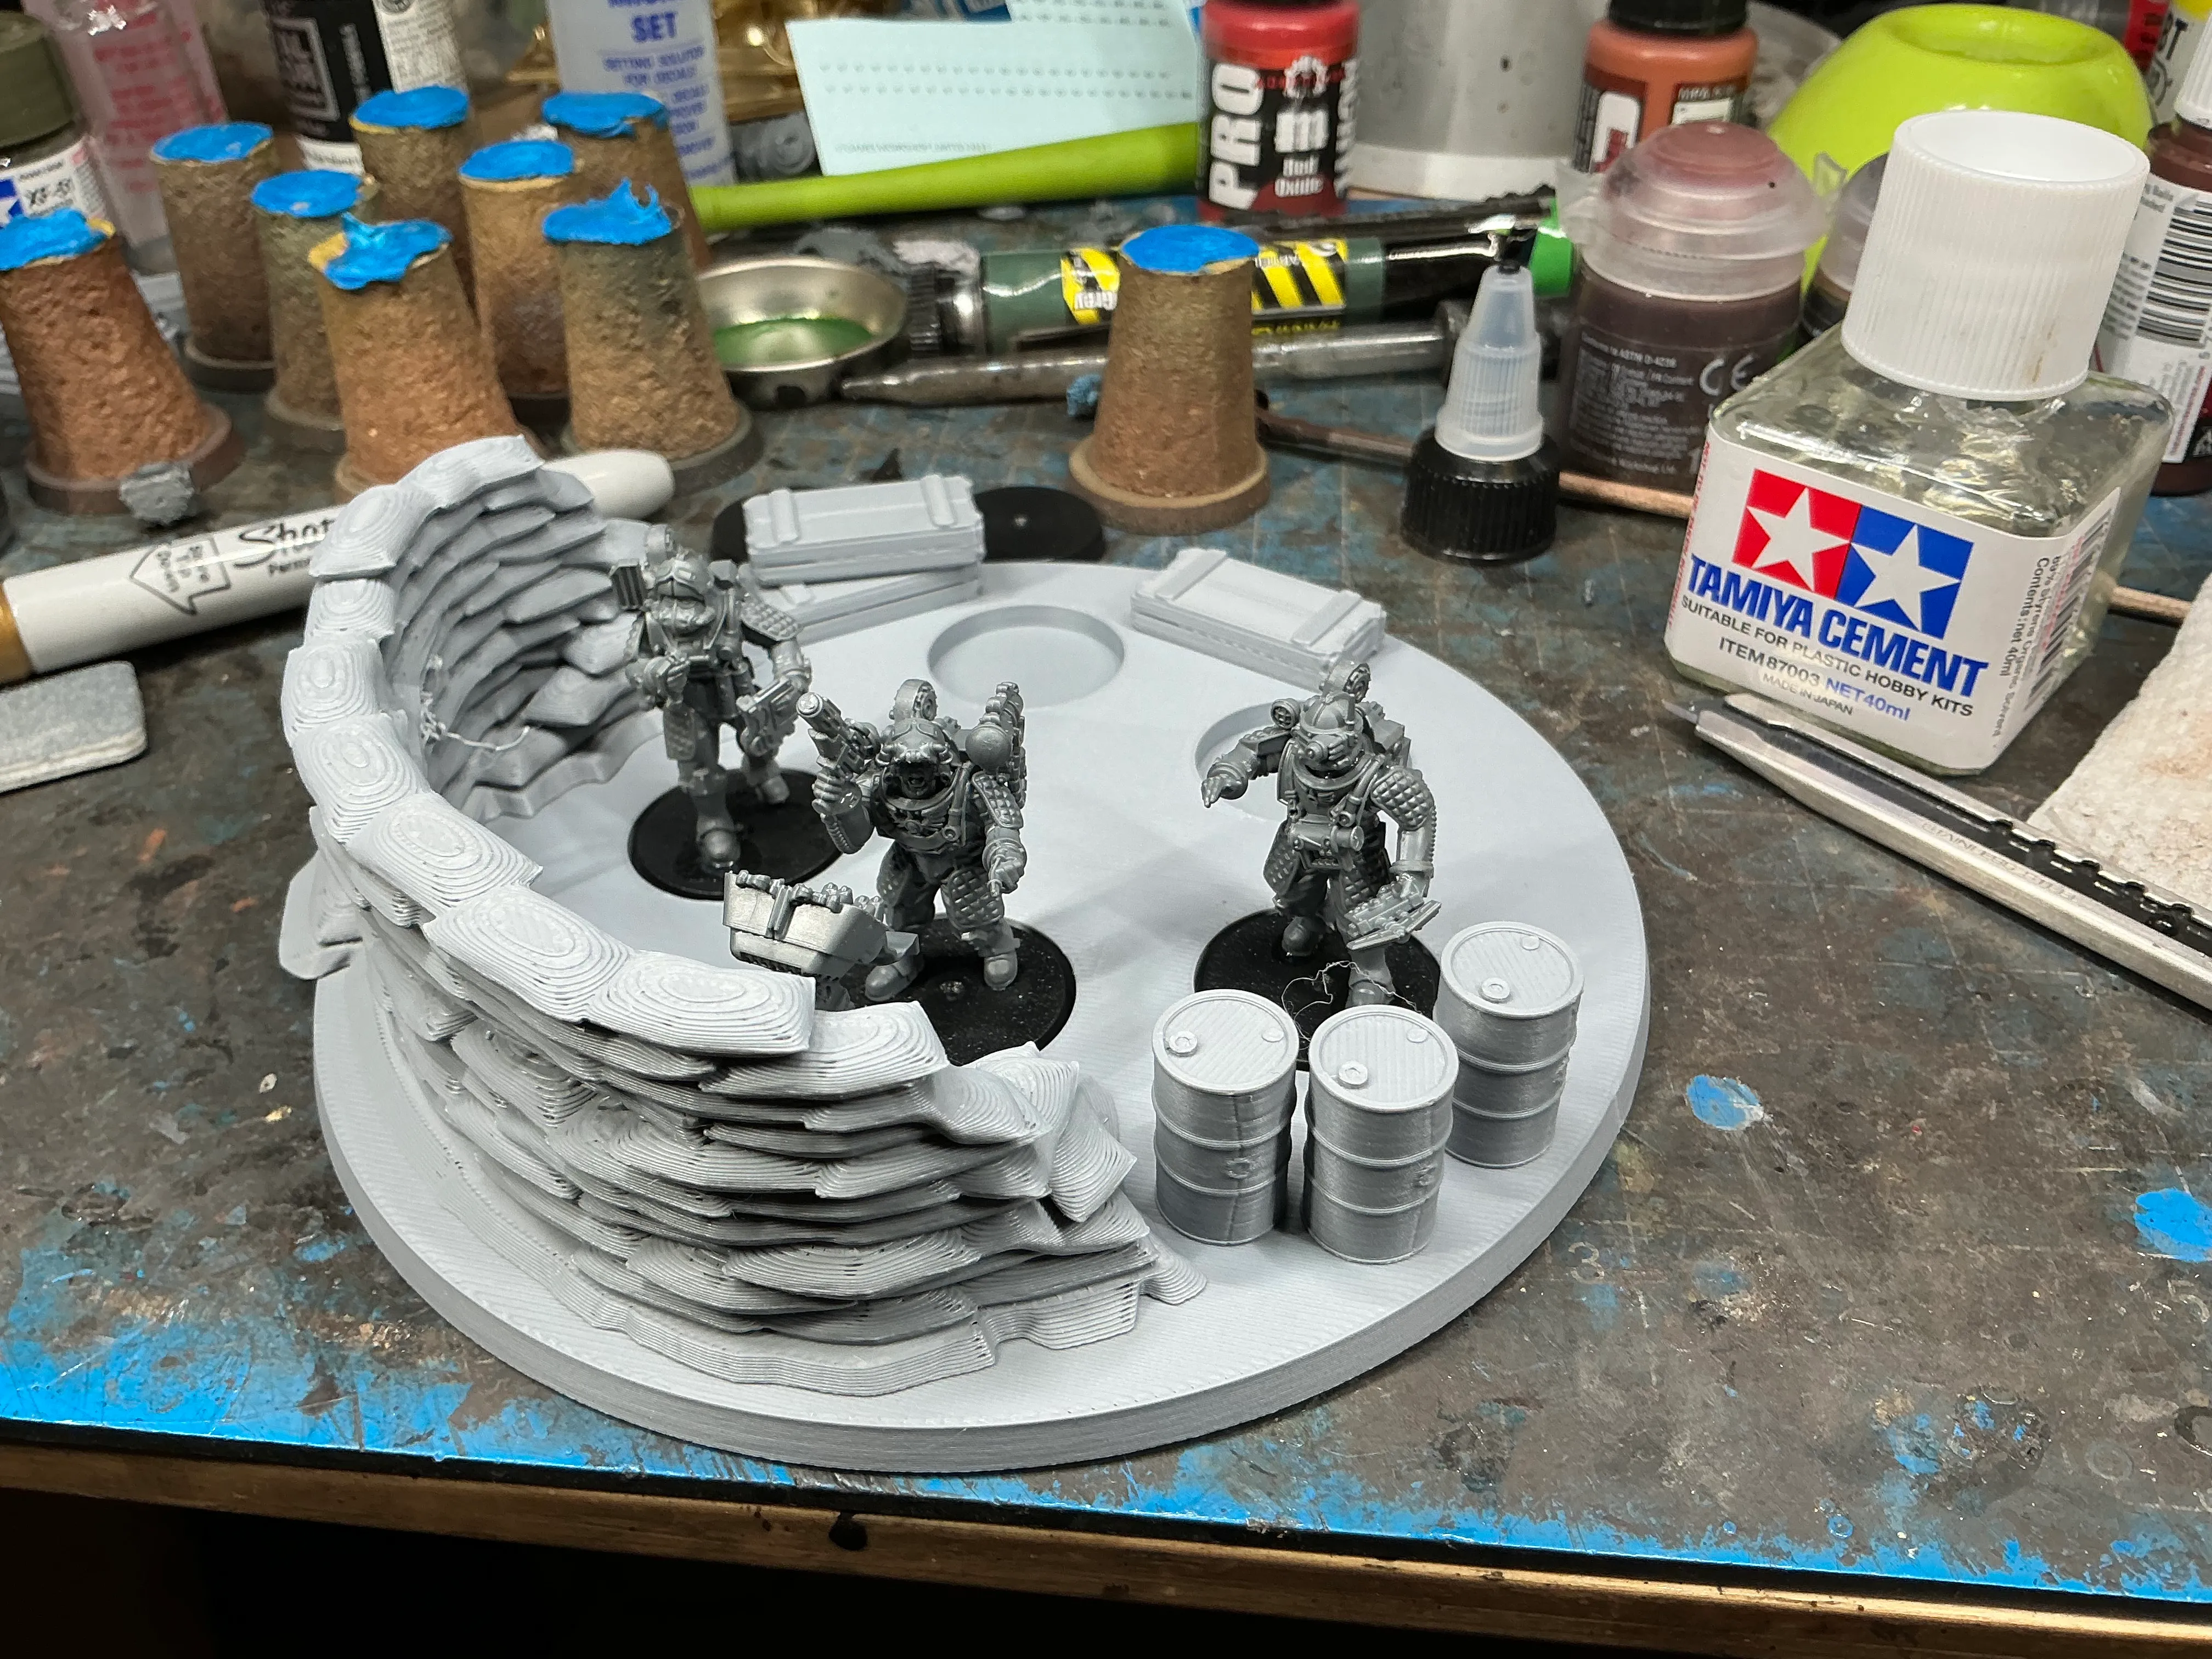

Primed base
There is not much to say about the base itself, except that I covered the sandbags with texture paint to hide the print layer lines. In general, I leaned into texture everywhere. If something felt flat, it got roughed up.

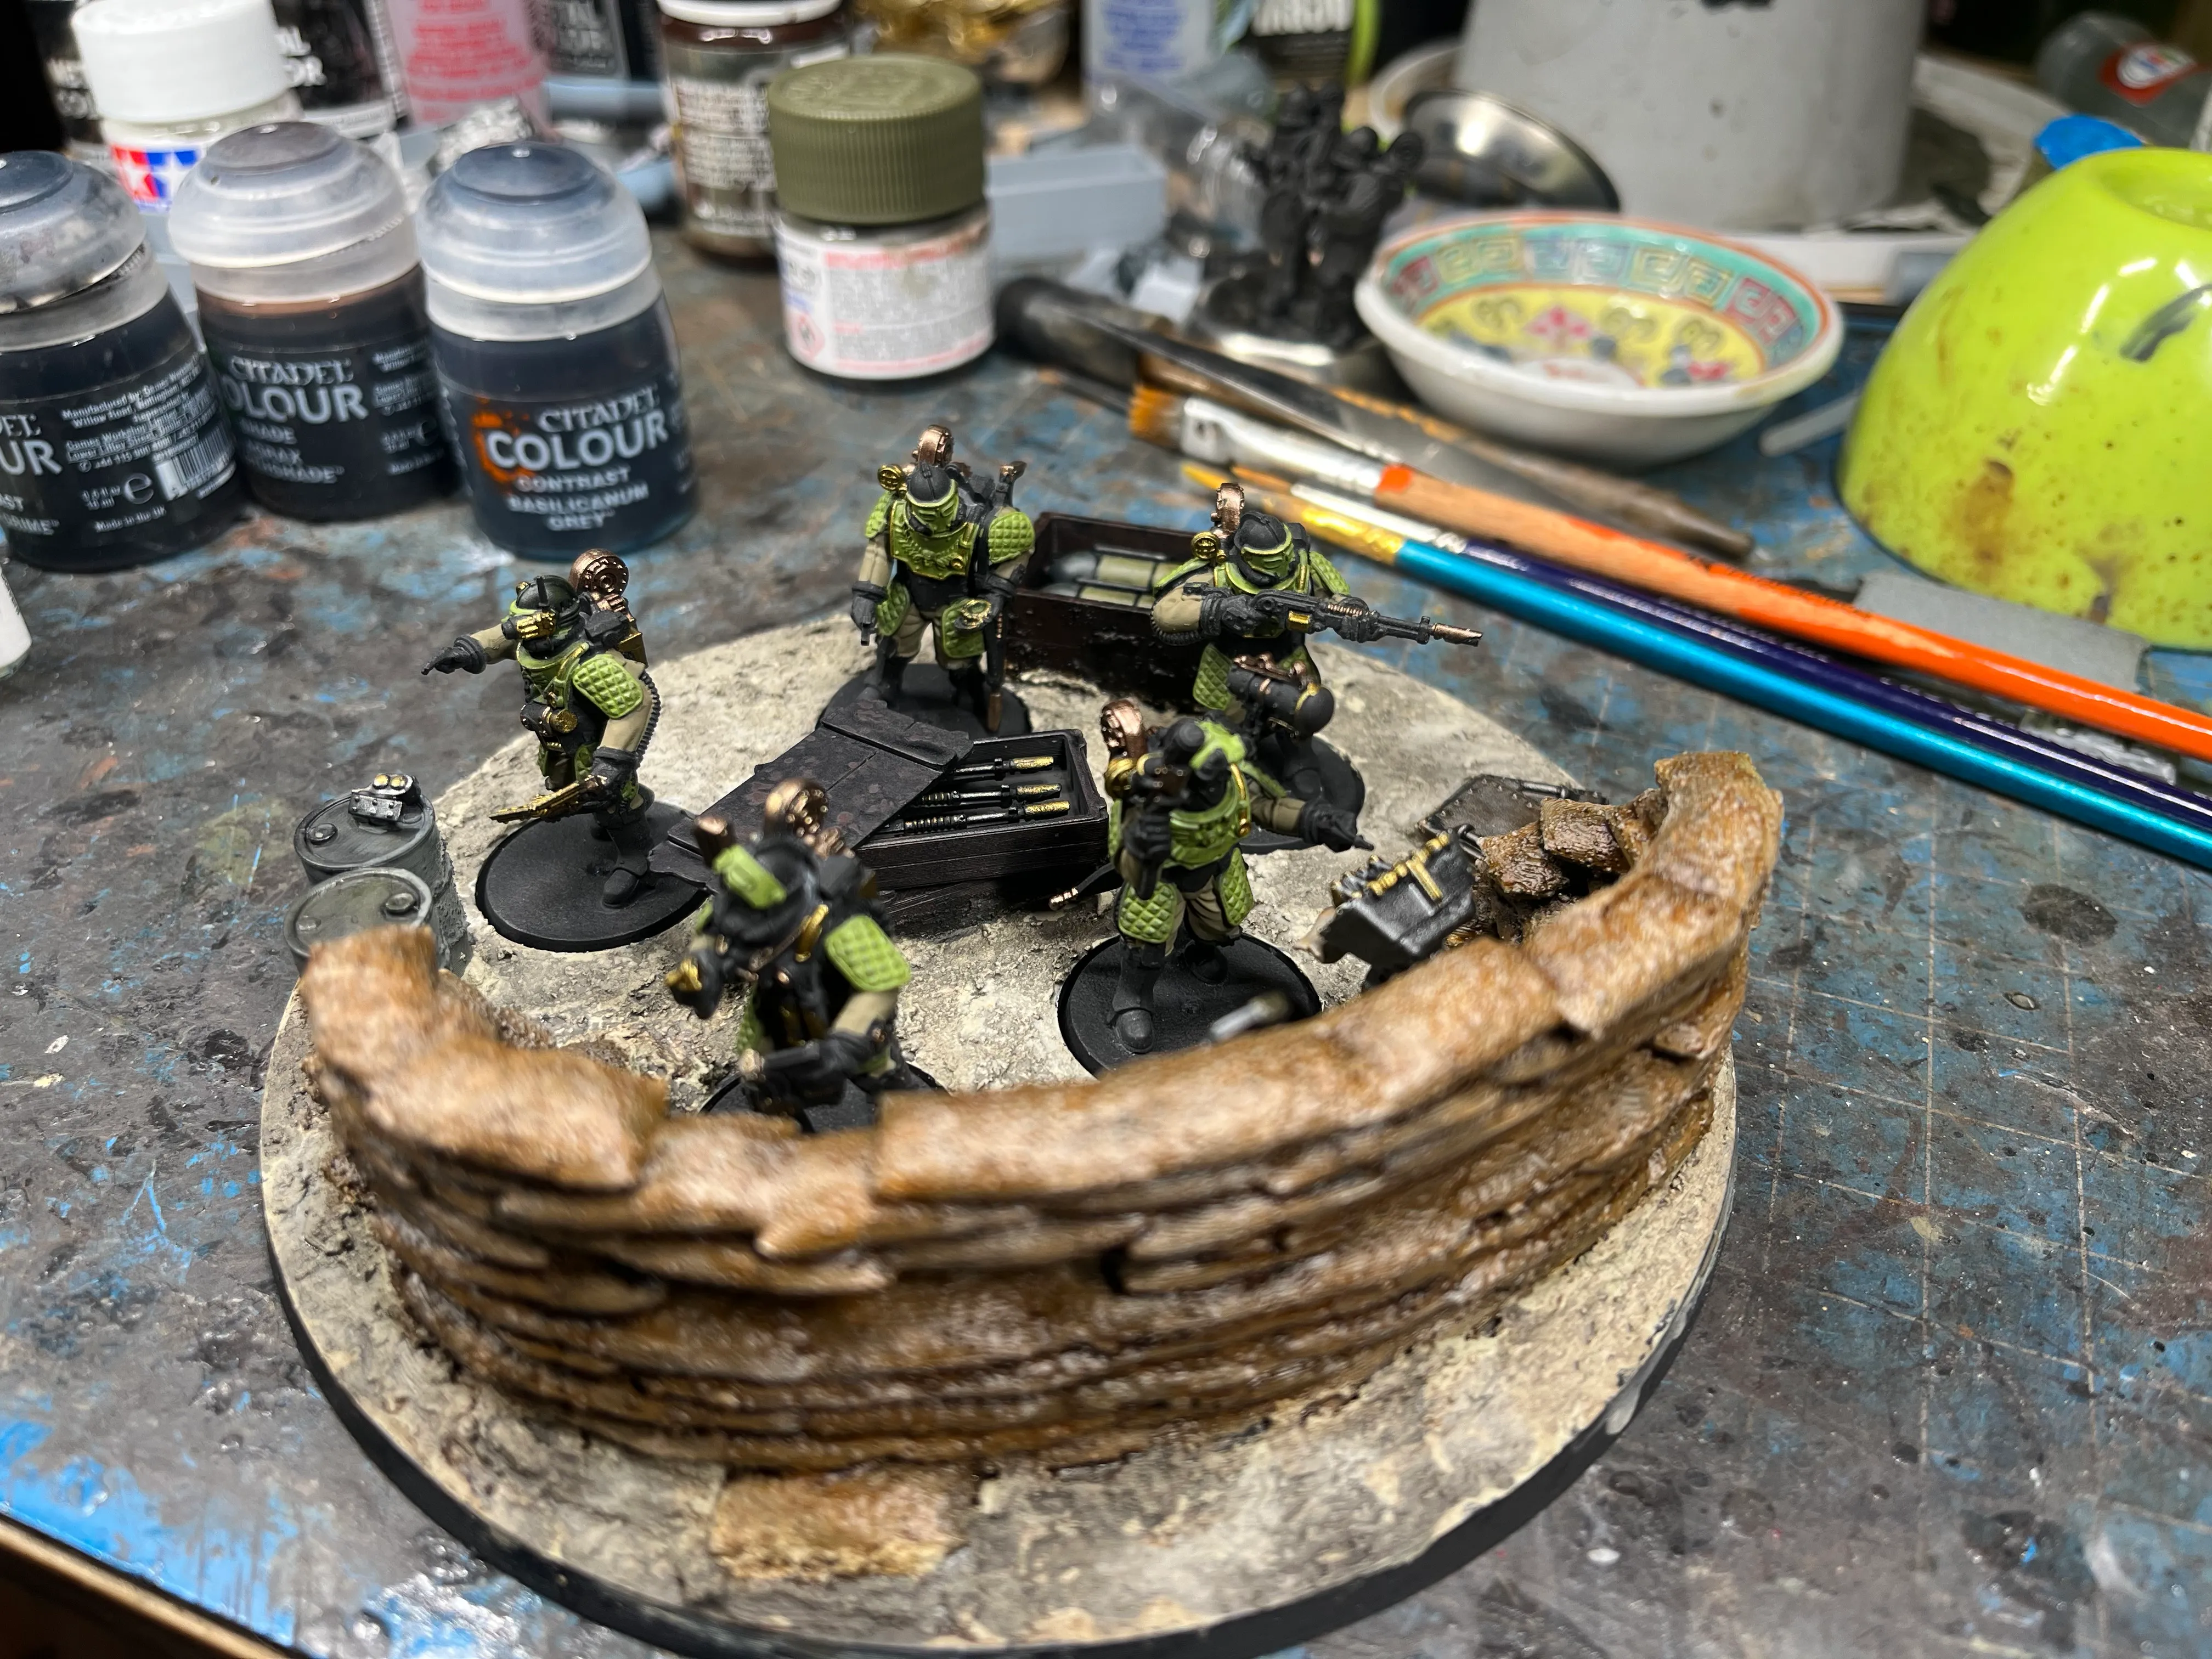

Finished
All in all, this was a strong project for me. I learned a lot, especially about designing a custom base with recesses and using texture to disguise print lines.
If I were to revisit it, I would probably add a few more scattered details to make the space feel more occupied. A few more signs that this position has been held for a while.