Death Guard Mastodon
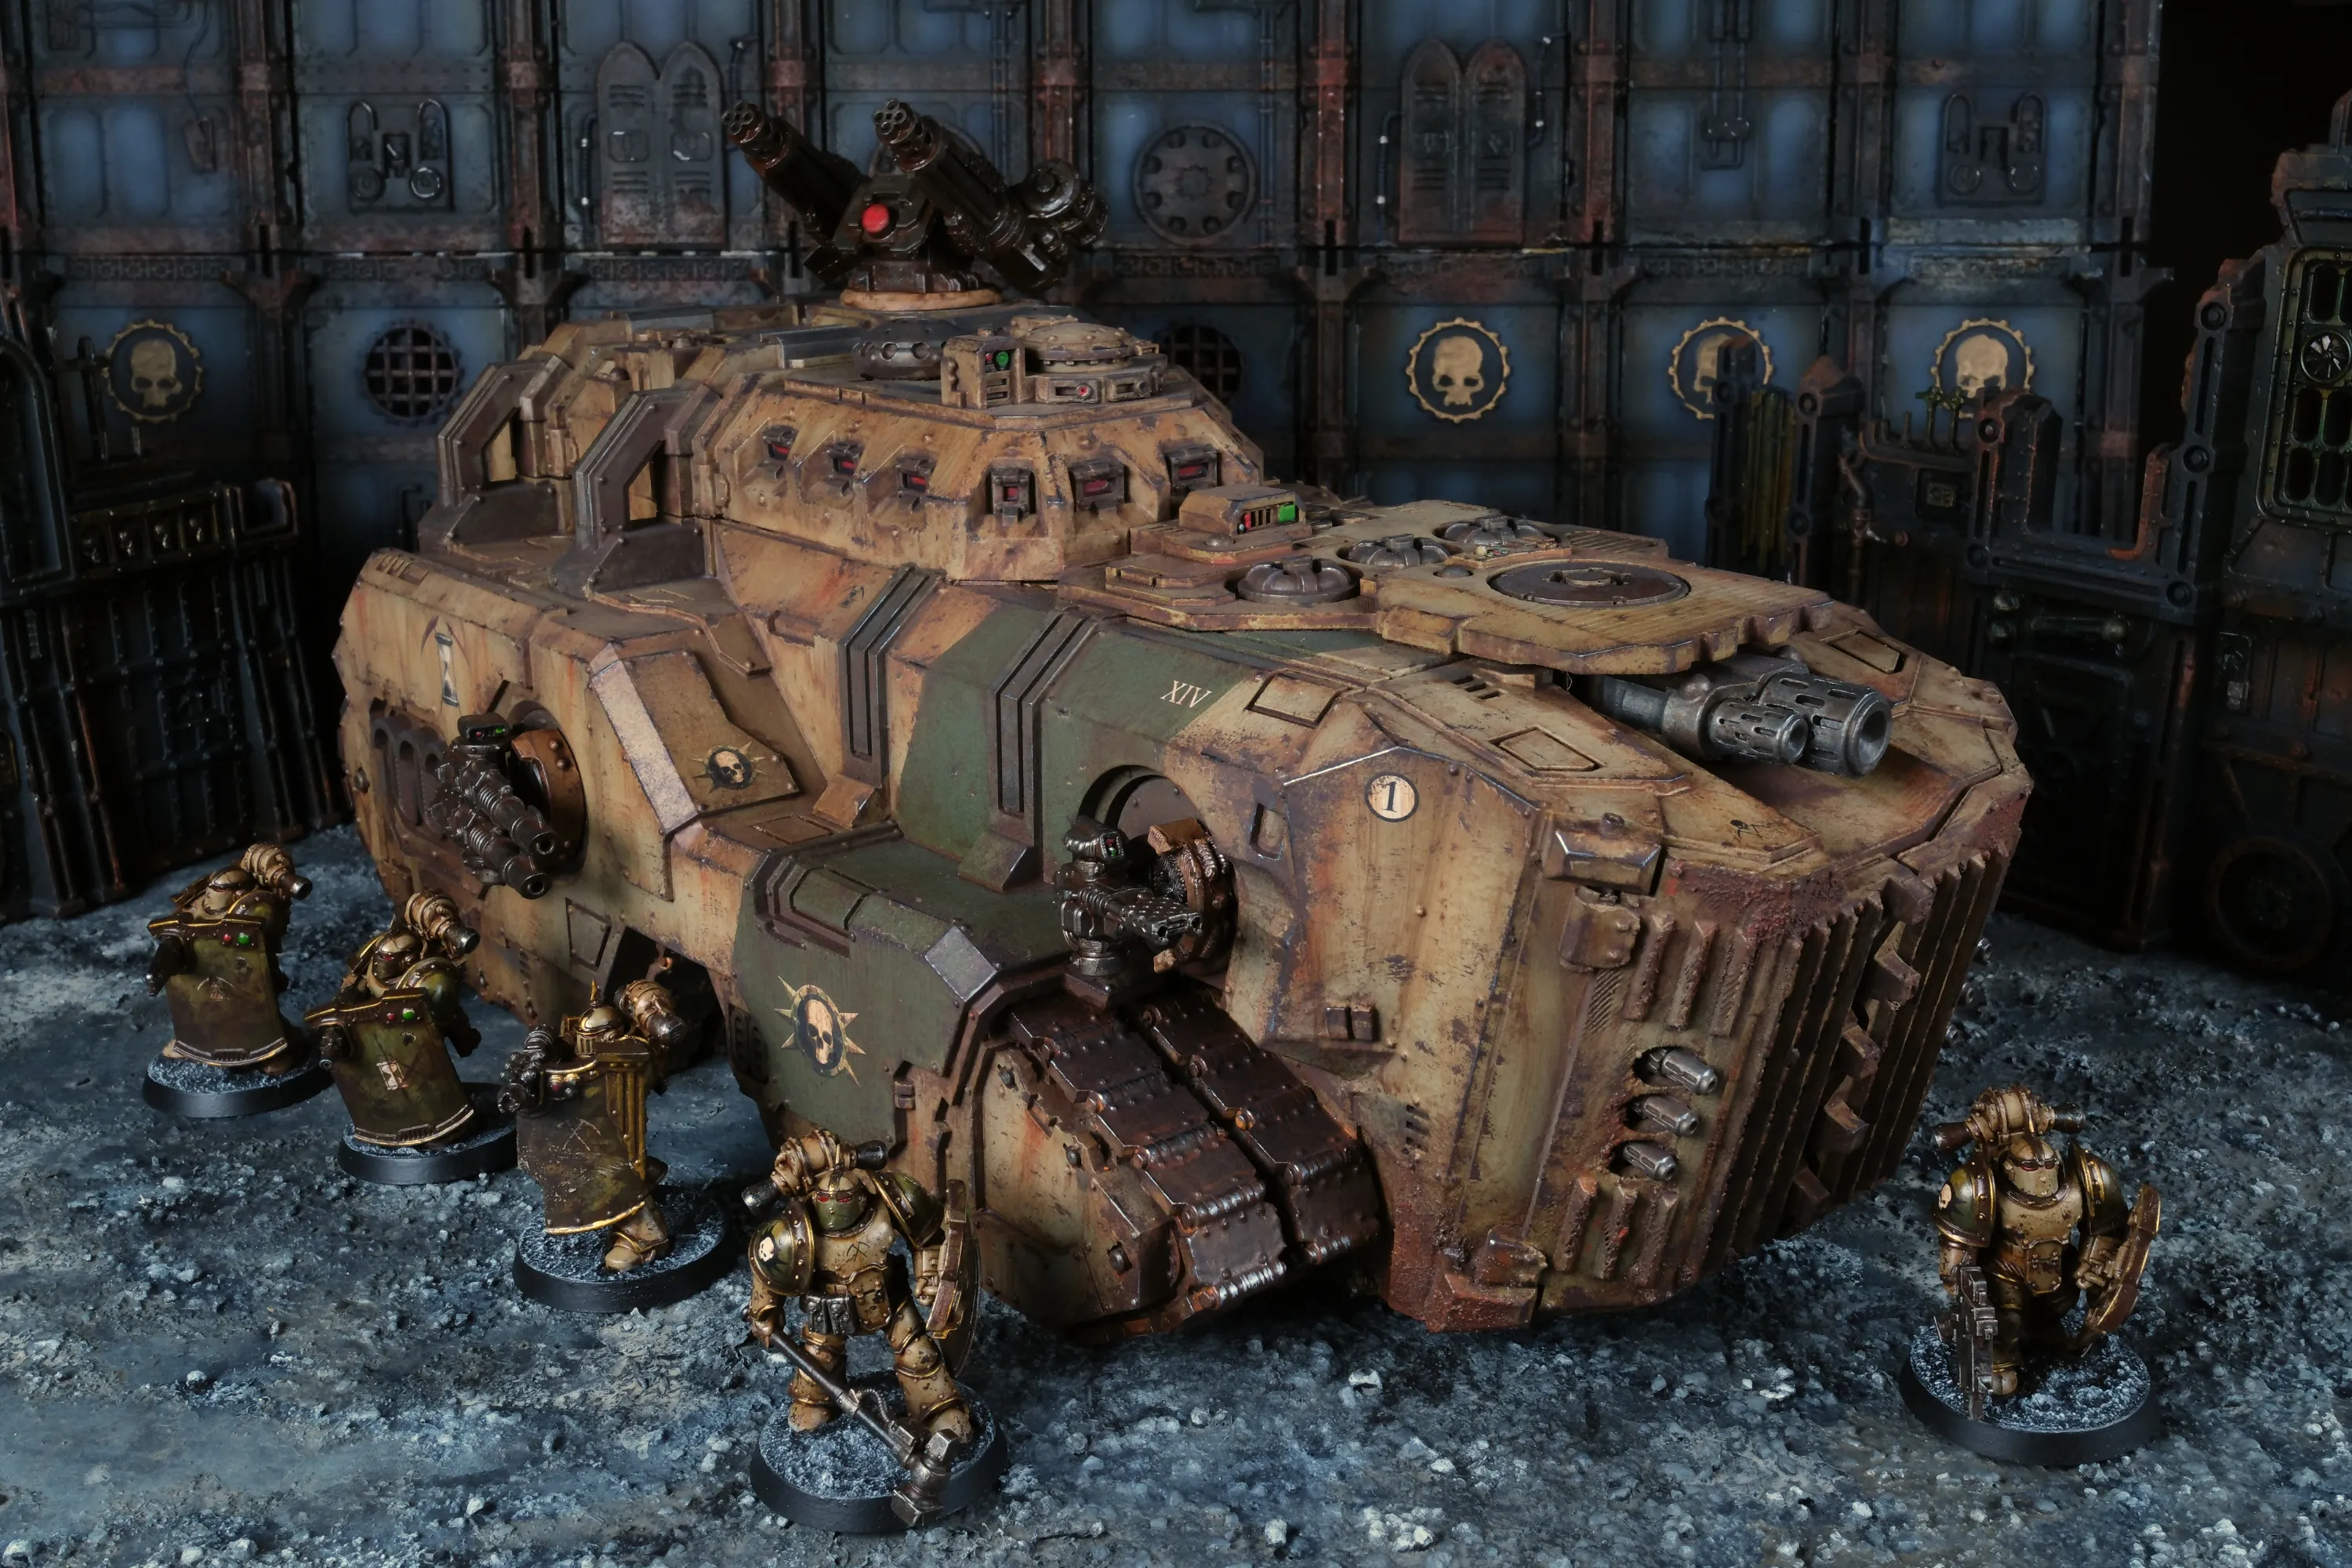
The Mastodon is one of those models that demands a certain kind of army. It’s a siege transport — not a fast or elegant machine, but an unyielding one. A thing built to move bodies through the worst of it, to absorb fire that would atomise anything smaller, to grind through fortified lines and disgorge its cargo into whatever hell waits on the other side. It belongs to an army that fights that way. For the Death Guard, it’s a natural fit.
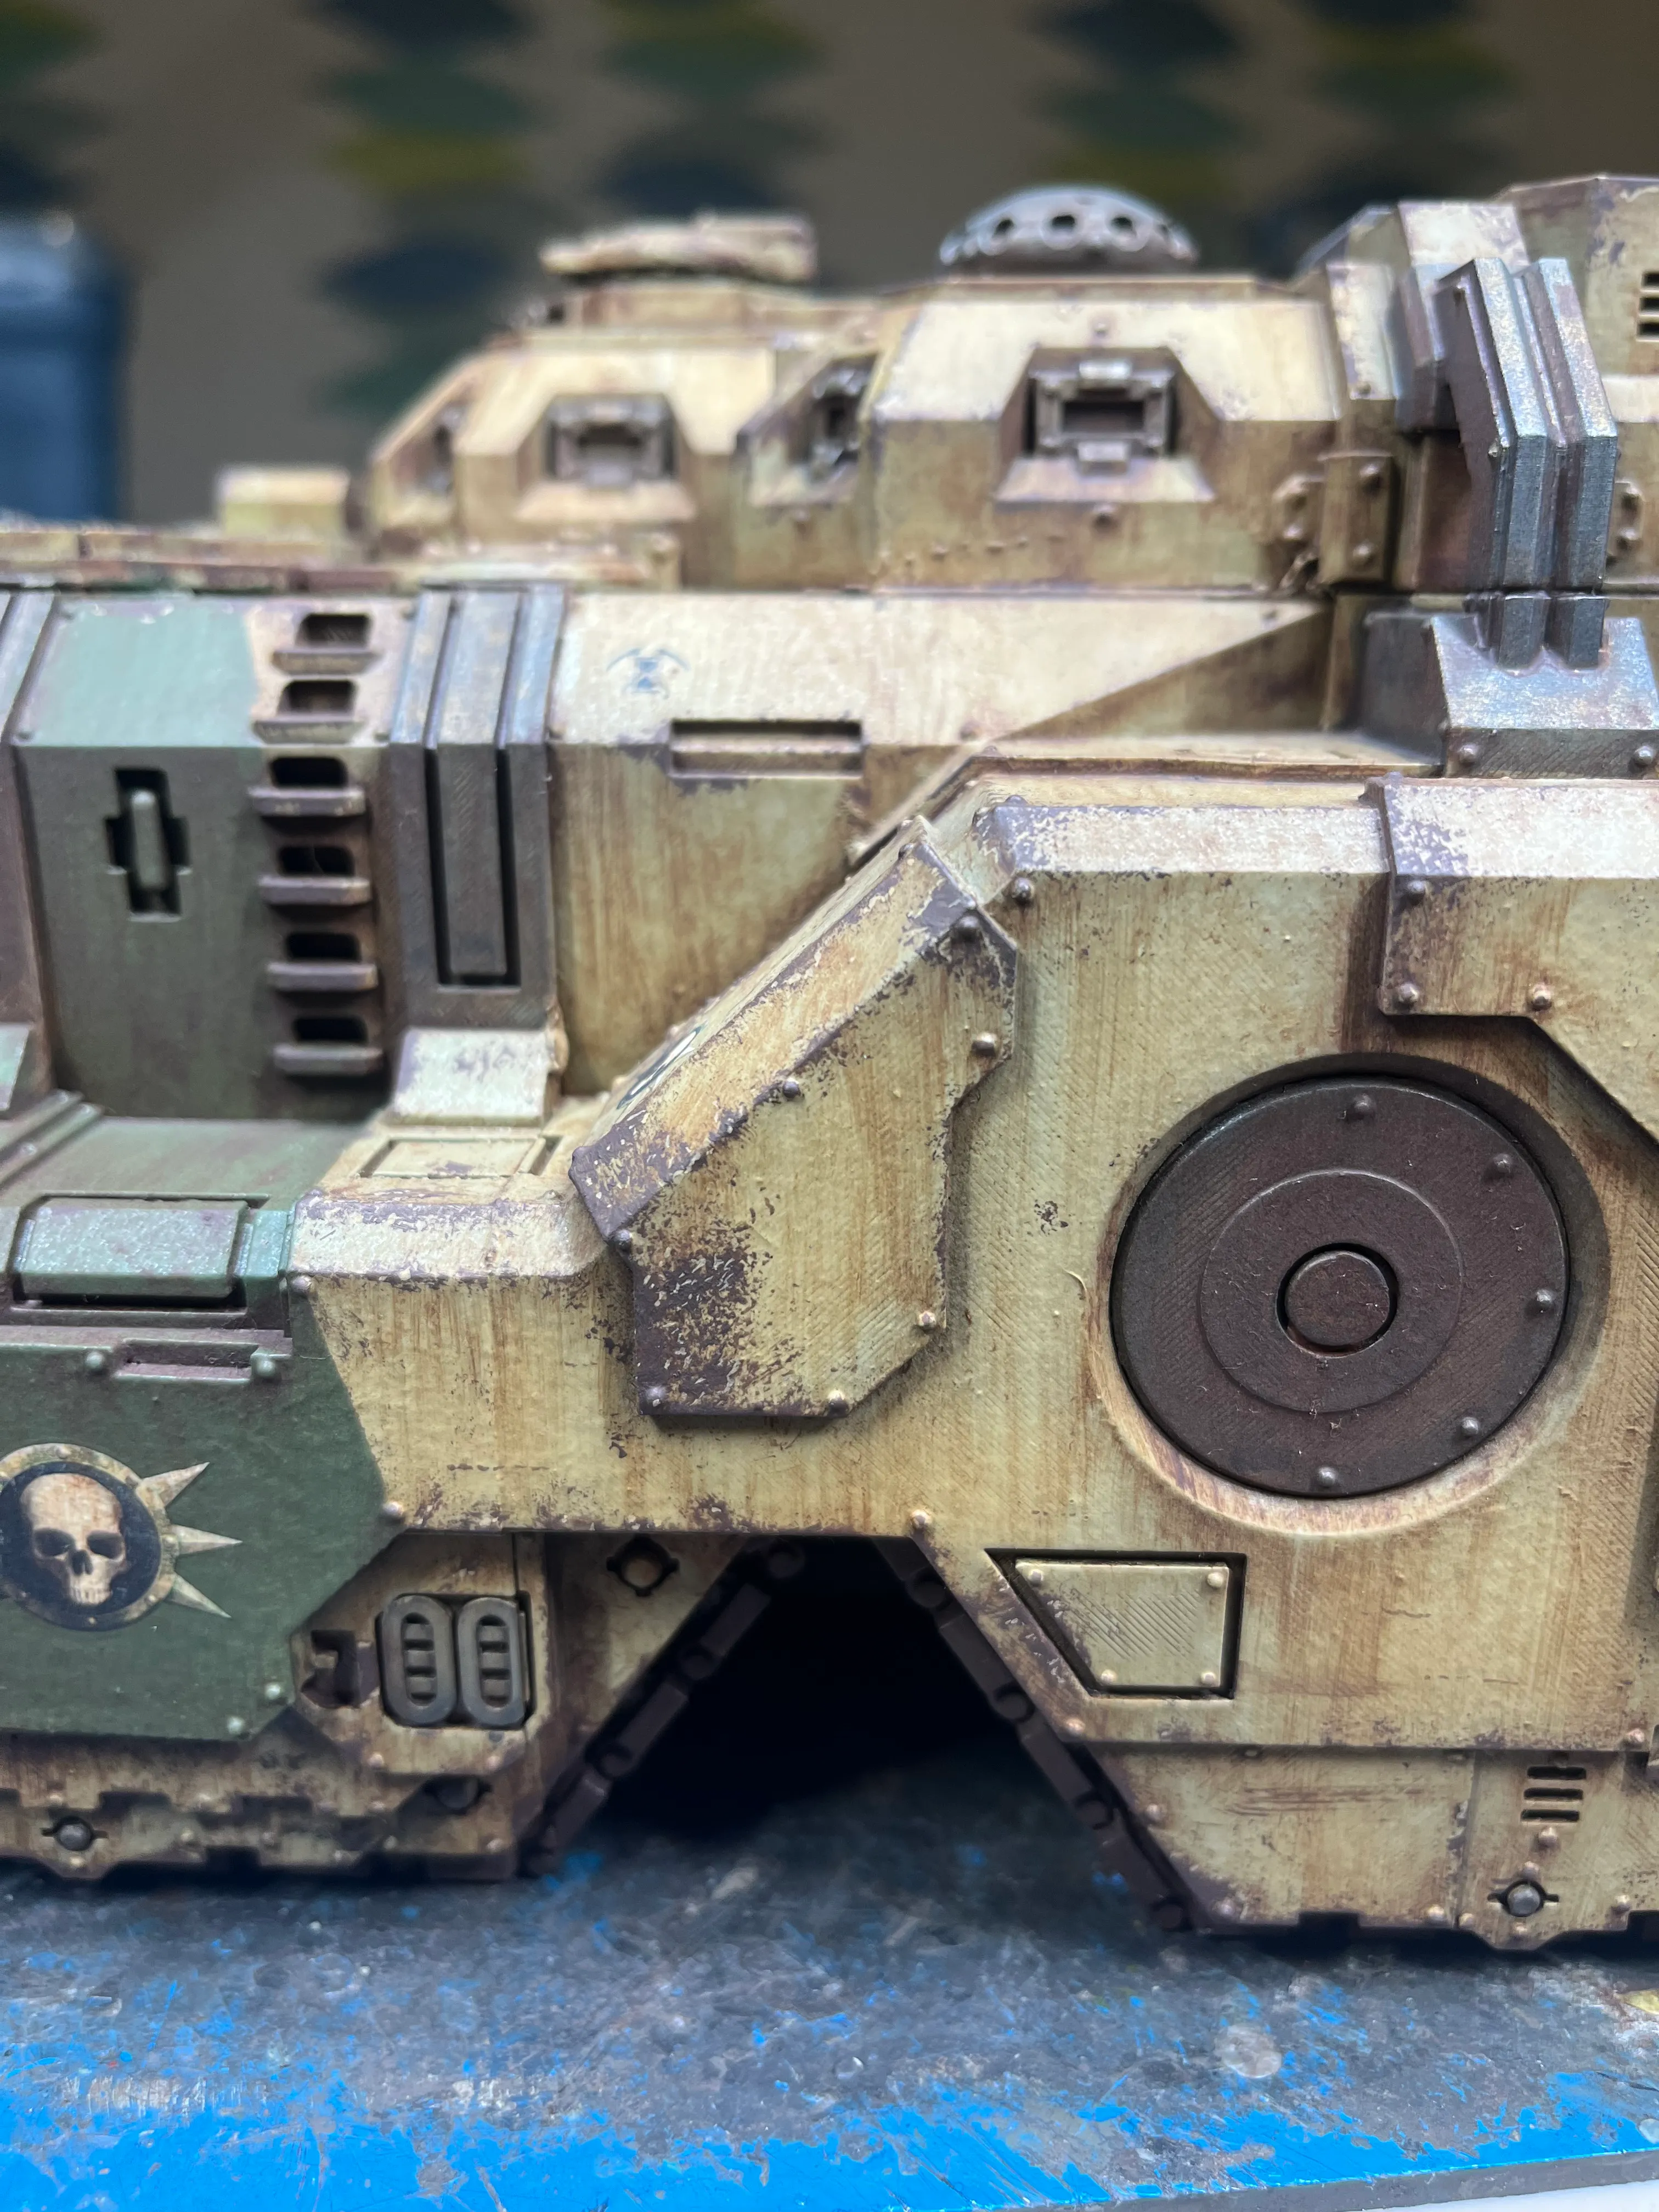
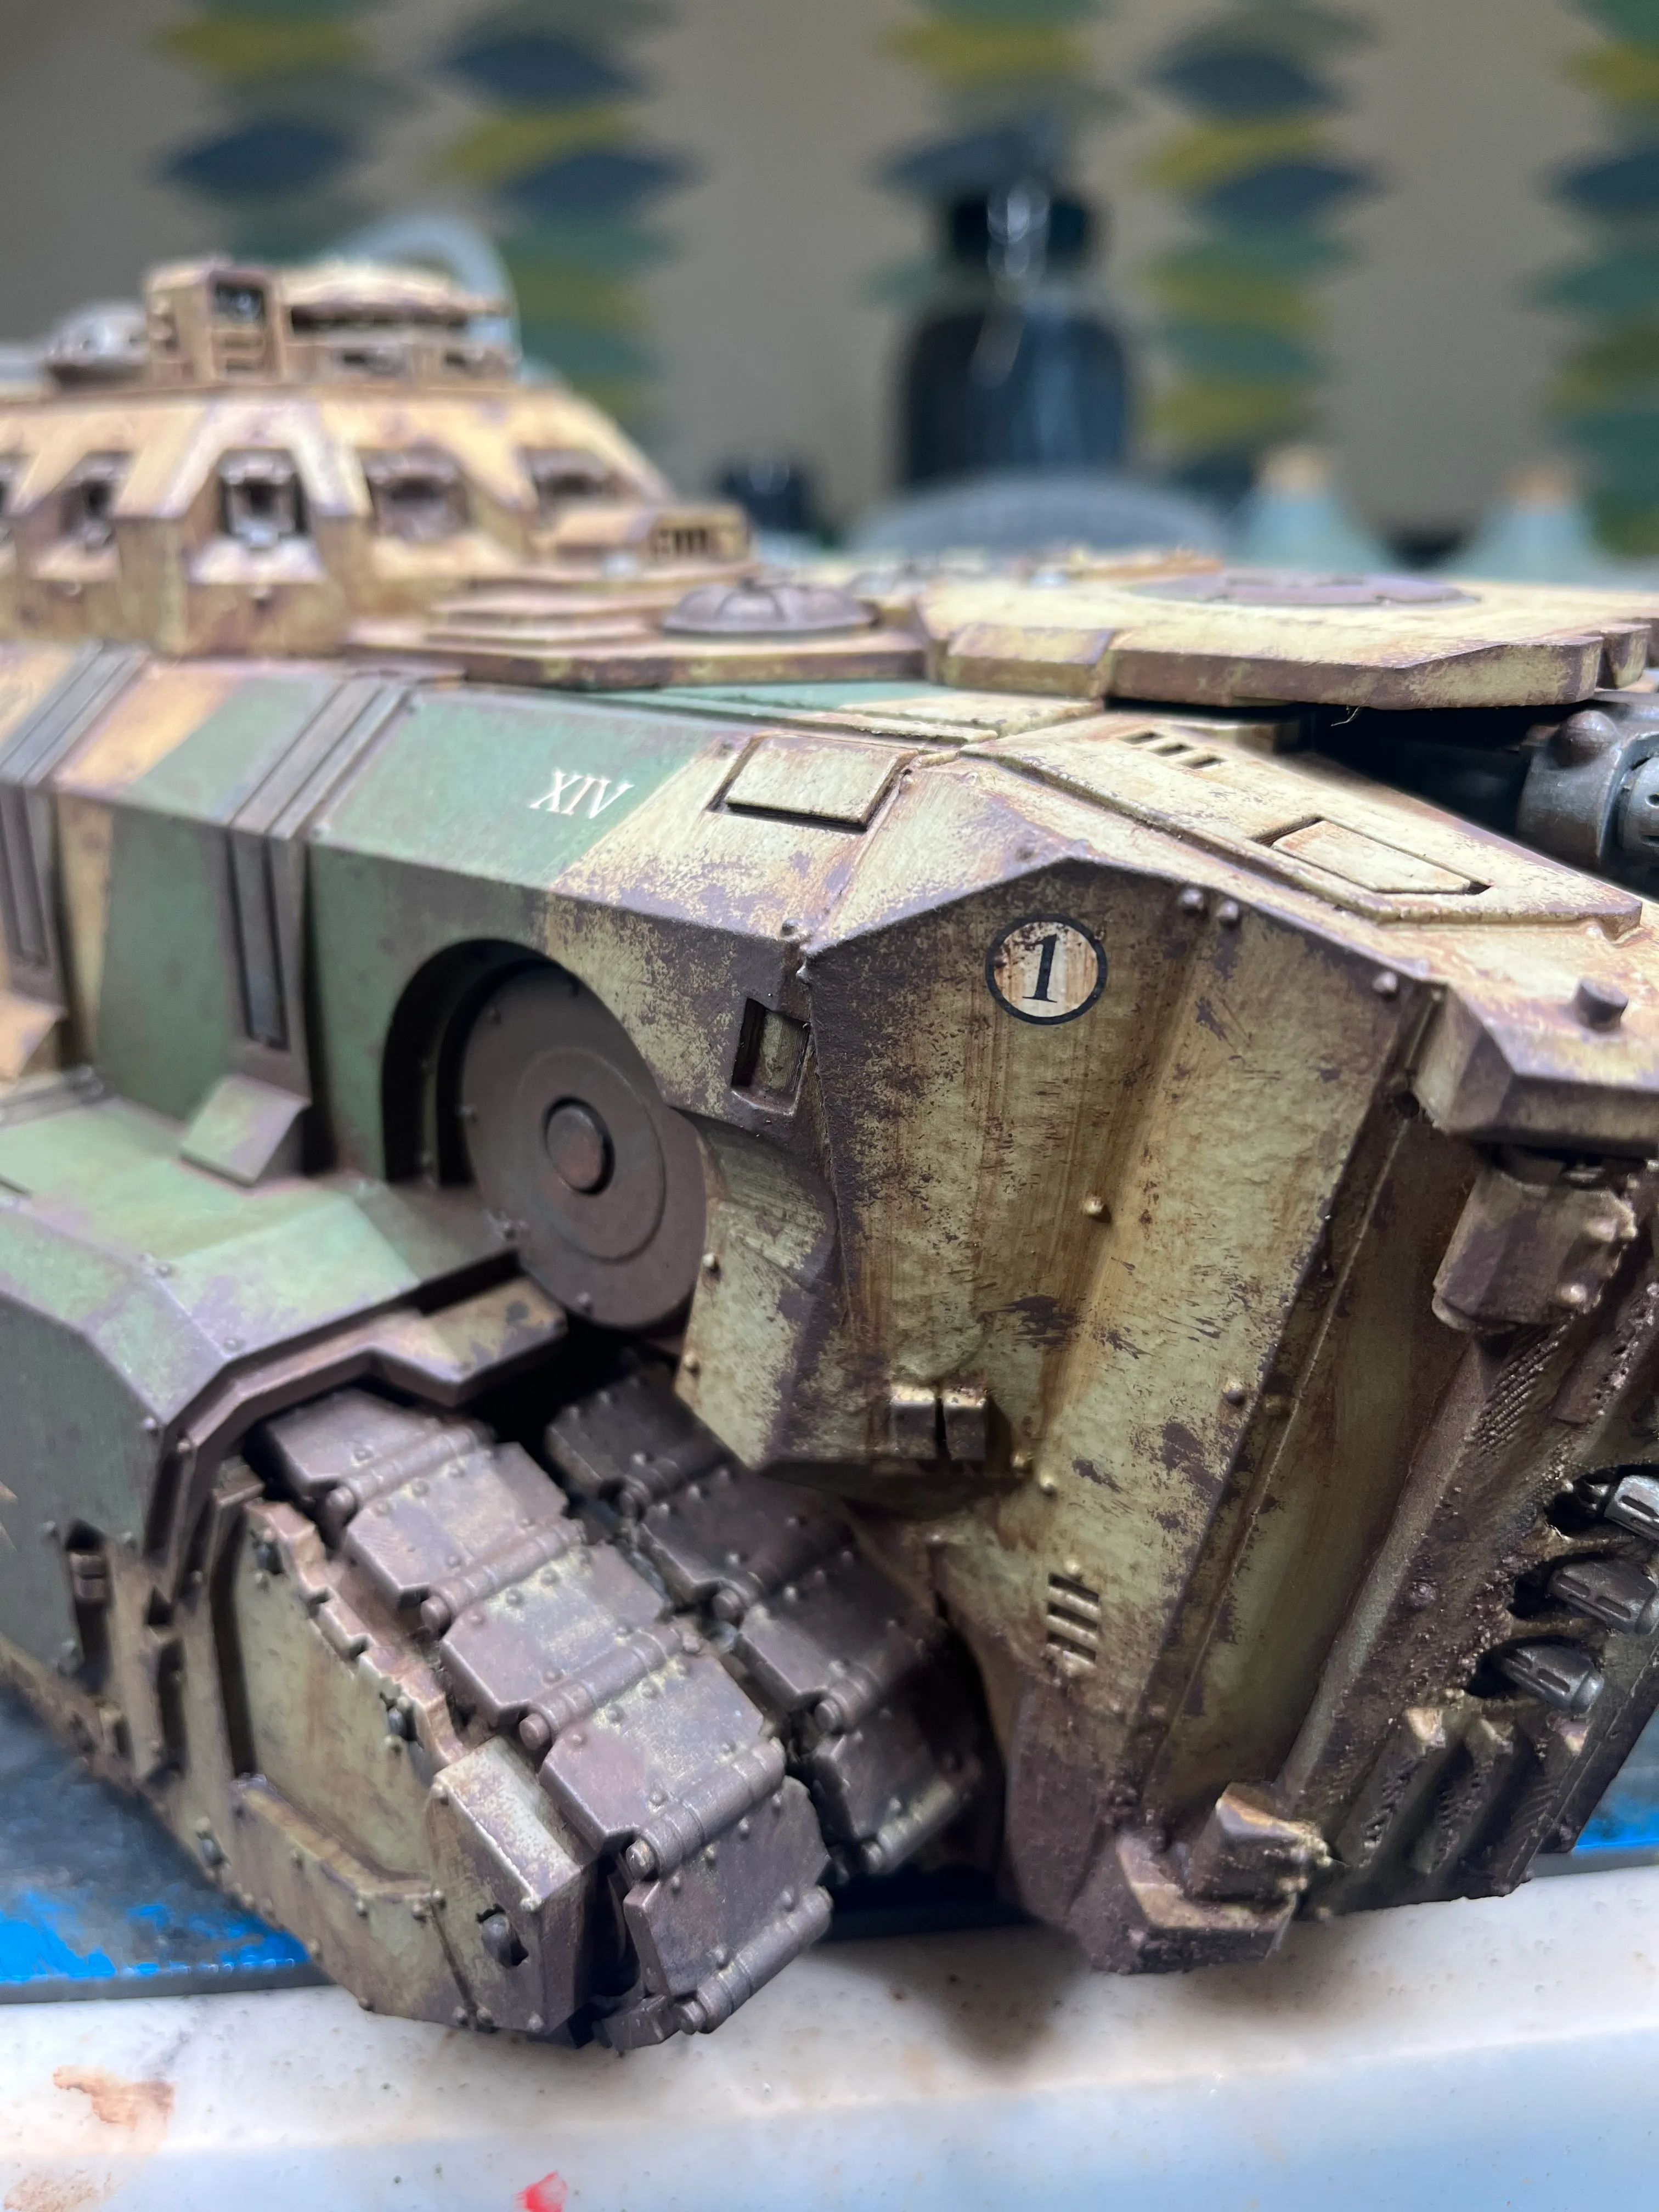
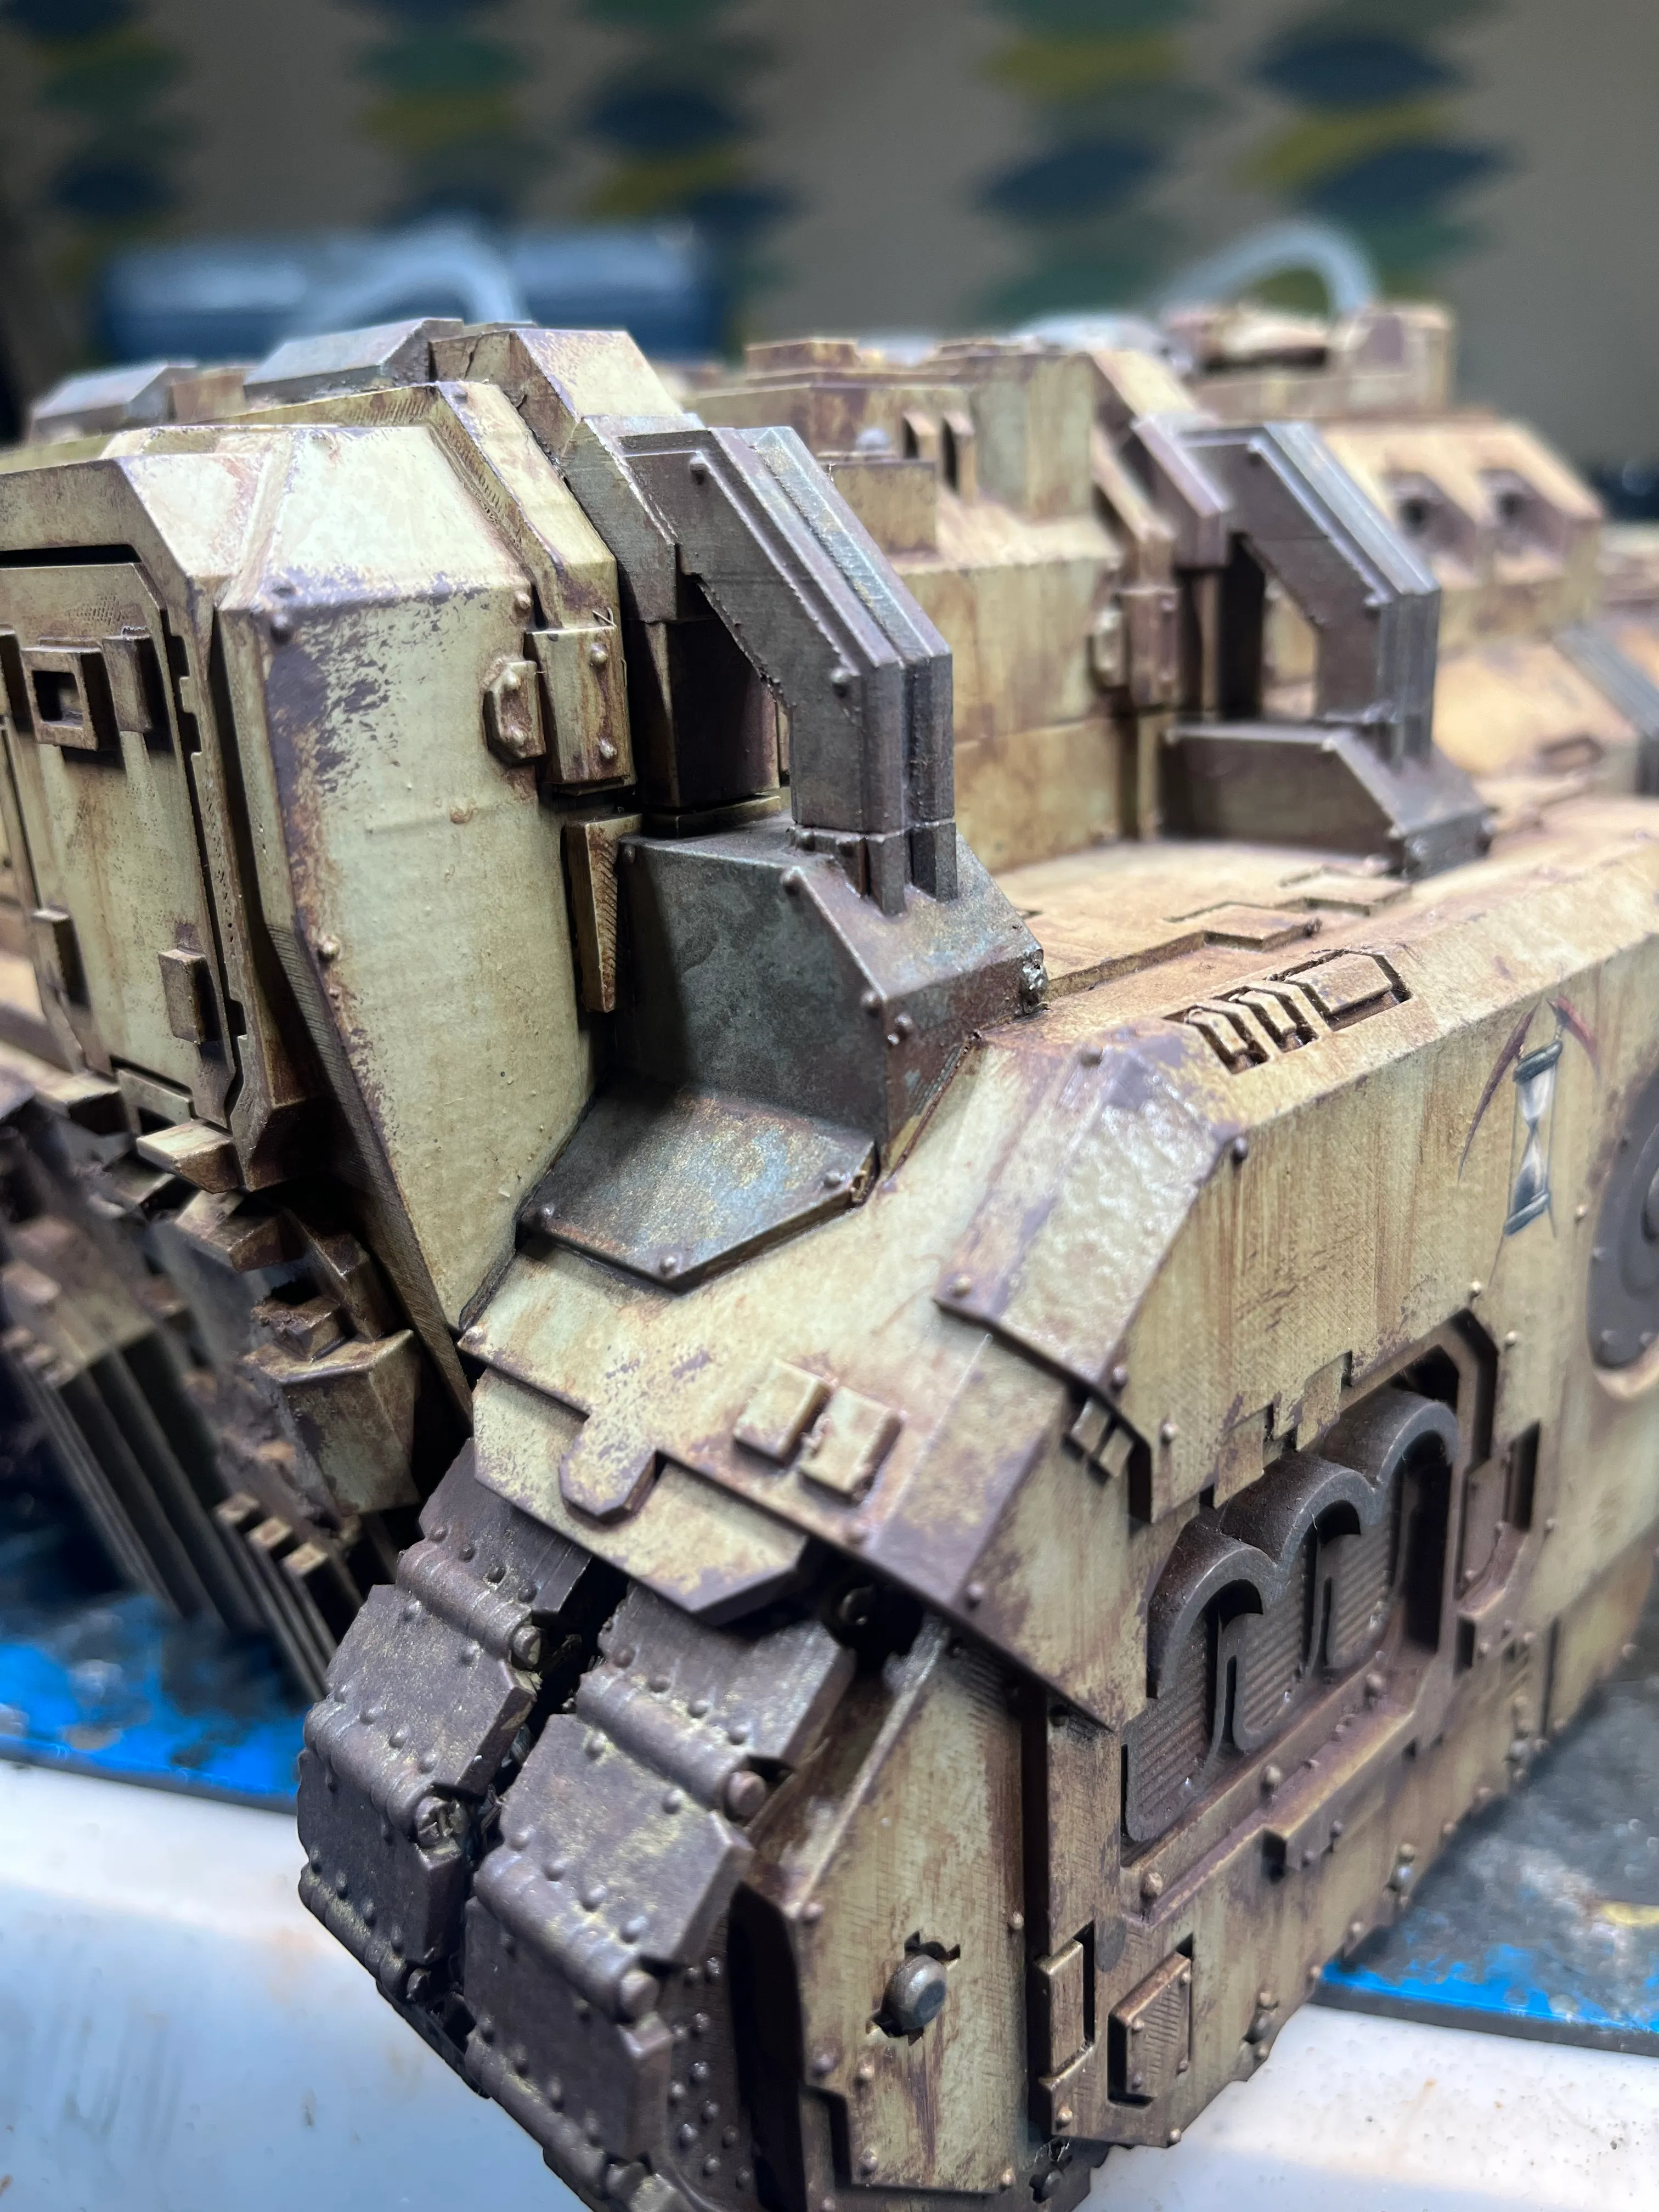
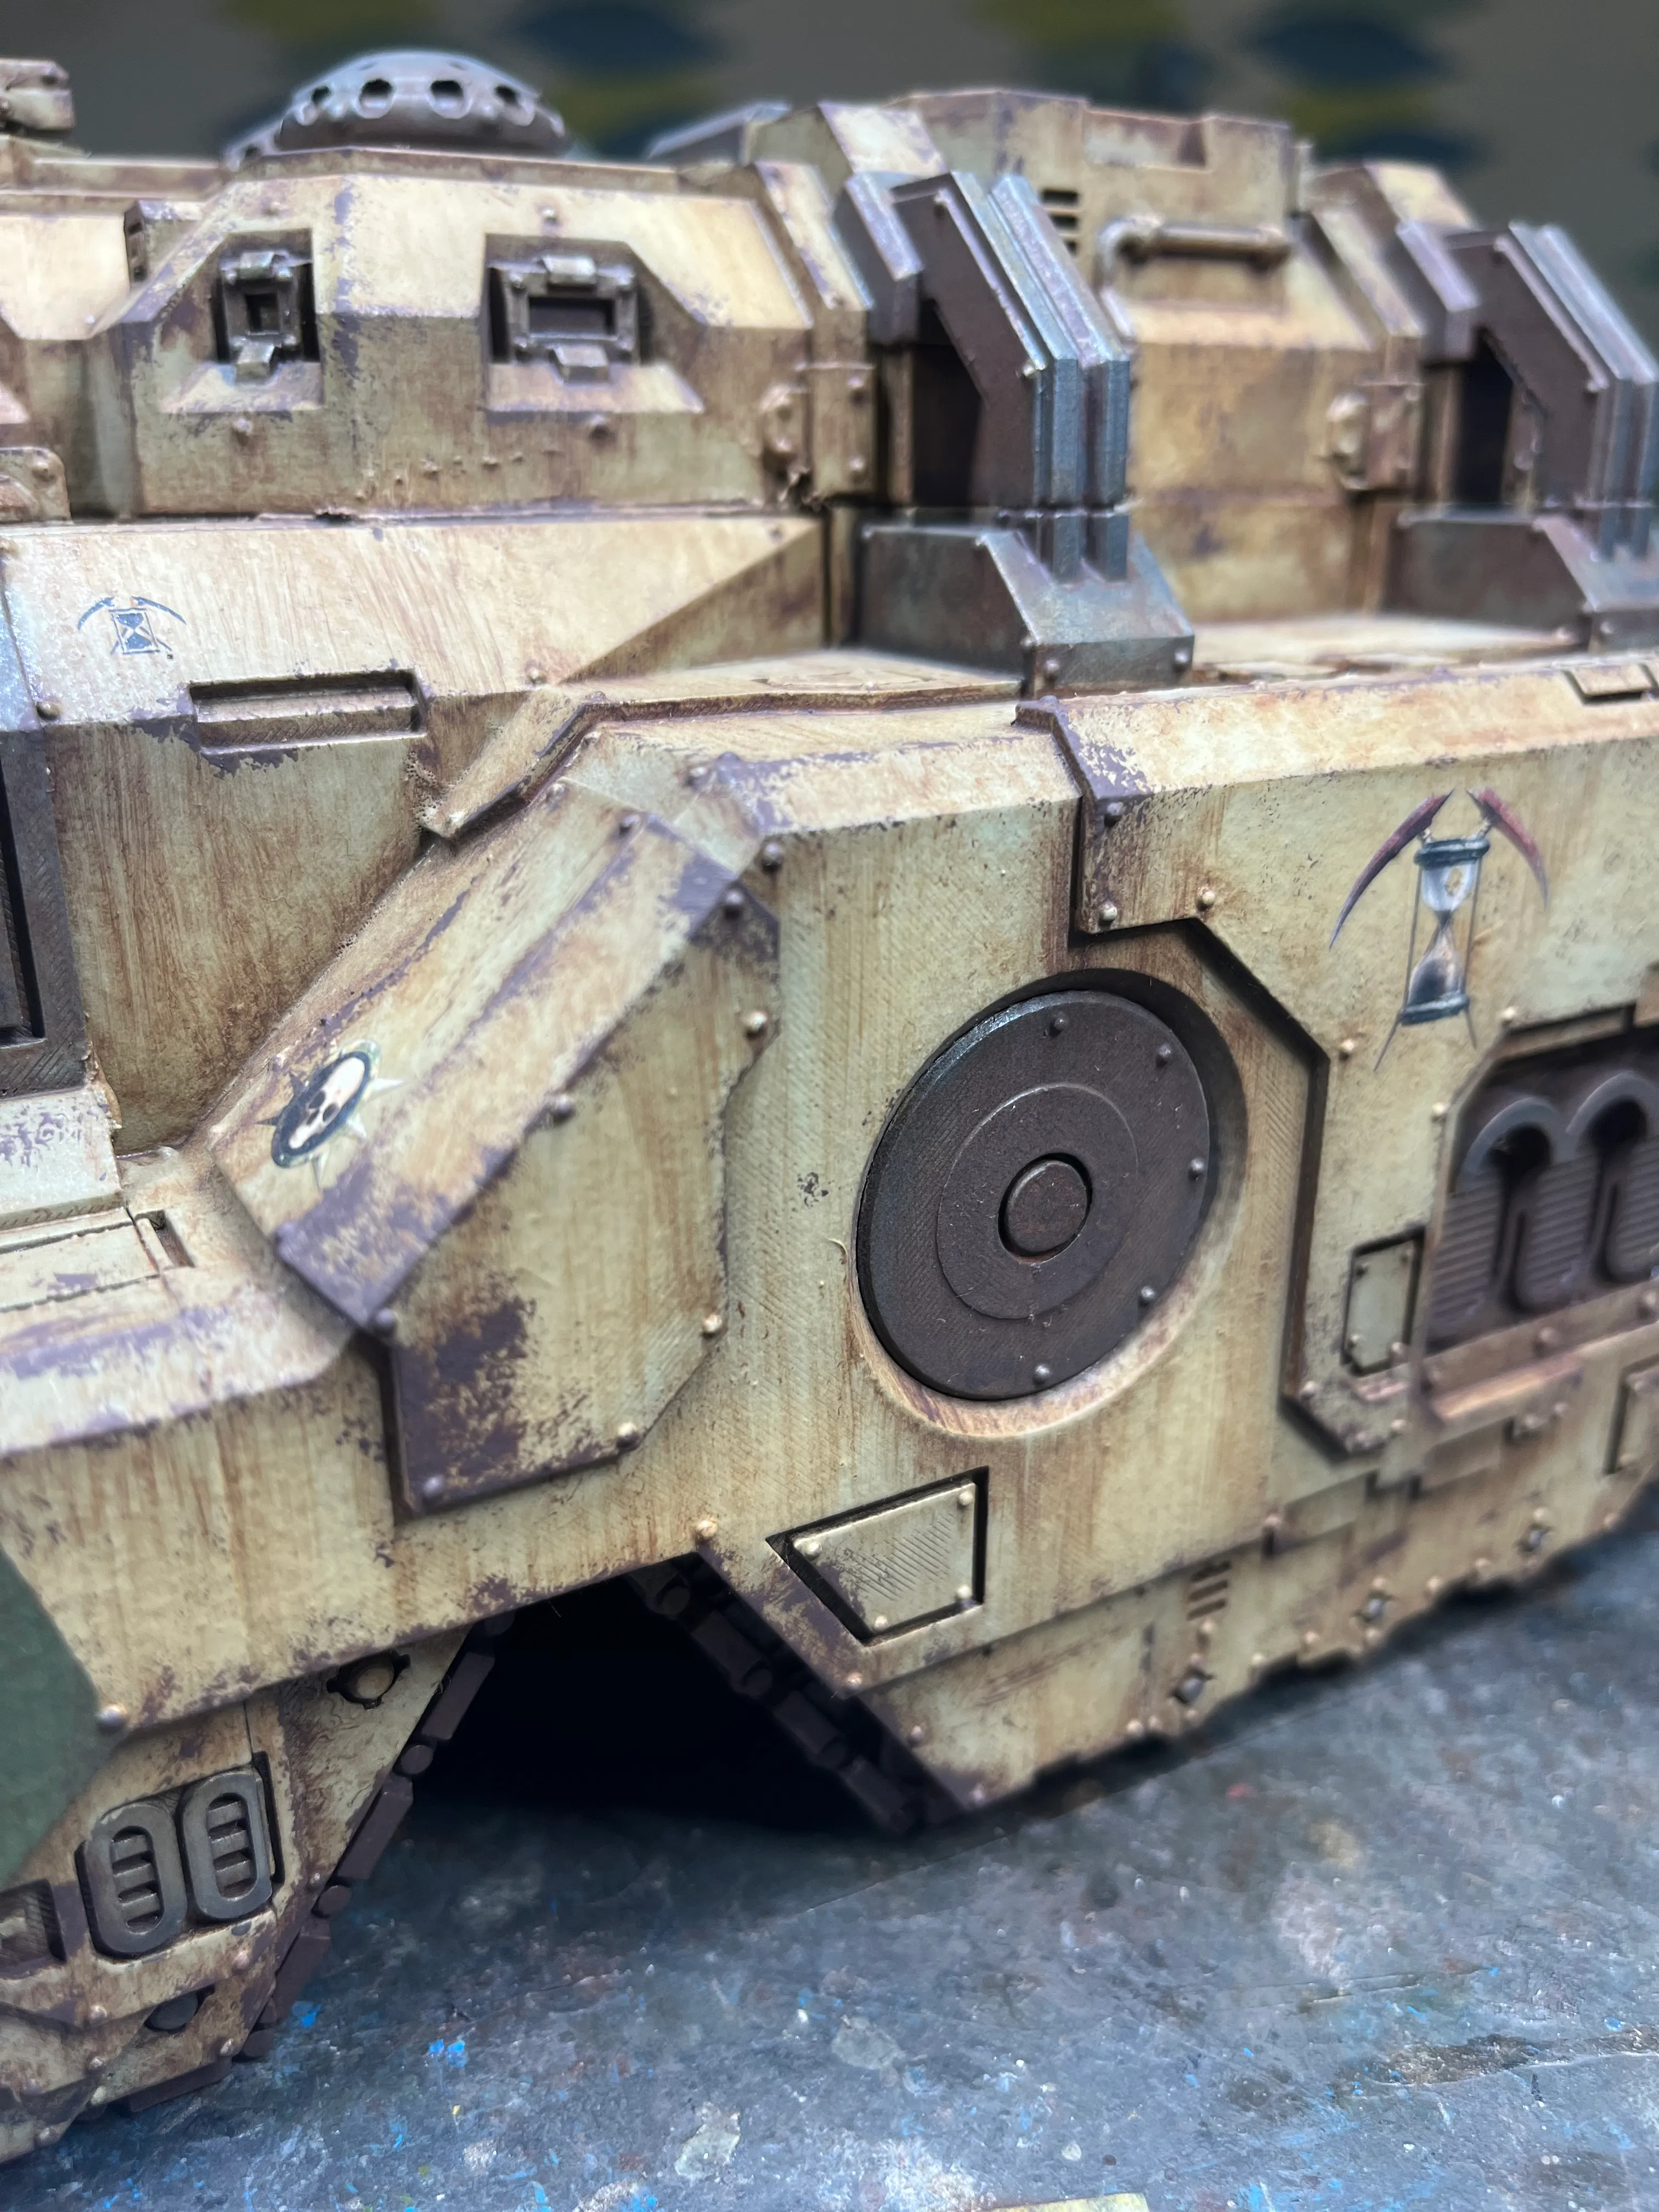
This one is FDM printed, and that turned out to be a gift. The layer lines that 3D printing leaves behind — usually something to sand away — read on a vehicle this size as surface texture. Subtle striations across flat panels, a faint grain running across armour plates. The print also didn’t go off without a hitch. It definitely had imperfections beyond layer lines, but I just leaned into those. On a loyalist Death Guard vehicle that has allegedly survived campaigns spanning centuries, that texture doesn’t look like a print artifact. It looks like a hull that’s been through things.


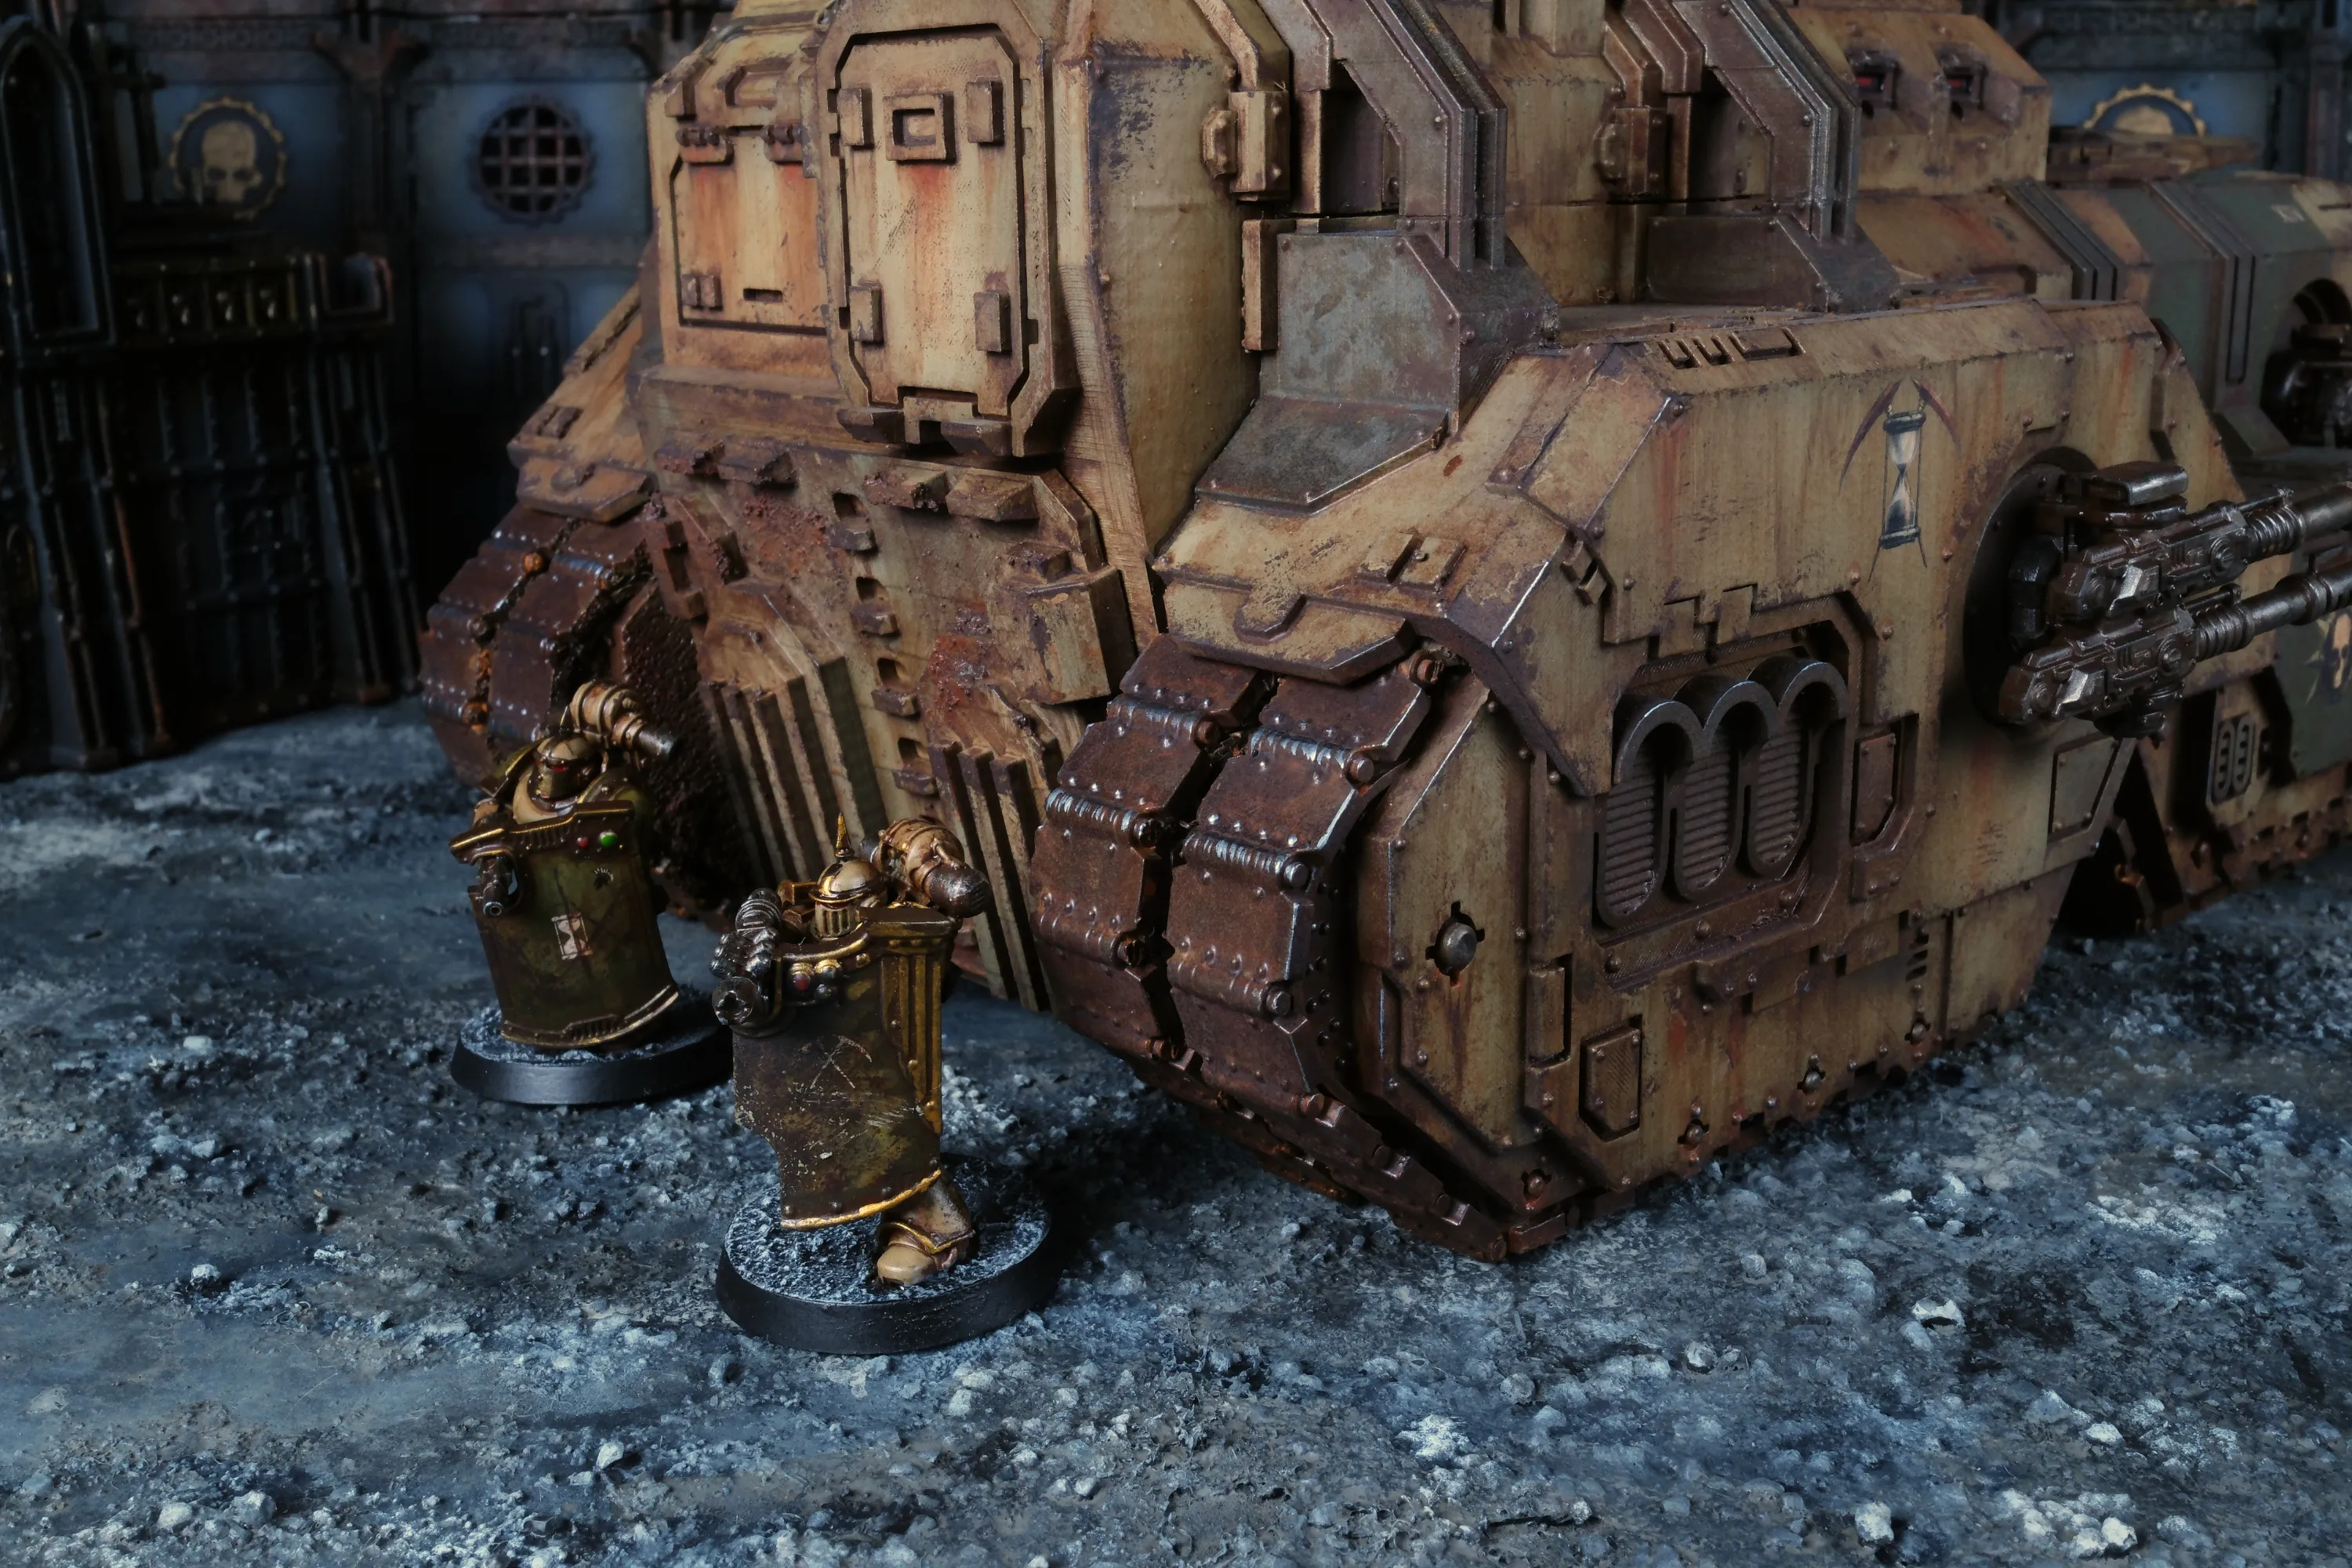
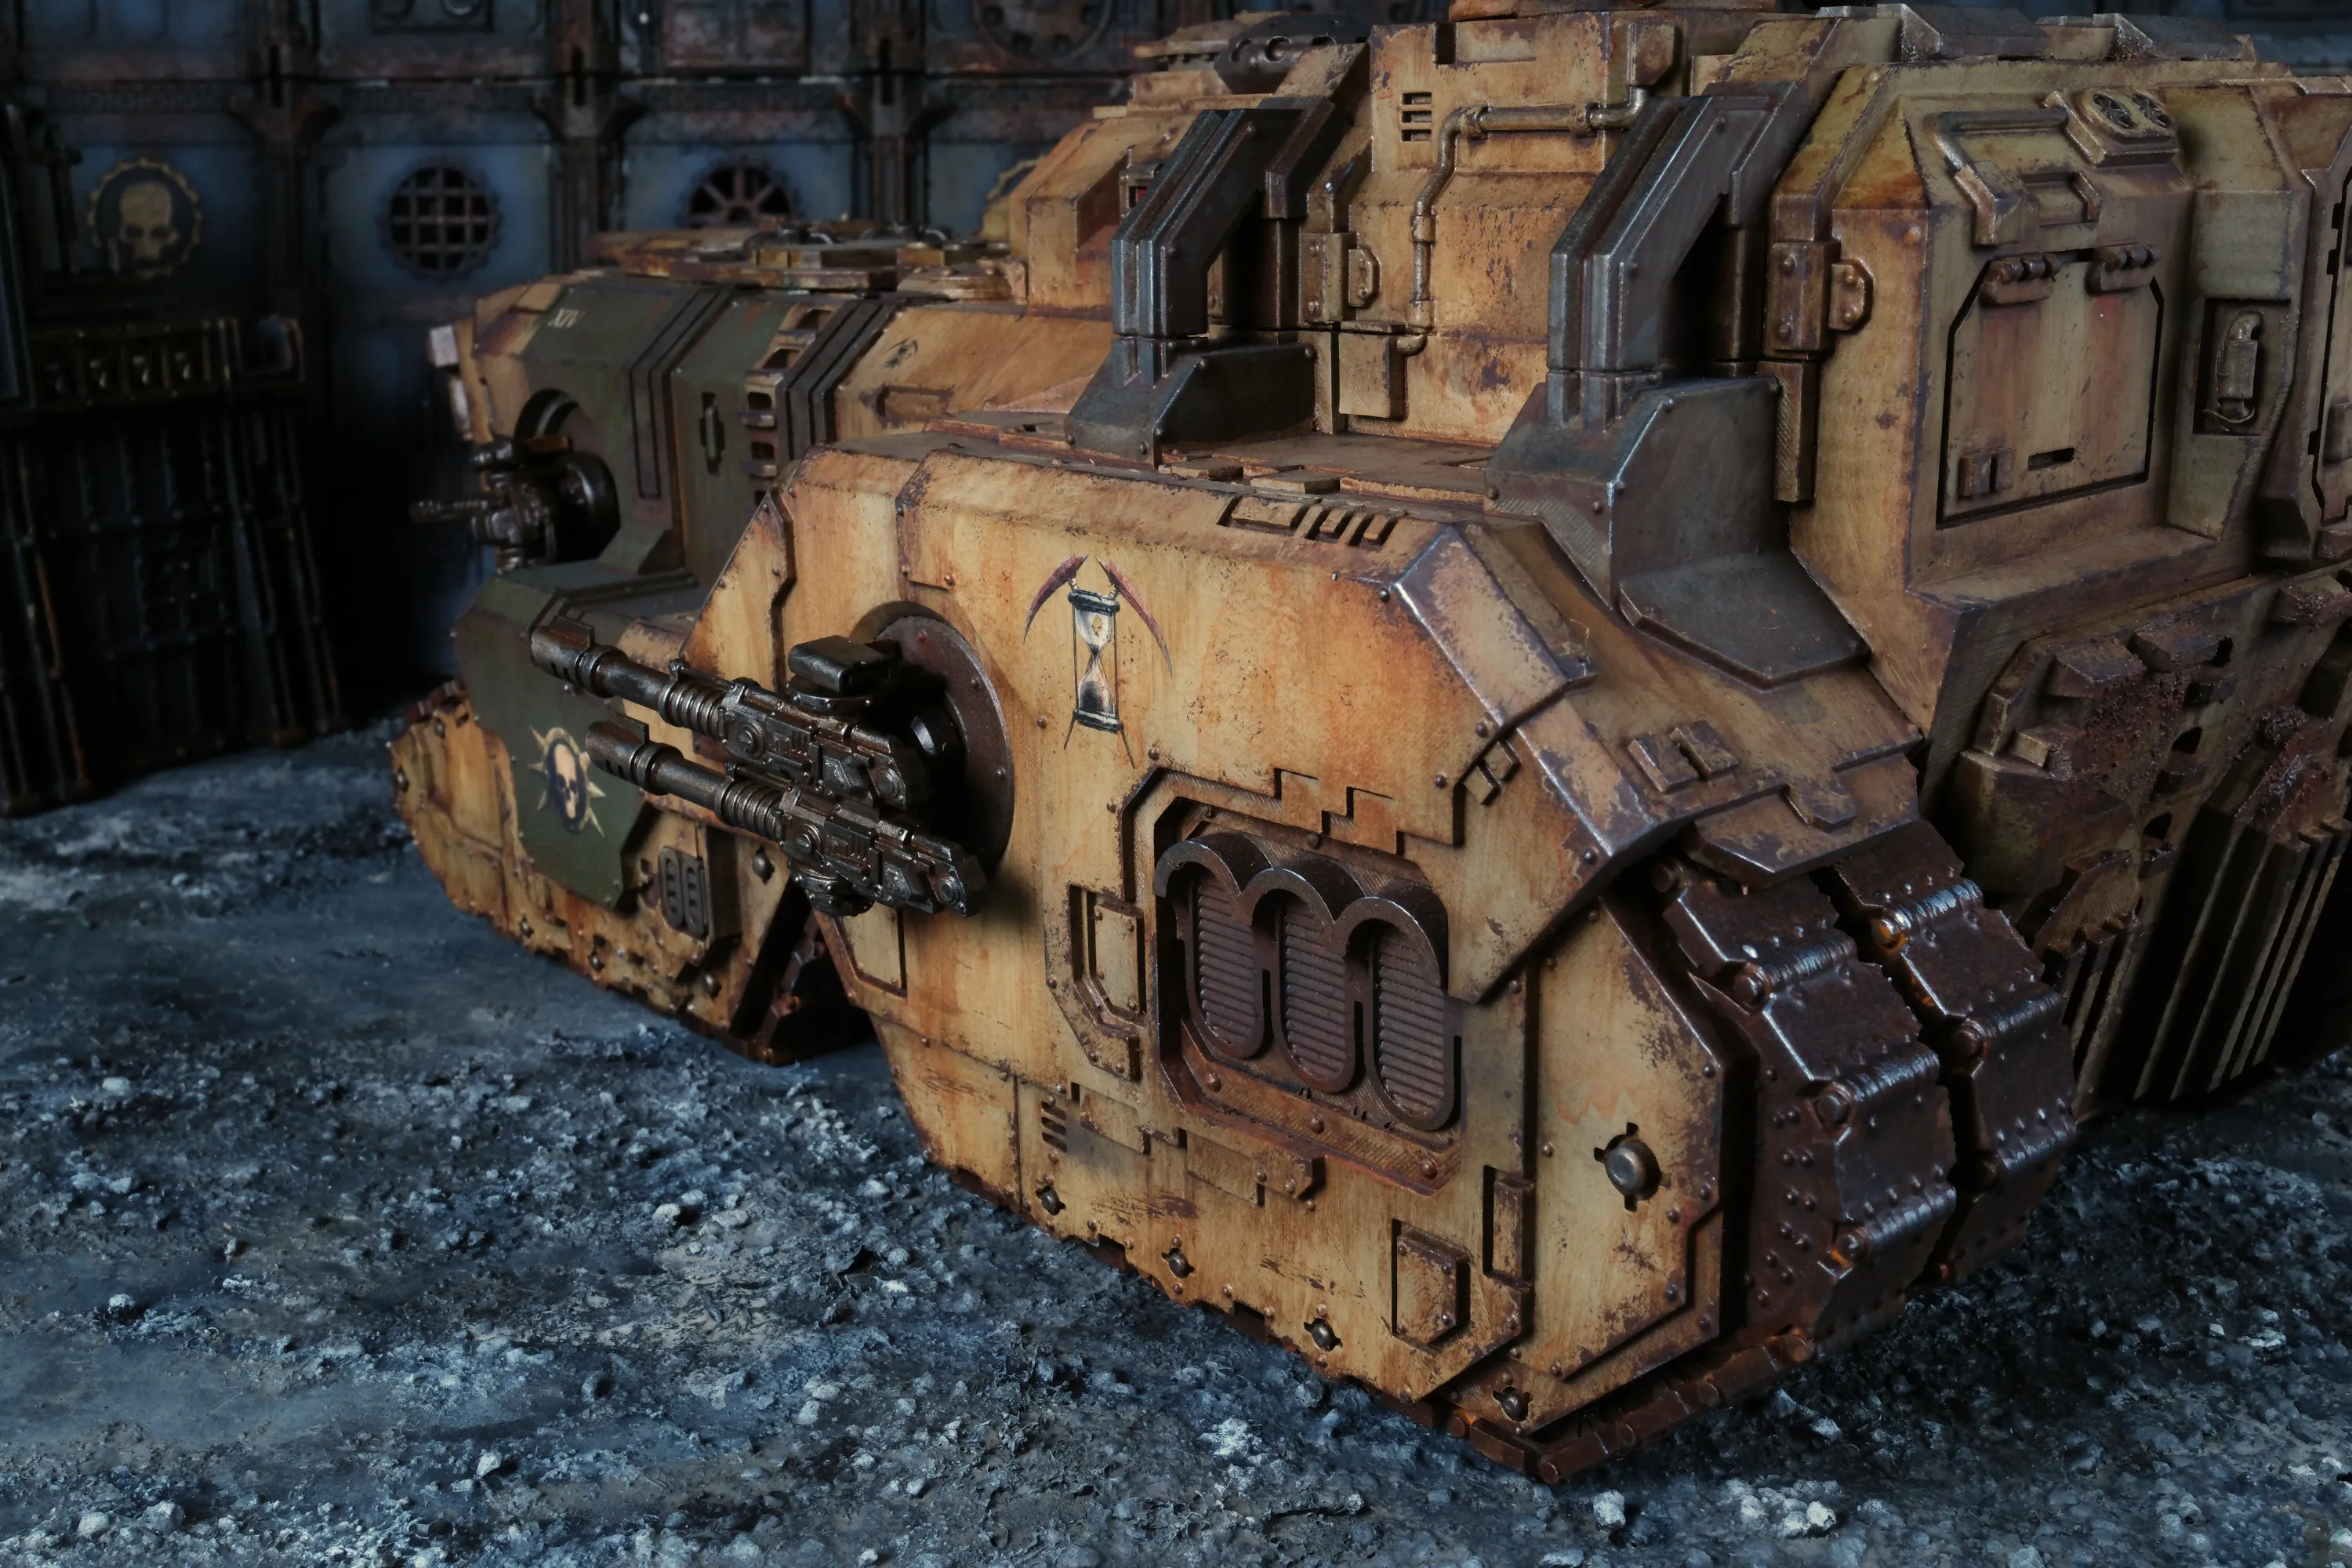

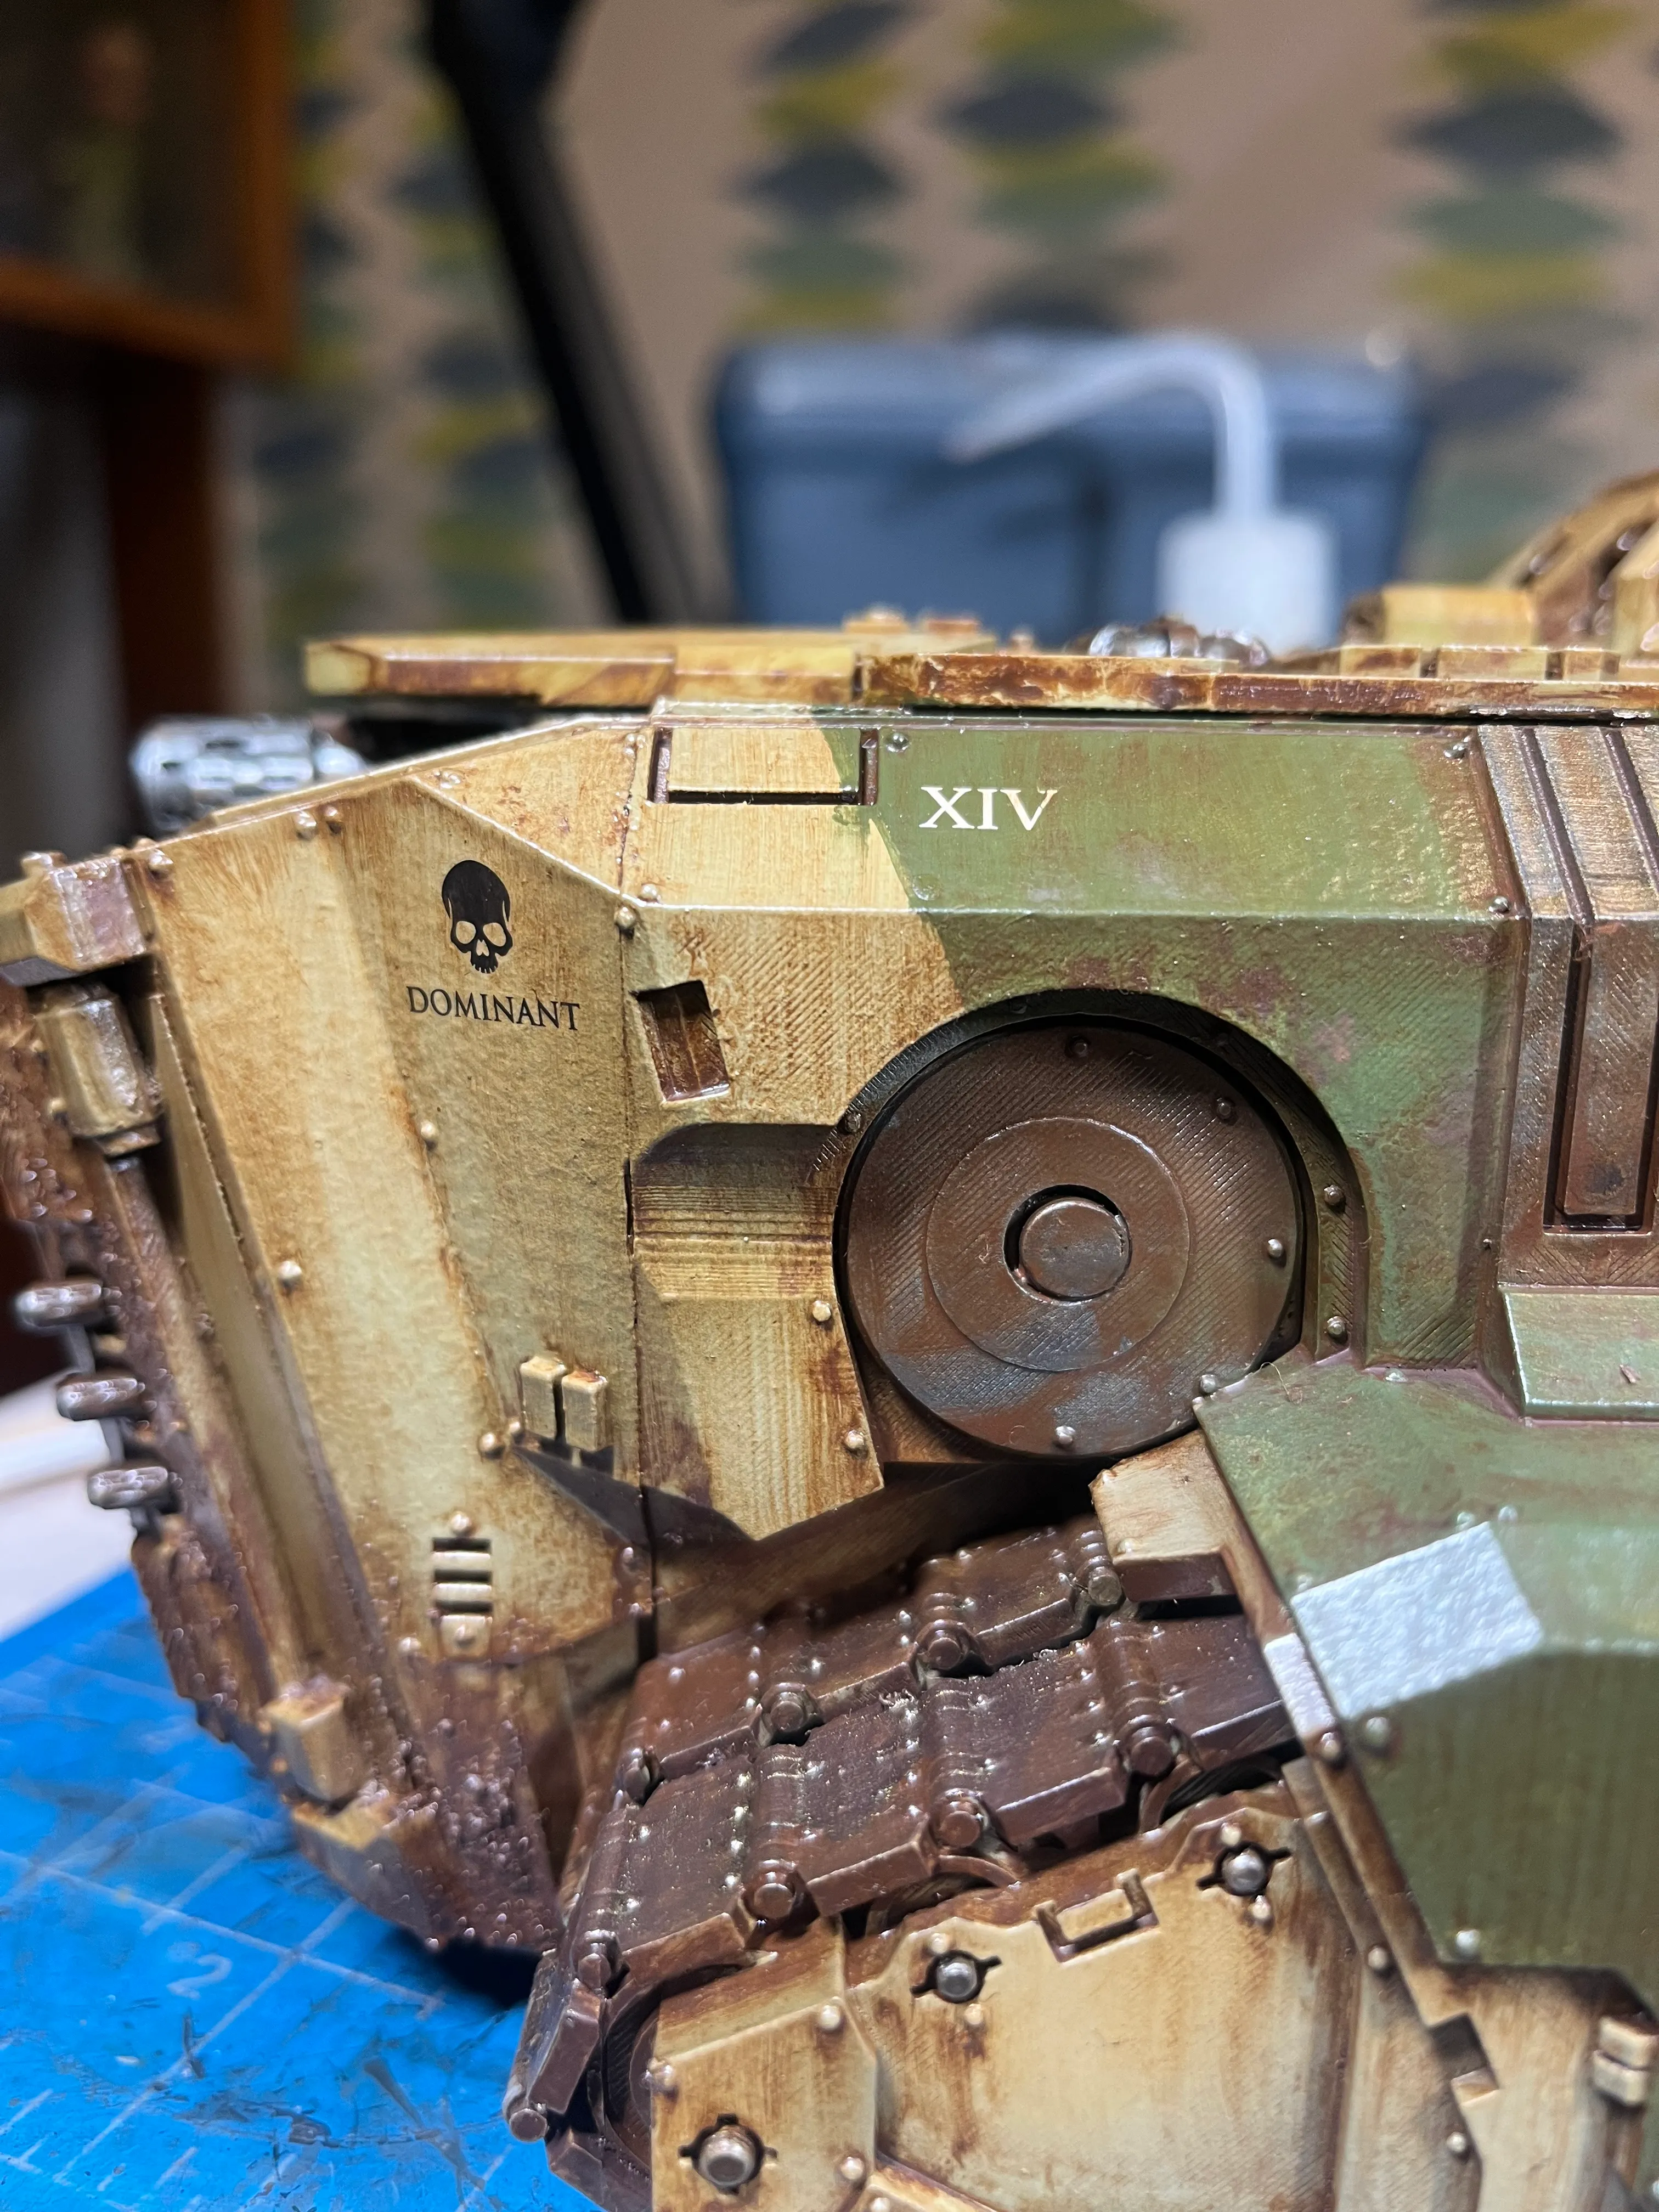
The colour palette is the same one running through the rest of the force — grimed up tan with a green detail, the kind of livery that has faded badly and been partially repainted over the years. The scale of the Mastodon makes the green detail more prominent than it reads on infantry or even dreadnoughts. At this size you can actually see that someone, at some point, cared enough to maintain the markings. They don’t anymore, but they did. Death Guard care about the weapons firing, not the cleanliness of the livery.


Process
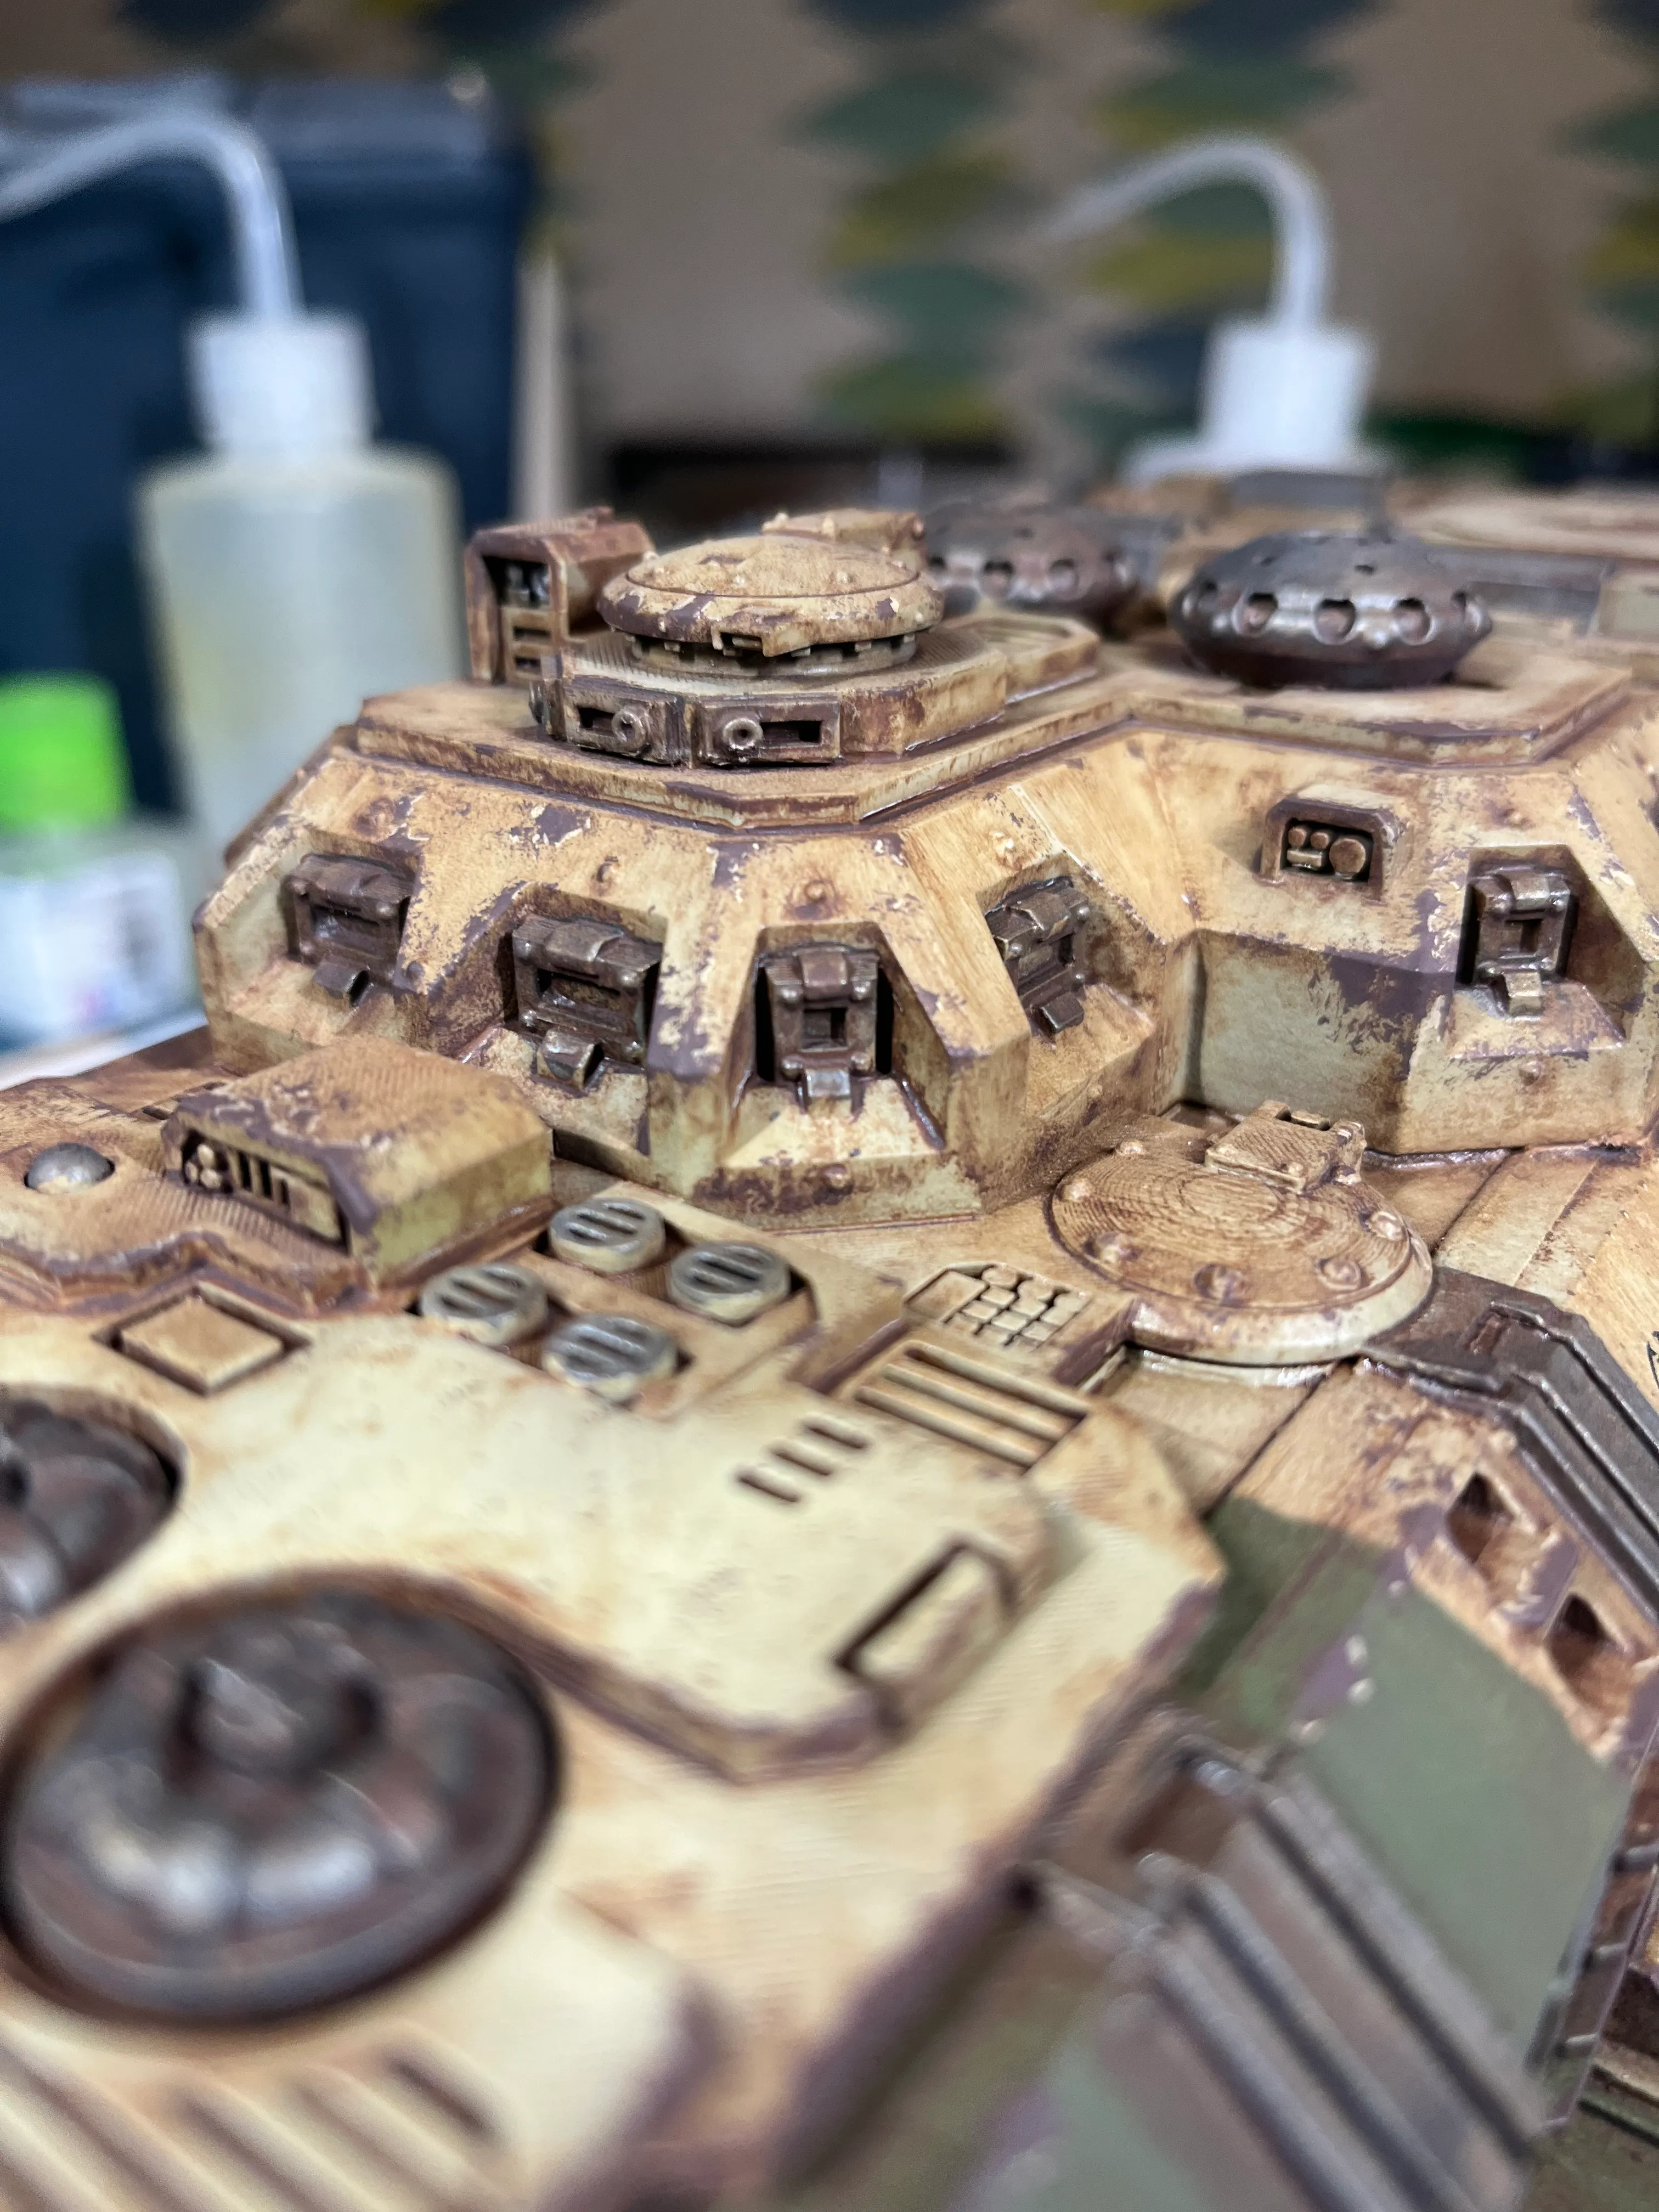
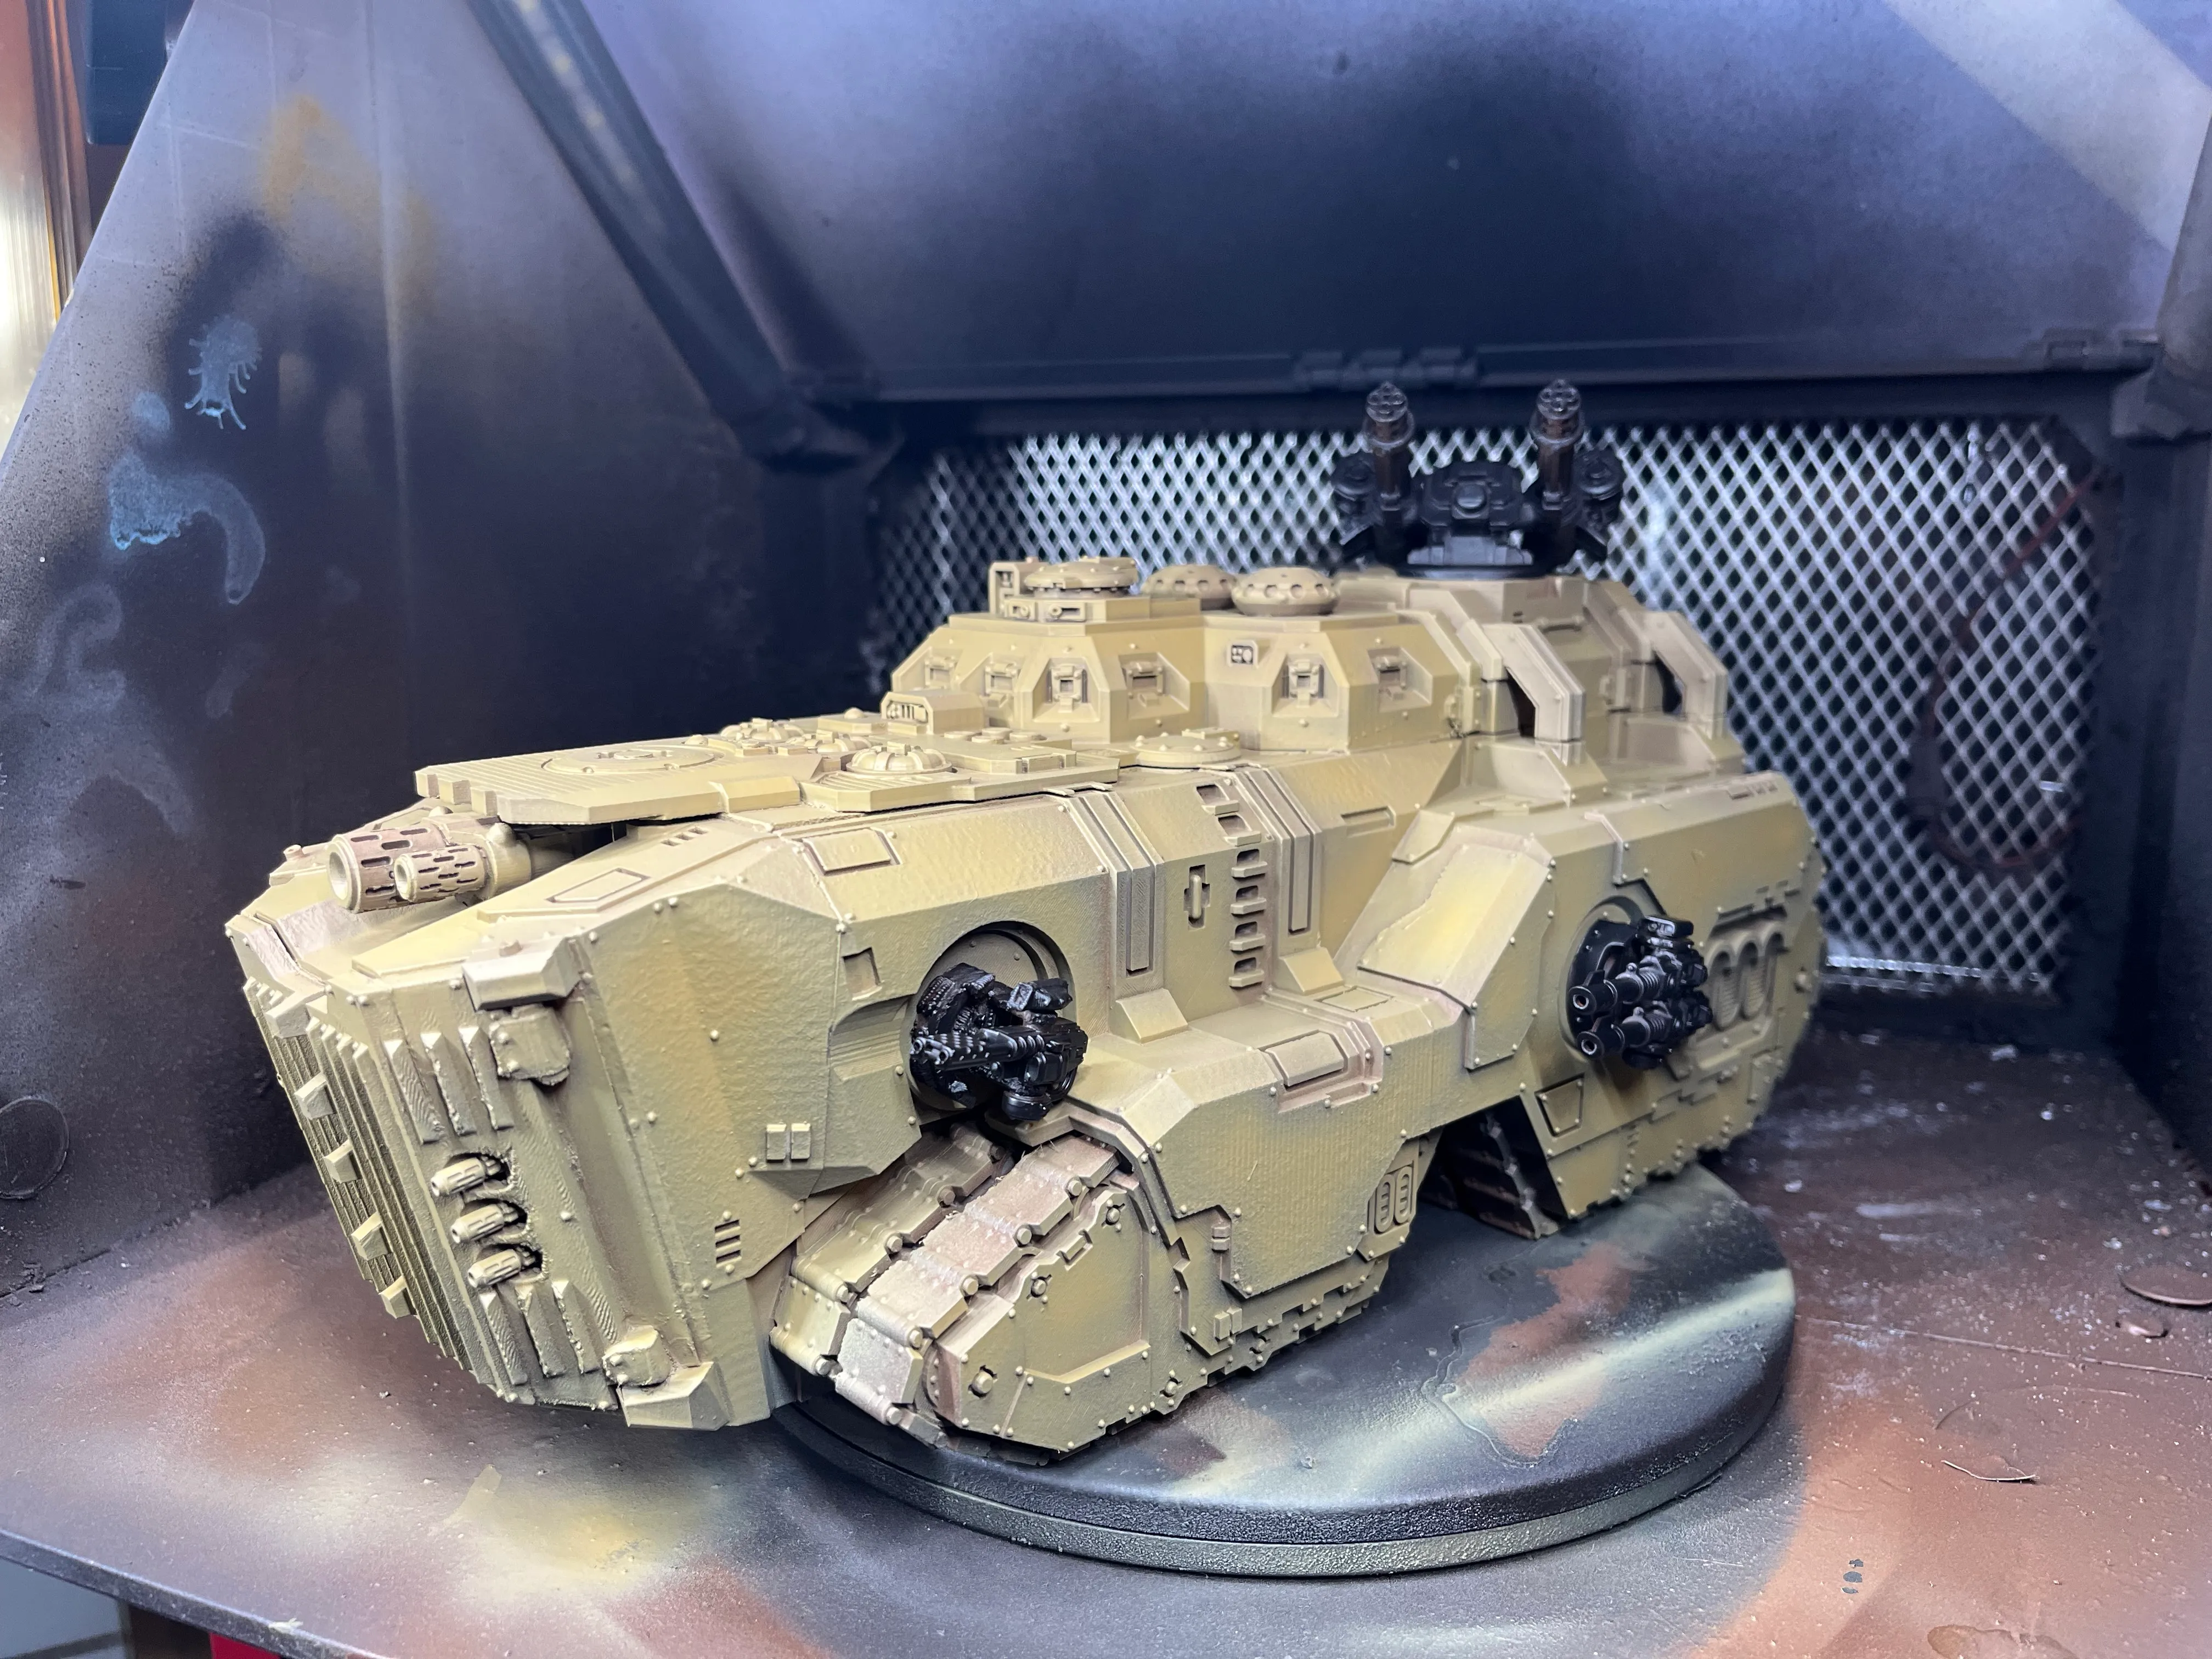
Texture and base coats
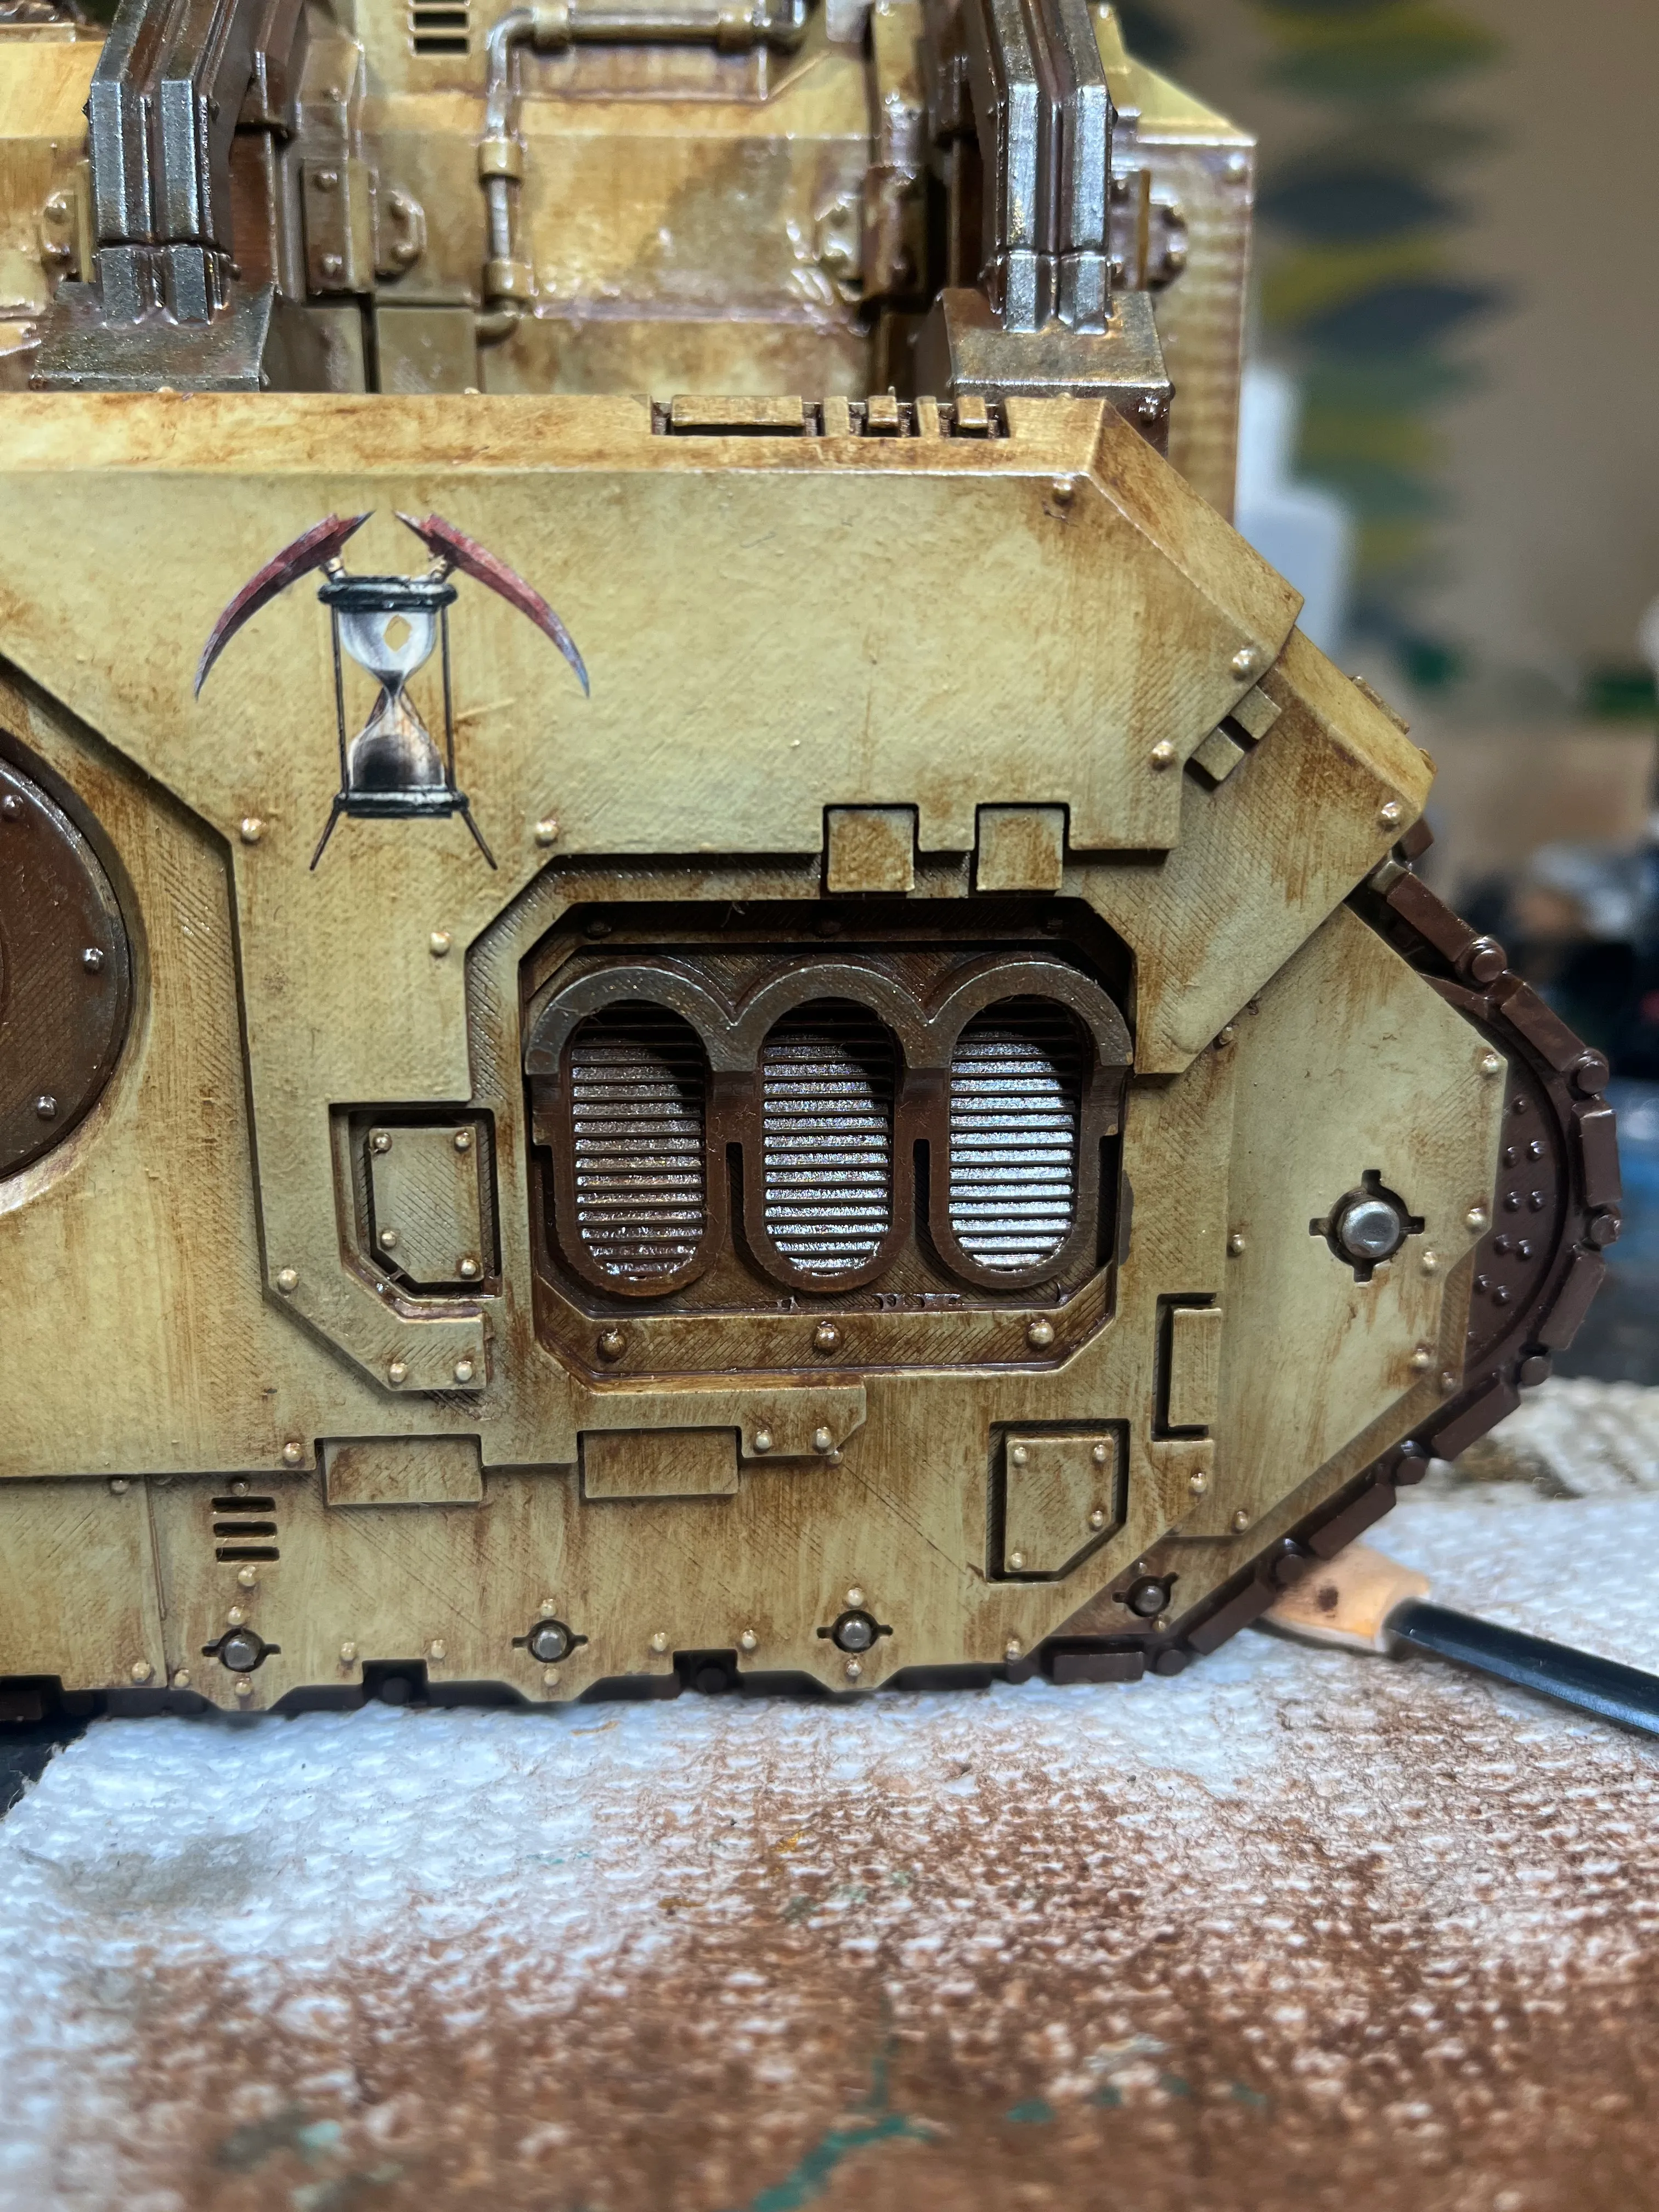
The surface texture starts with Vallejo Acrylic Putty, thinned down and stippled across the hull. The putty has a slightly gritty quality when thinned to working consistency — not a smooth fill but a granular, irregular deposit that breaks up flat areas and gives the enamel wash something to cling to later. Applied to panels that would have had heavy surface treatment or crude repairs, it adds a tactile quality that paint alone doesn’t. To hide some of the jankier FDM artifacts, I applied a coat of the Vallejo rust effect.
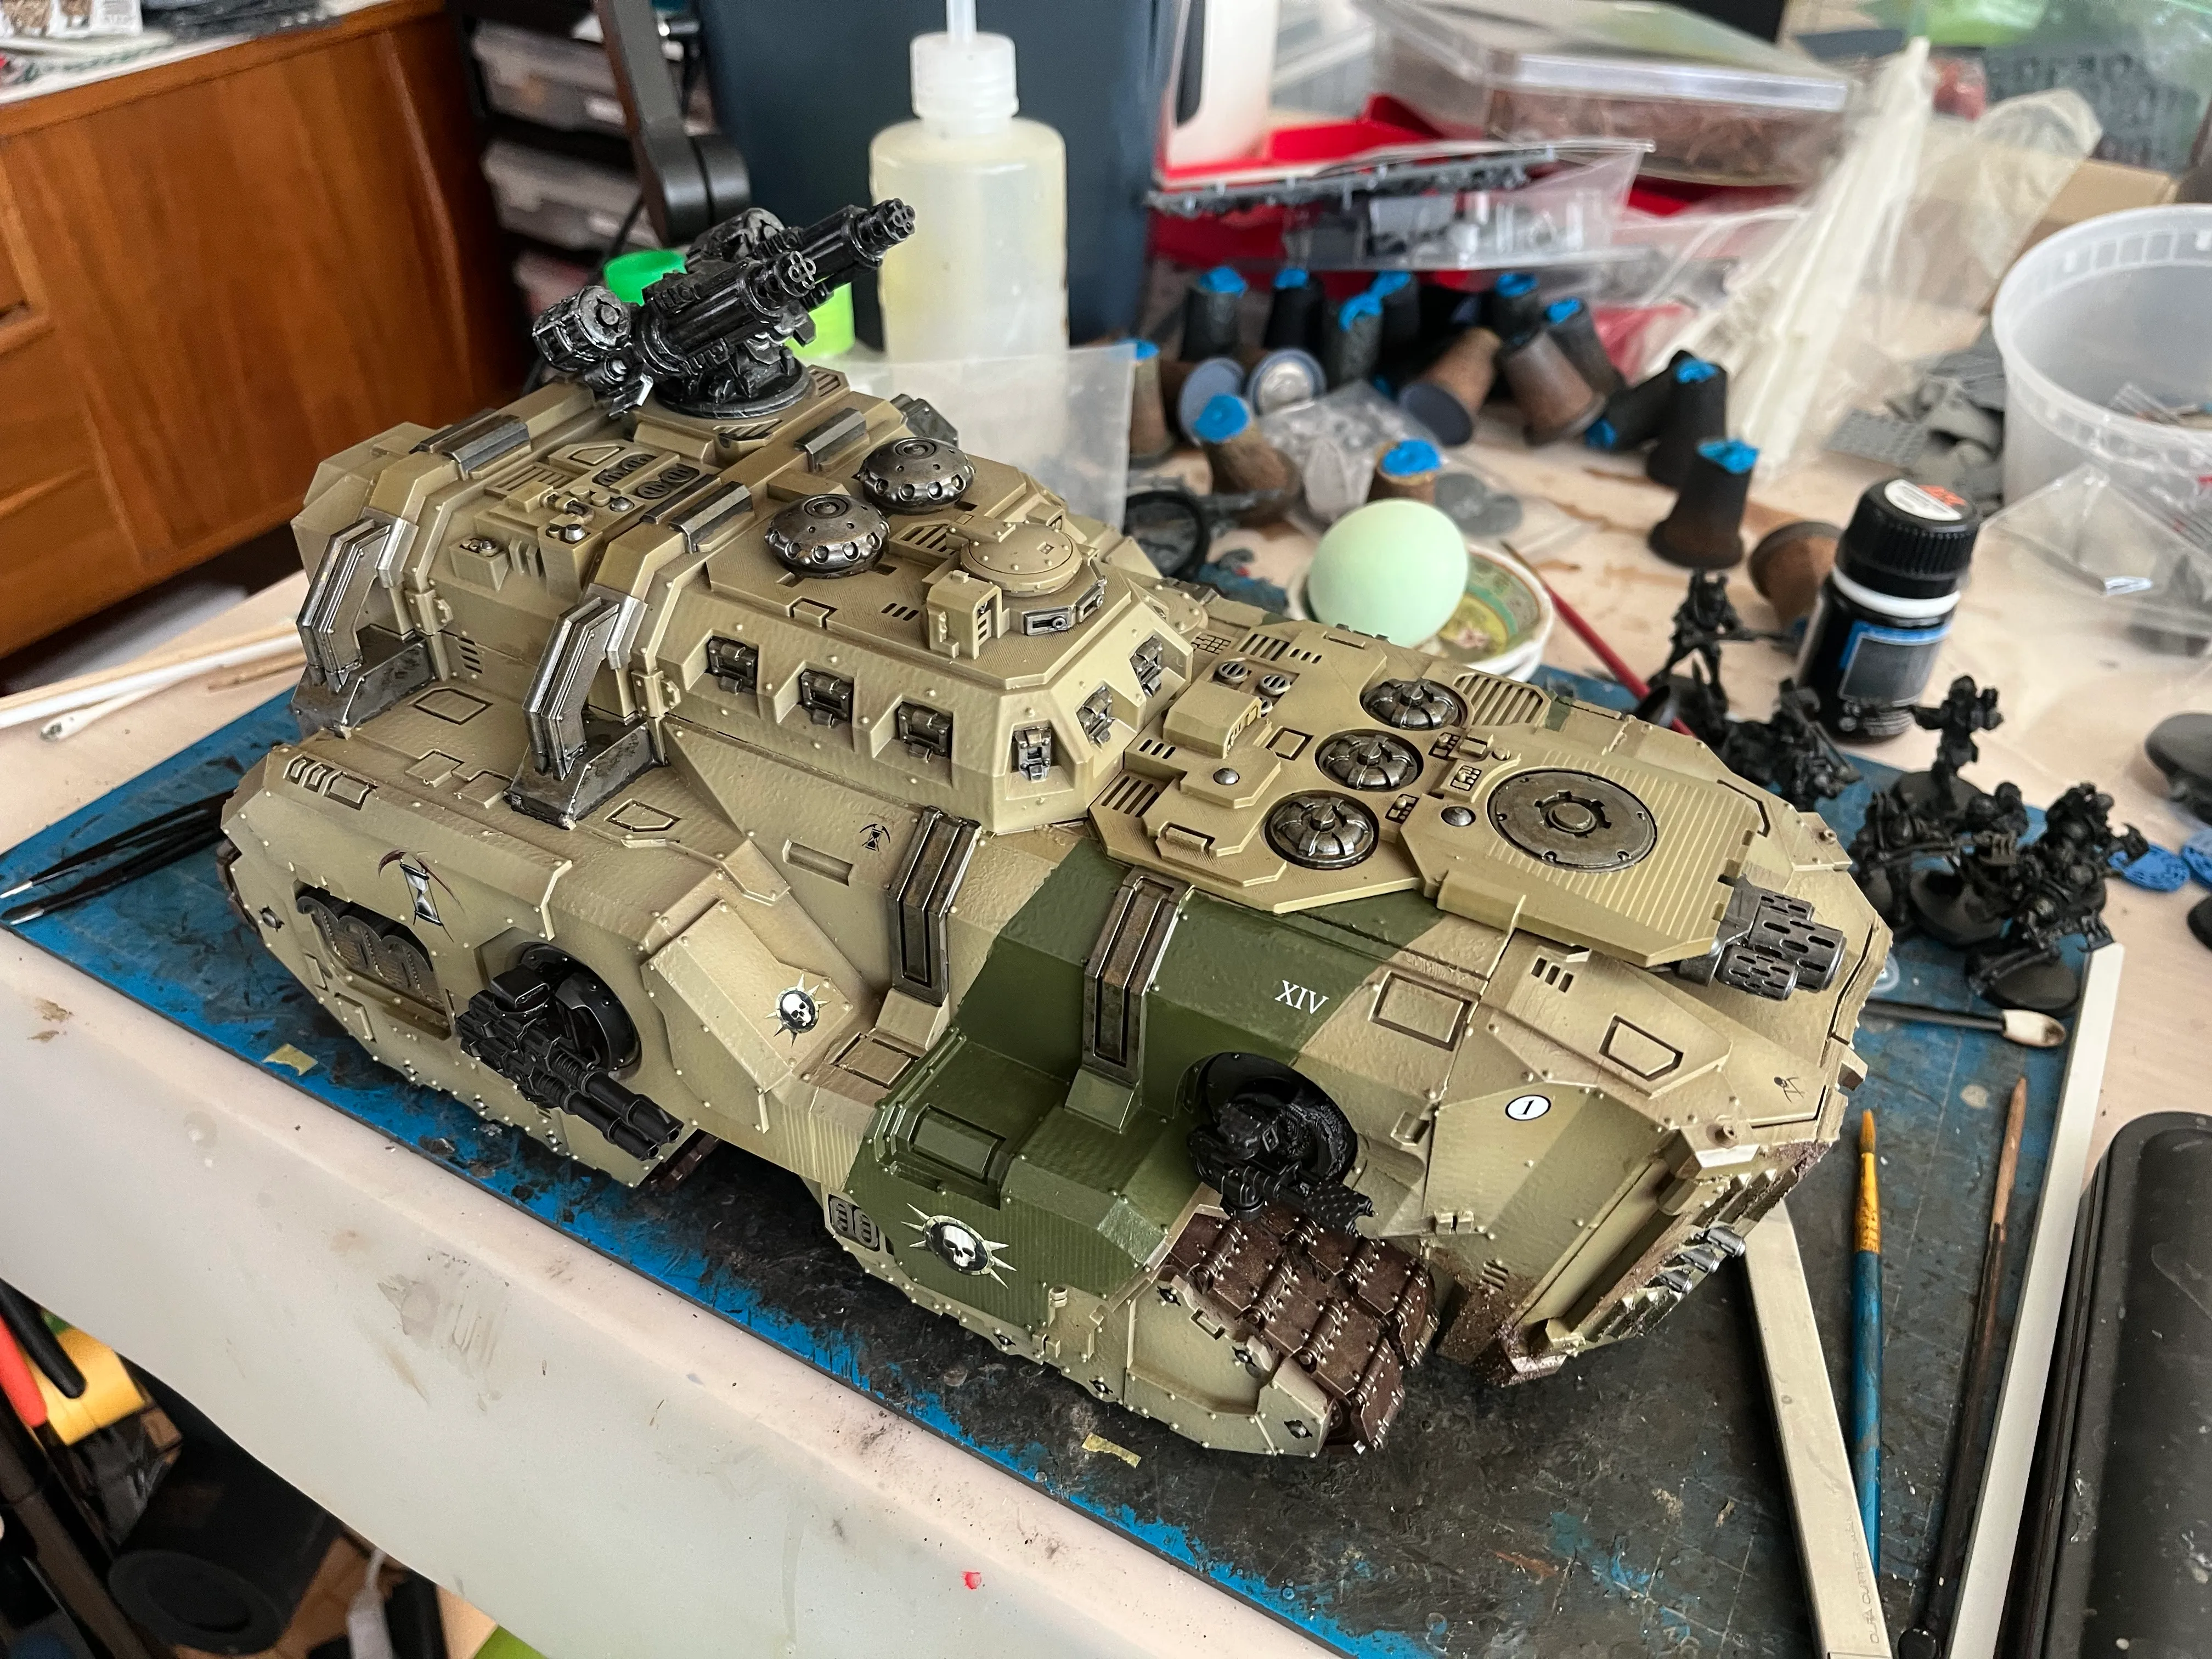
Base coats go on by airbrush. The primary hull colour is built up in layers — a darker rust undercoat first, then the main tone, then a lighter modulation toward the top of each panel. This gives the flat surfaces some inherent depth before any weathering touches them. The Death Guard green striping is done by hand with a brush, which keeps the edges slightly imprecise. That suits the look; perfect decal-sharp lines would undercut everything else.

Enamel coat
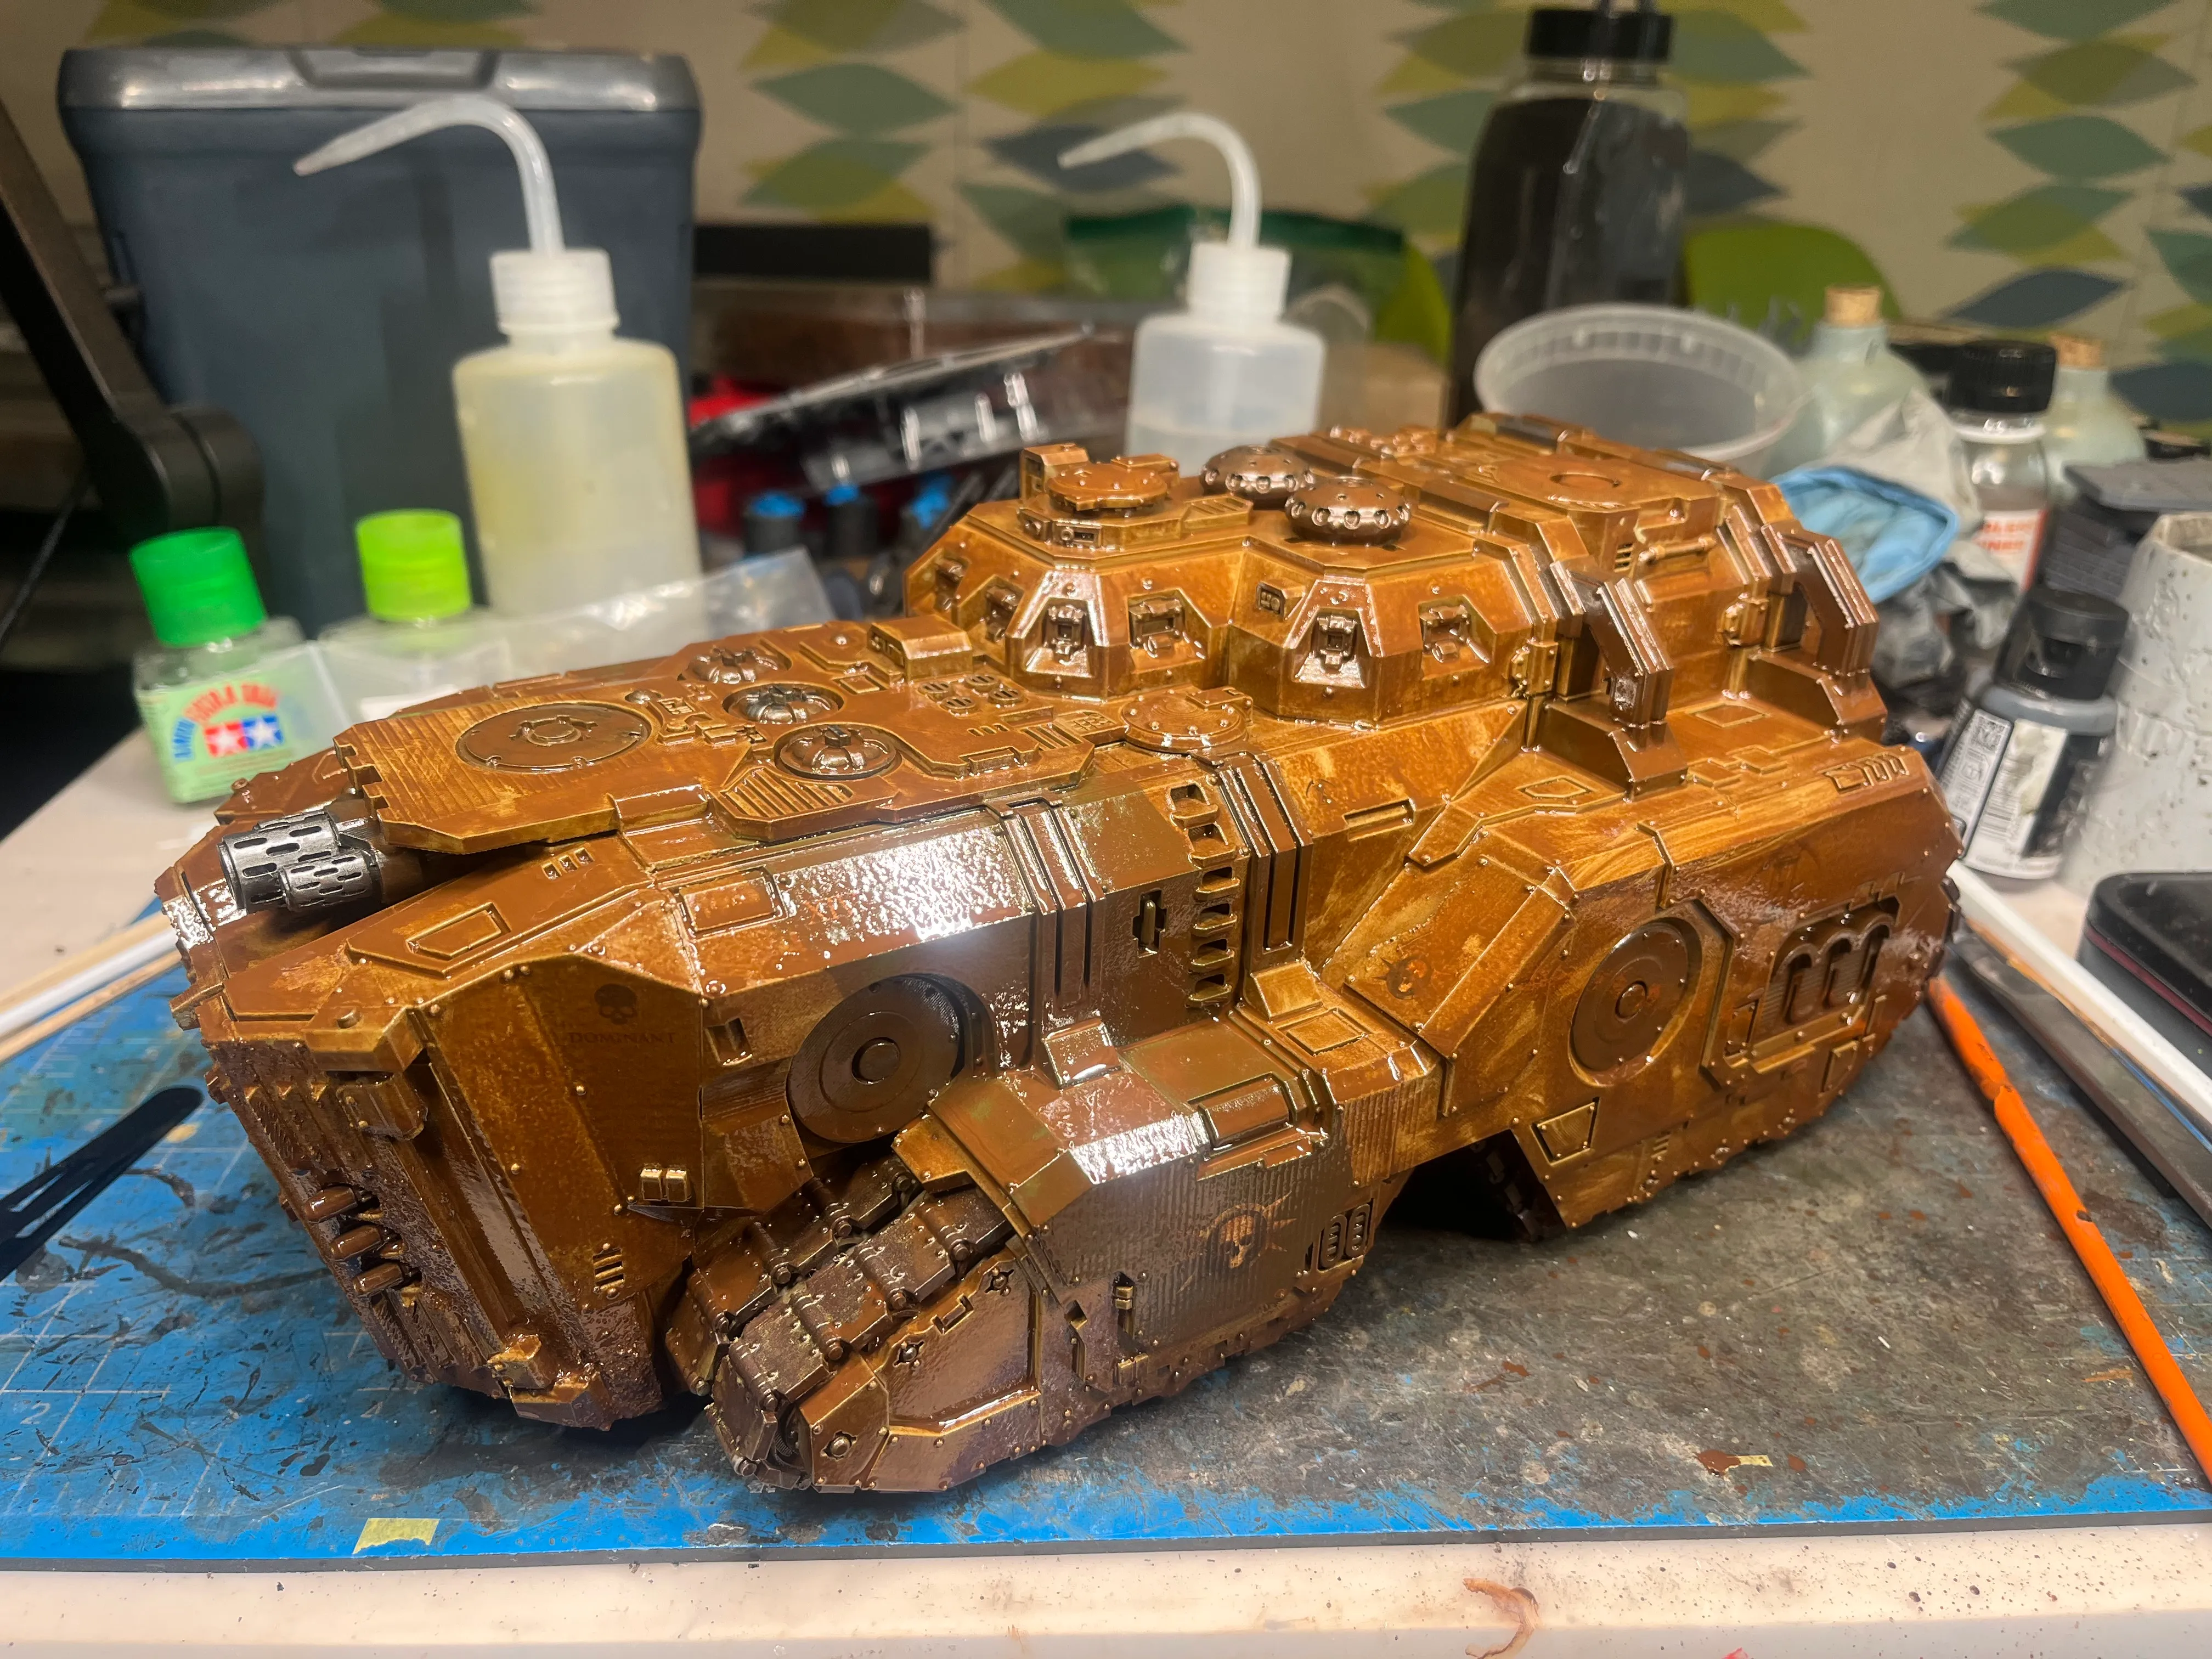
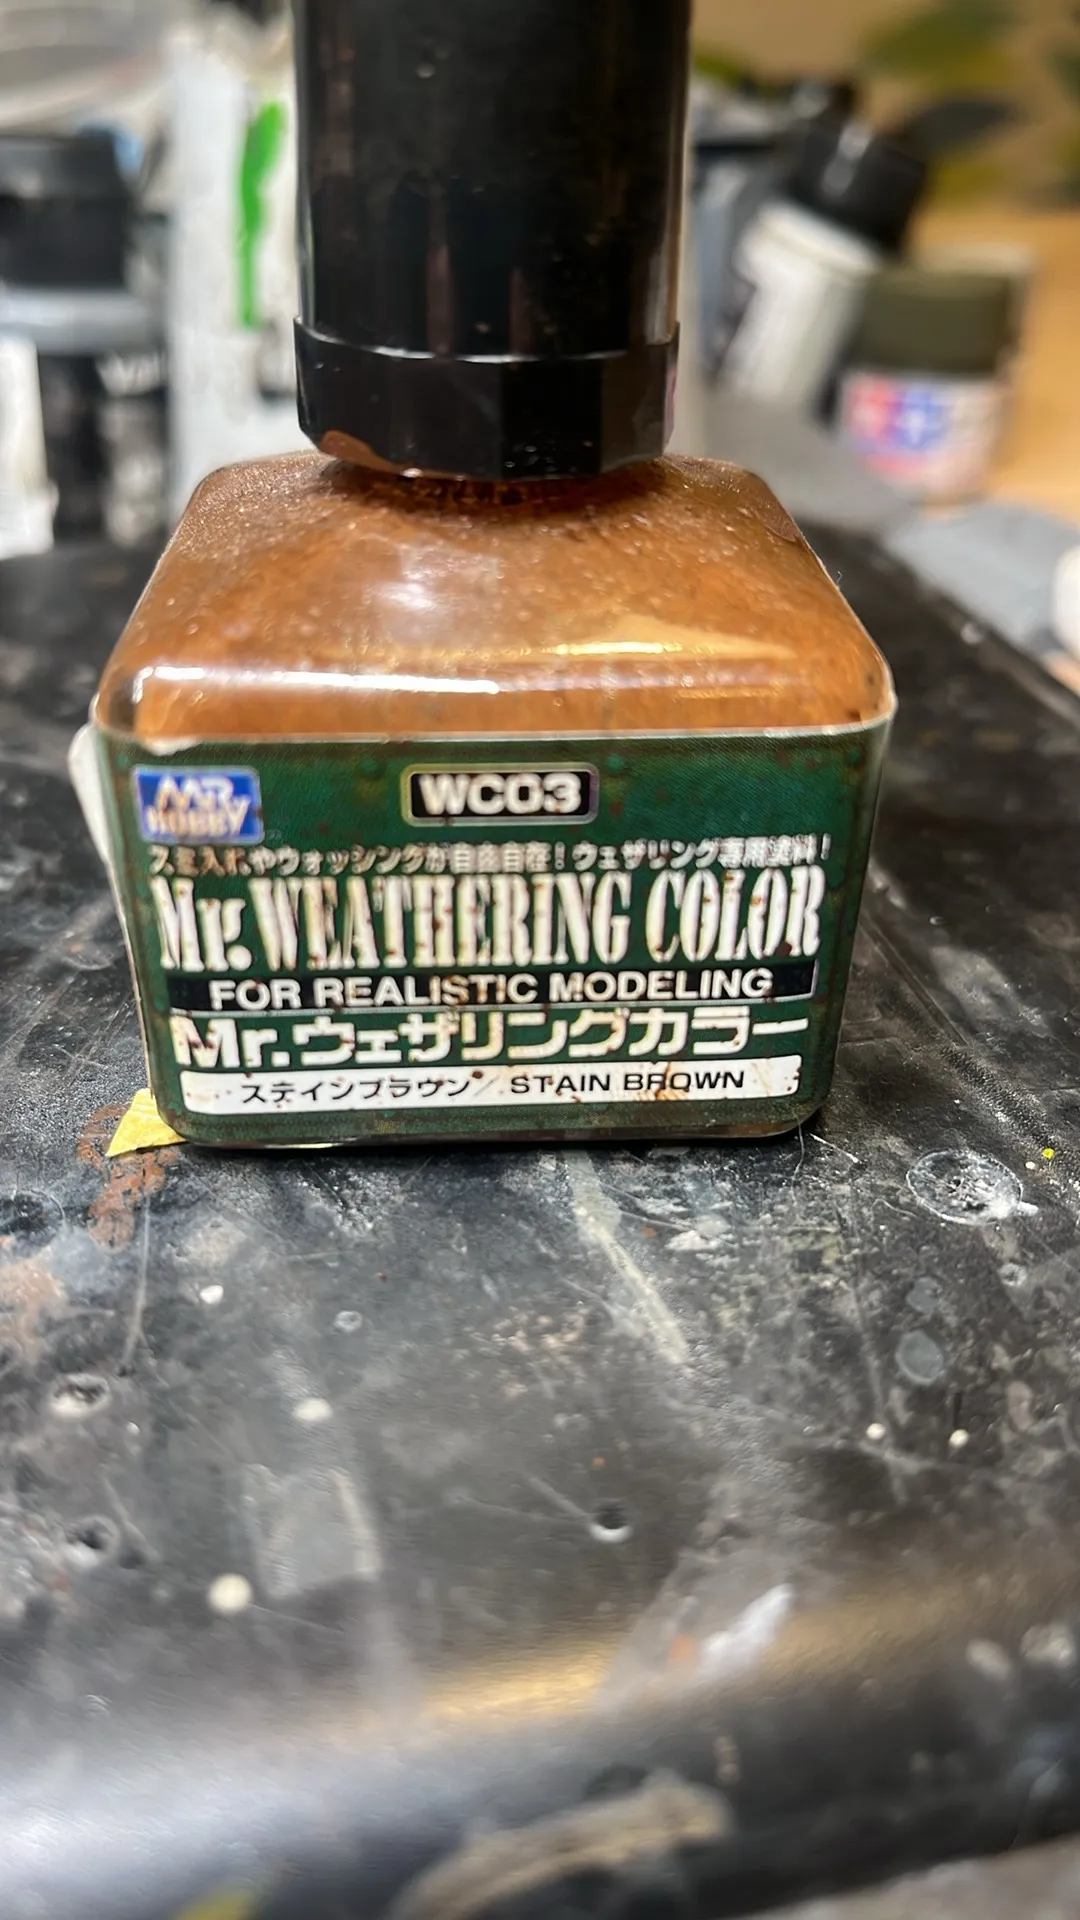
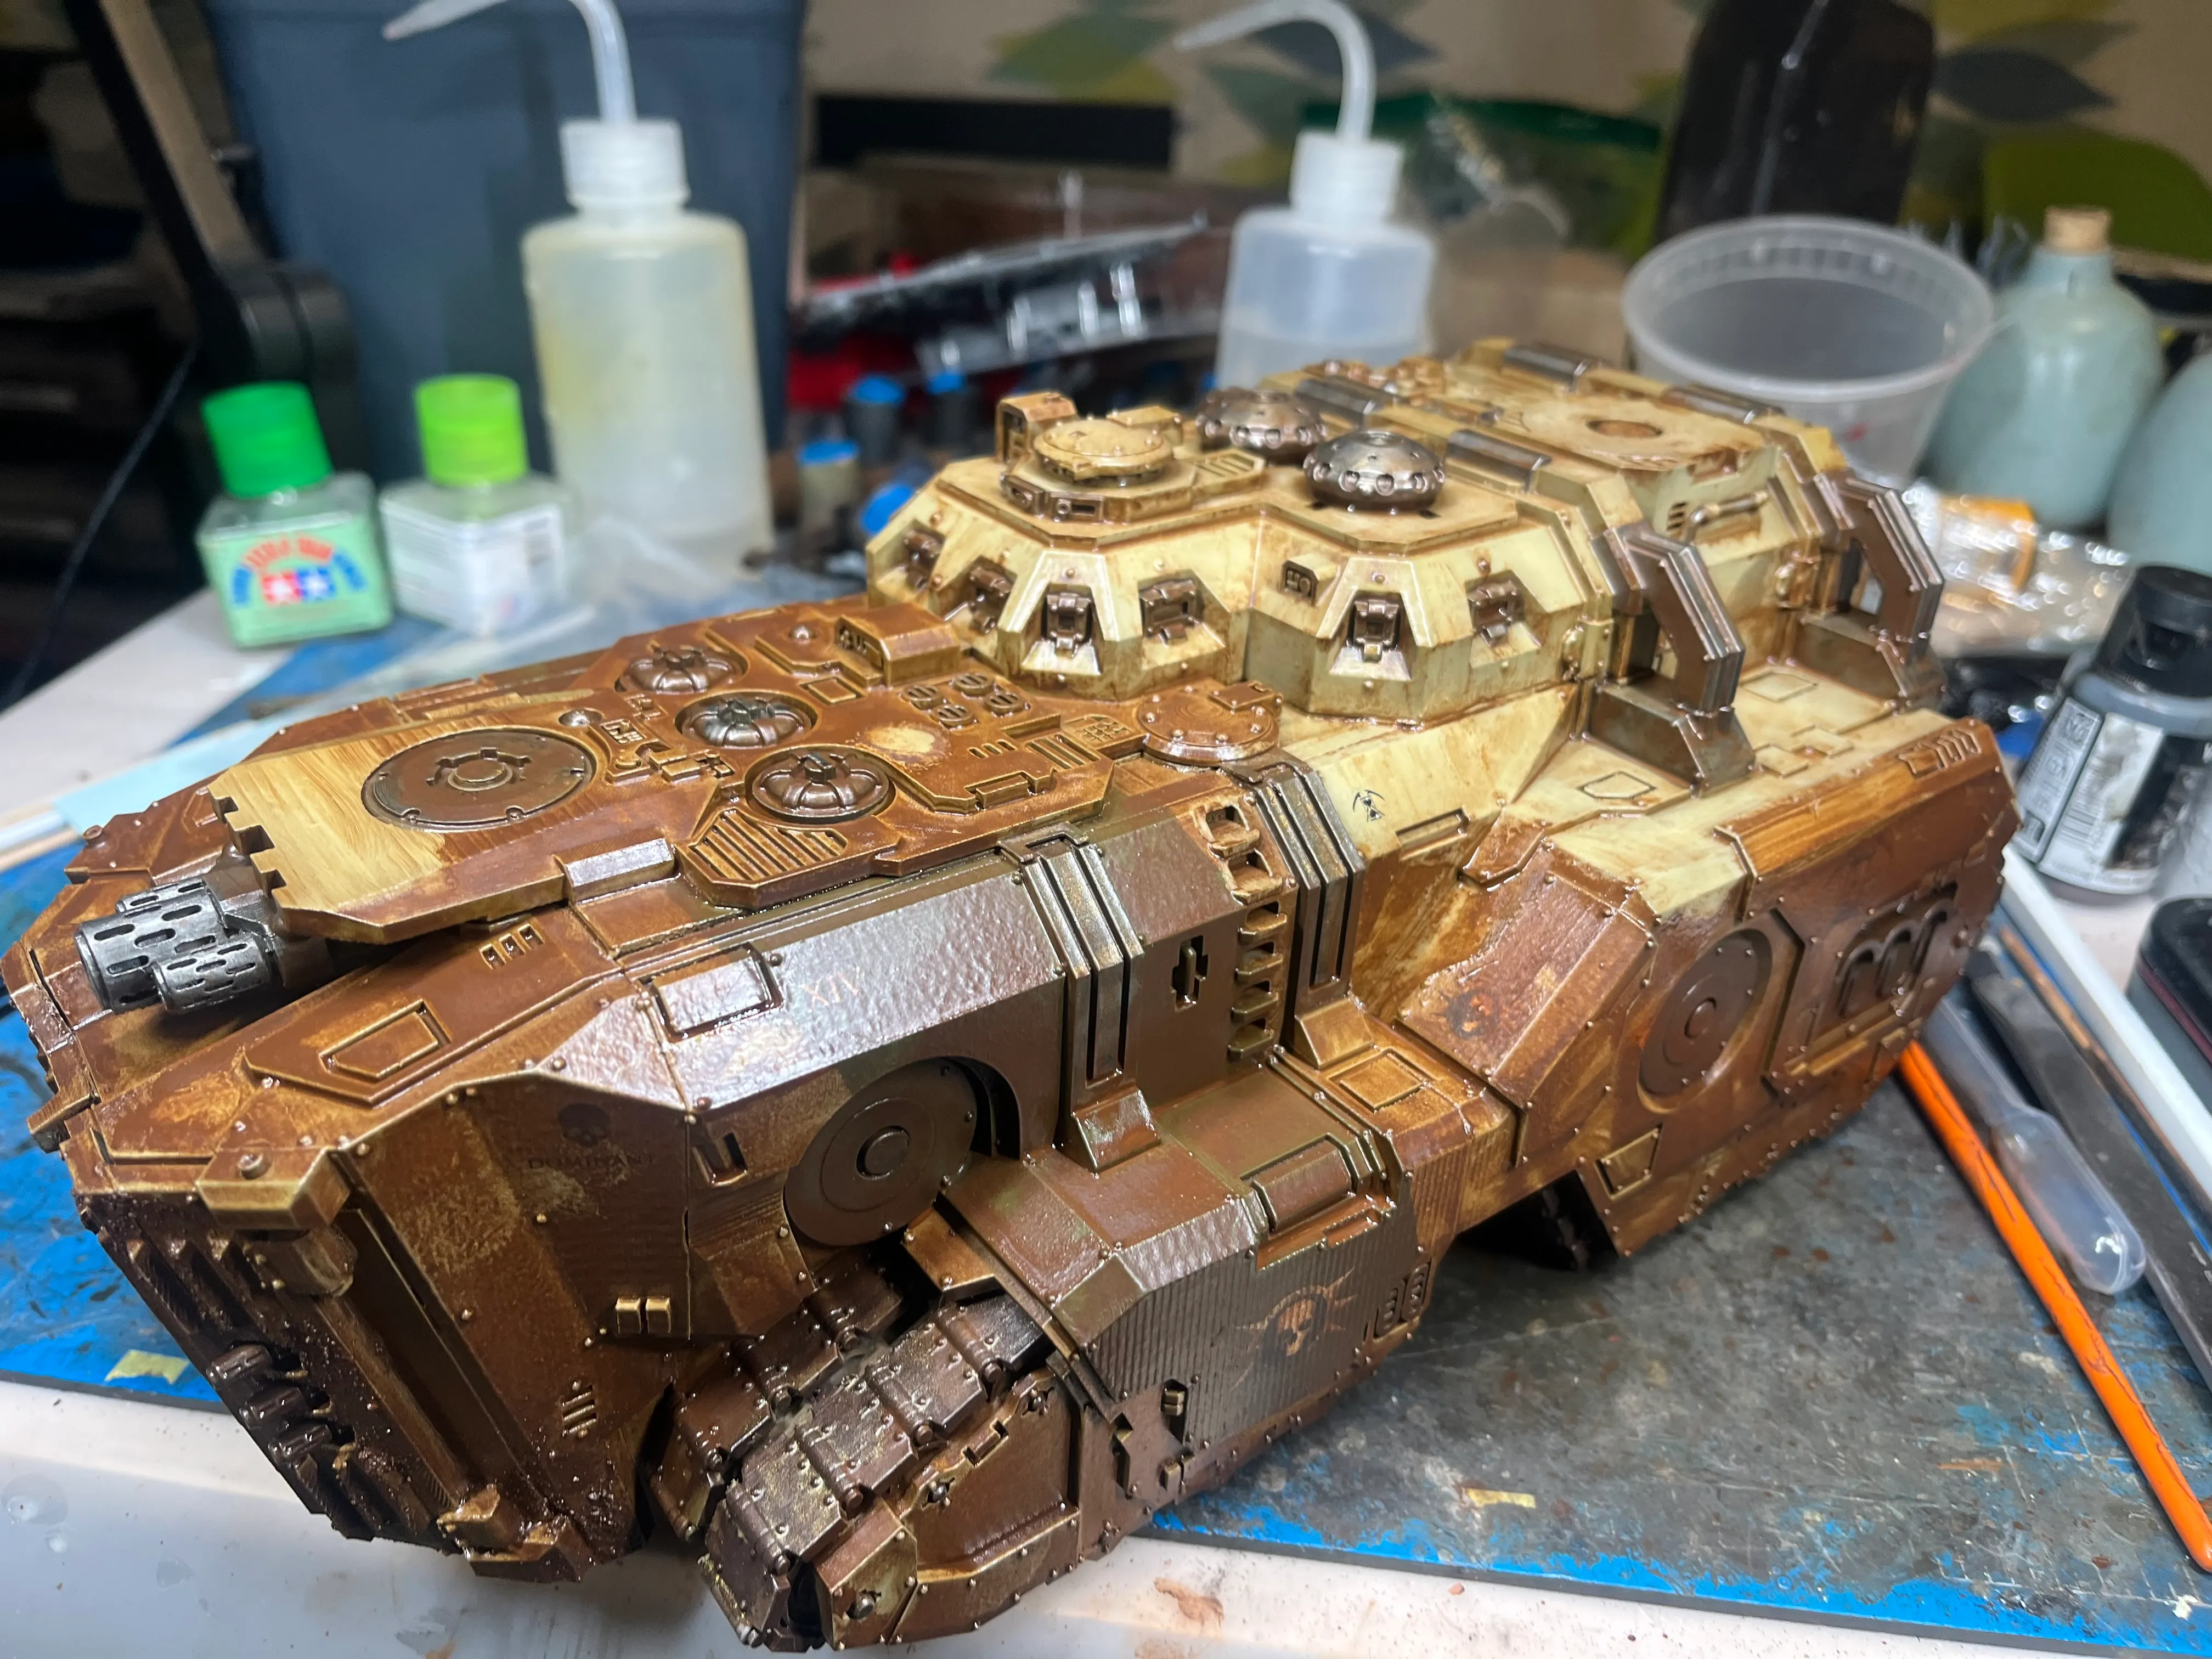
The enamel coat is Mr Weathering Colour Stain Brown, applied over a sealed matte varnish. Stain Brown is a useful product — it has more body than a standard enamel wash, somewhere between a filter and a full pin wash. Applied broadly across the hull, it shifts the whole tone toward a grimy, oil-stained warmth and settles into every recess and surface break.
The matte varnish underneath is important. Without it the enamel can lift the acrylic base when you come to clean it back. With it, you have a safe working surface and the enamel sits on top rather than bonding into the paint layer.
Cleaning off — reductive technique
Once the enamel is dry to the touch but not fully cured, it comes back off — selectively. Enamel thinner on a flat brush or small makeup sponge, wiped across flat surfaces in the direction that grime would naturally run. What you’re left with is enamel in the recesses and detail pockets, cleared off the raised faces. The effect is a reading of depth and accumulated dirt that the flat acrylic base simply can’t produce on its own.
The reductive approach gives you more control than applying wash and hoping it behaves. You put the grime exactly where you want it. Tight corners, panel joins, the underside of any raised lip — those hold the enamel. Open faces get cleaned. The Mastodon’s scale makes this especially satisfying; there’s a lot of surface to work across and the results vary panel to panel in a way that feels organic rather than systematic.
Sponge chipping
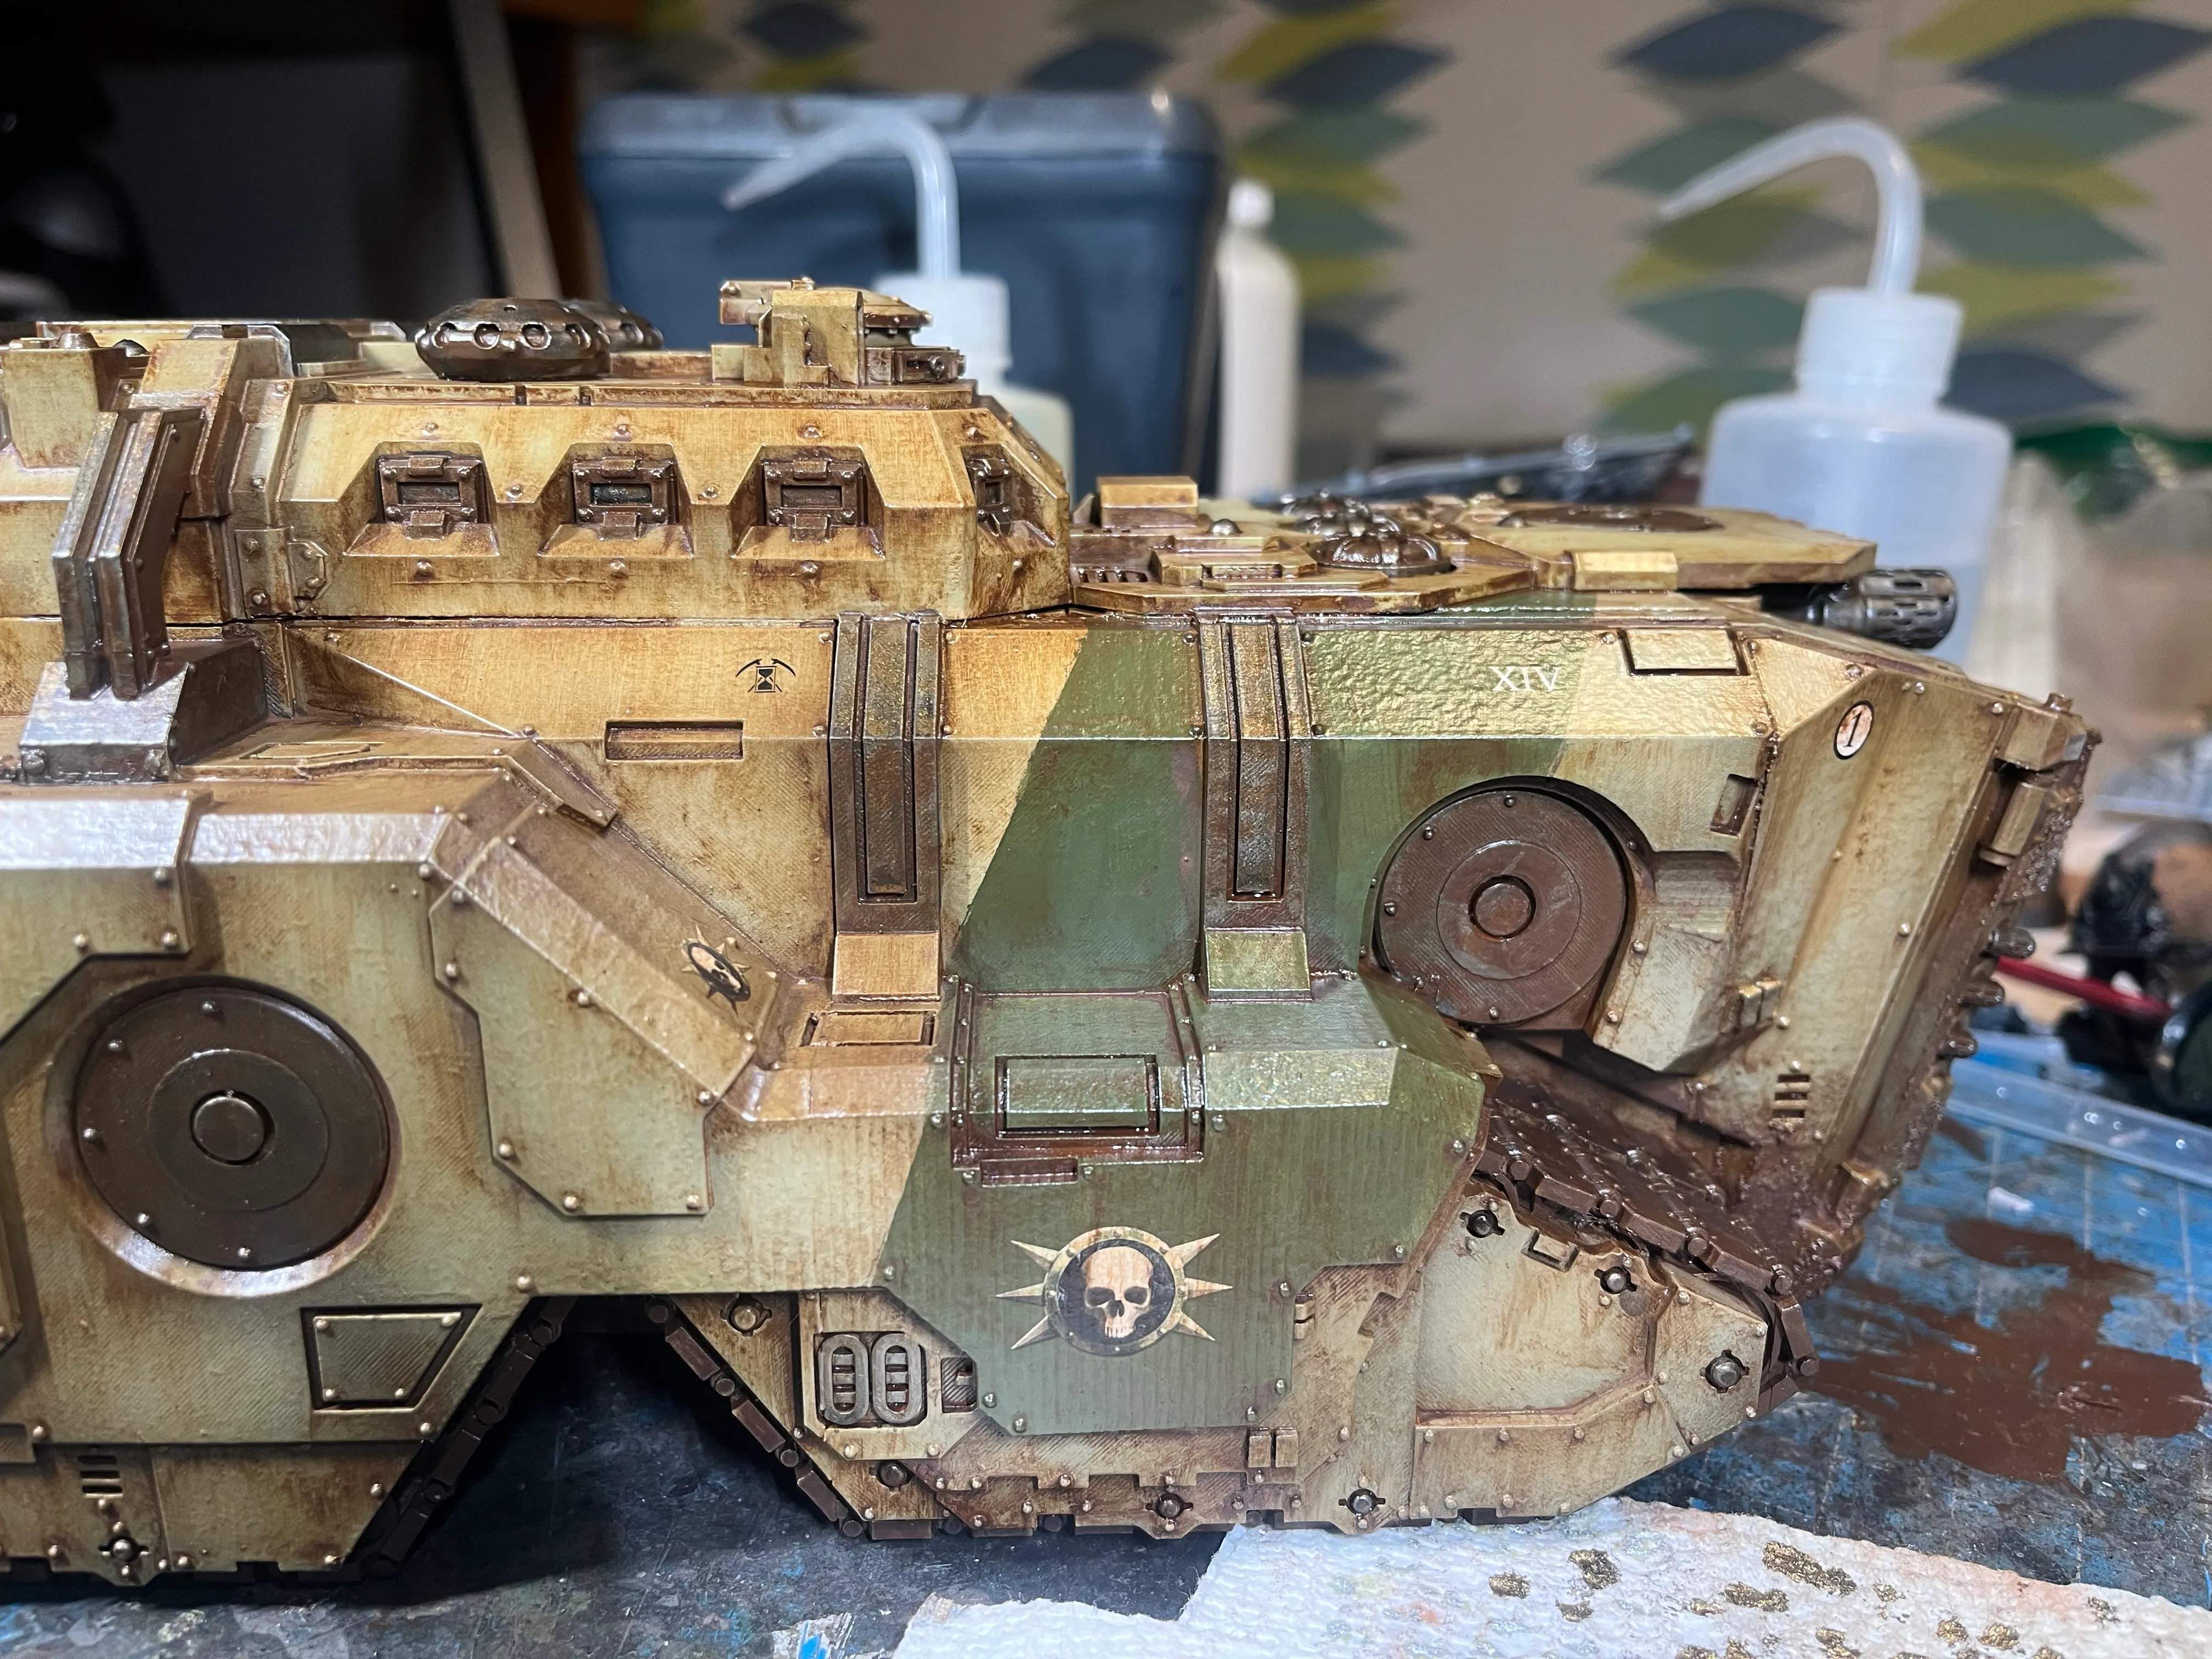
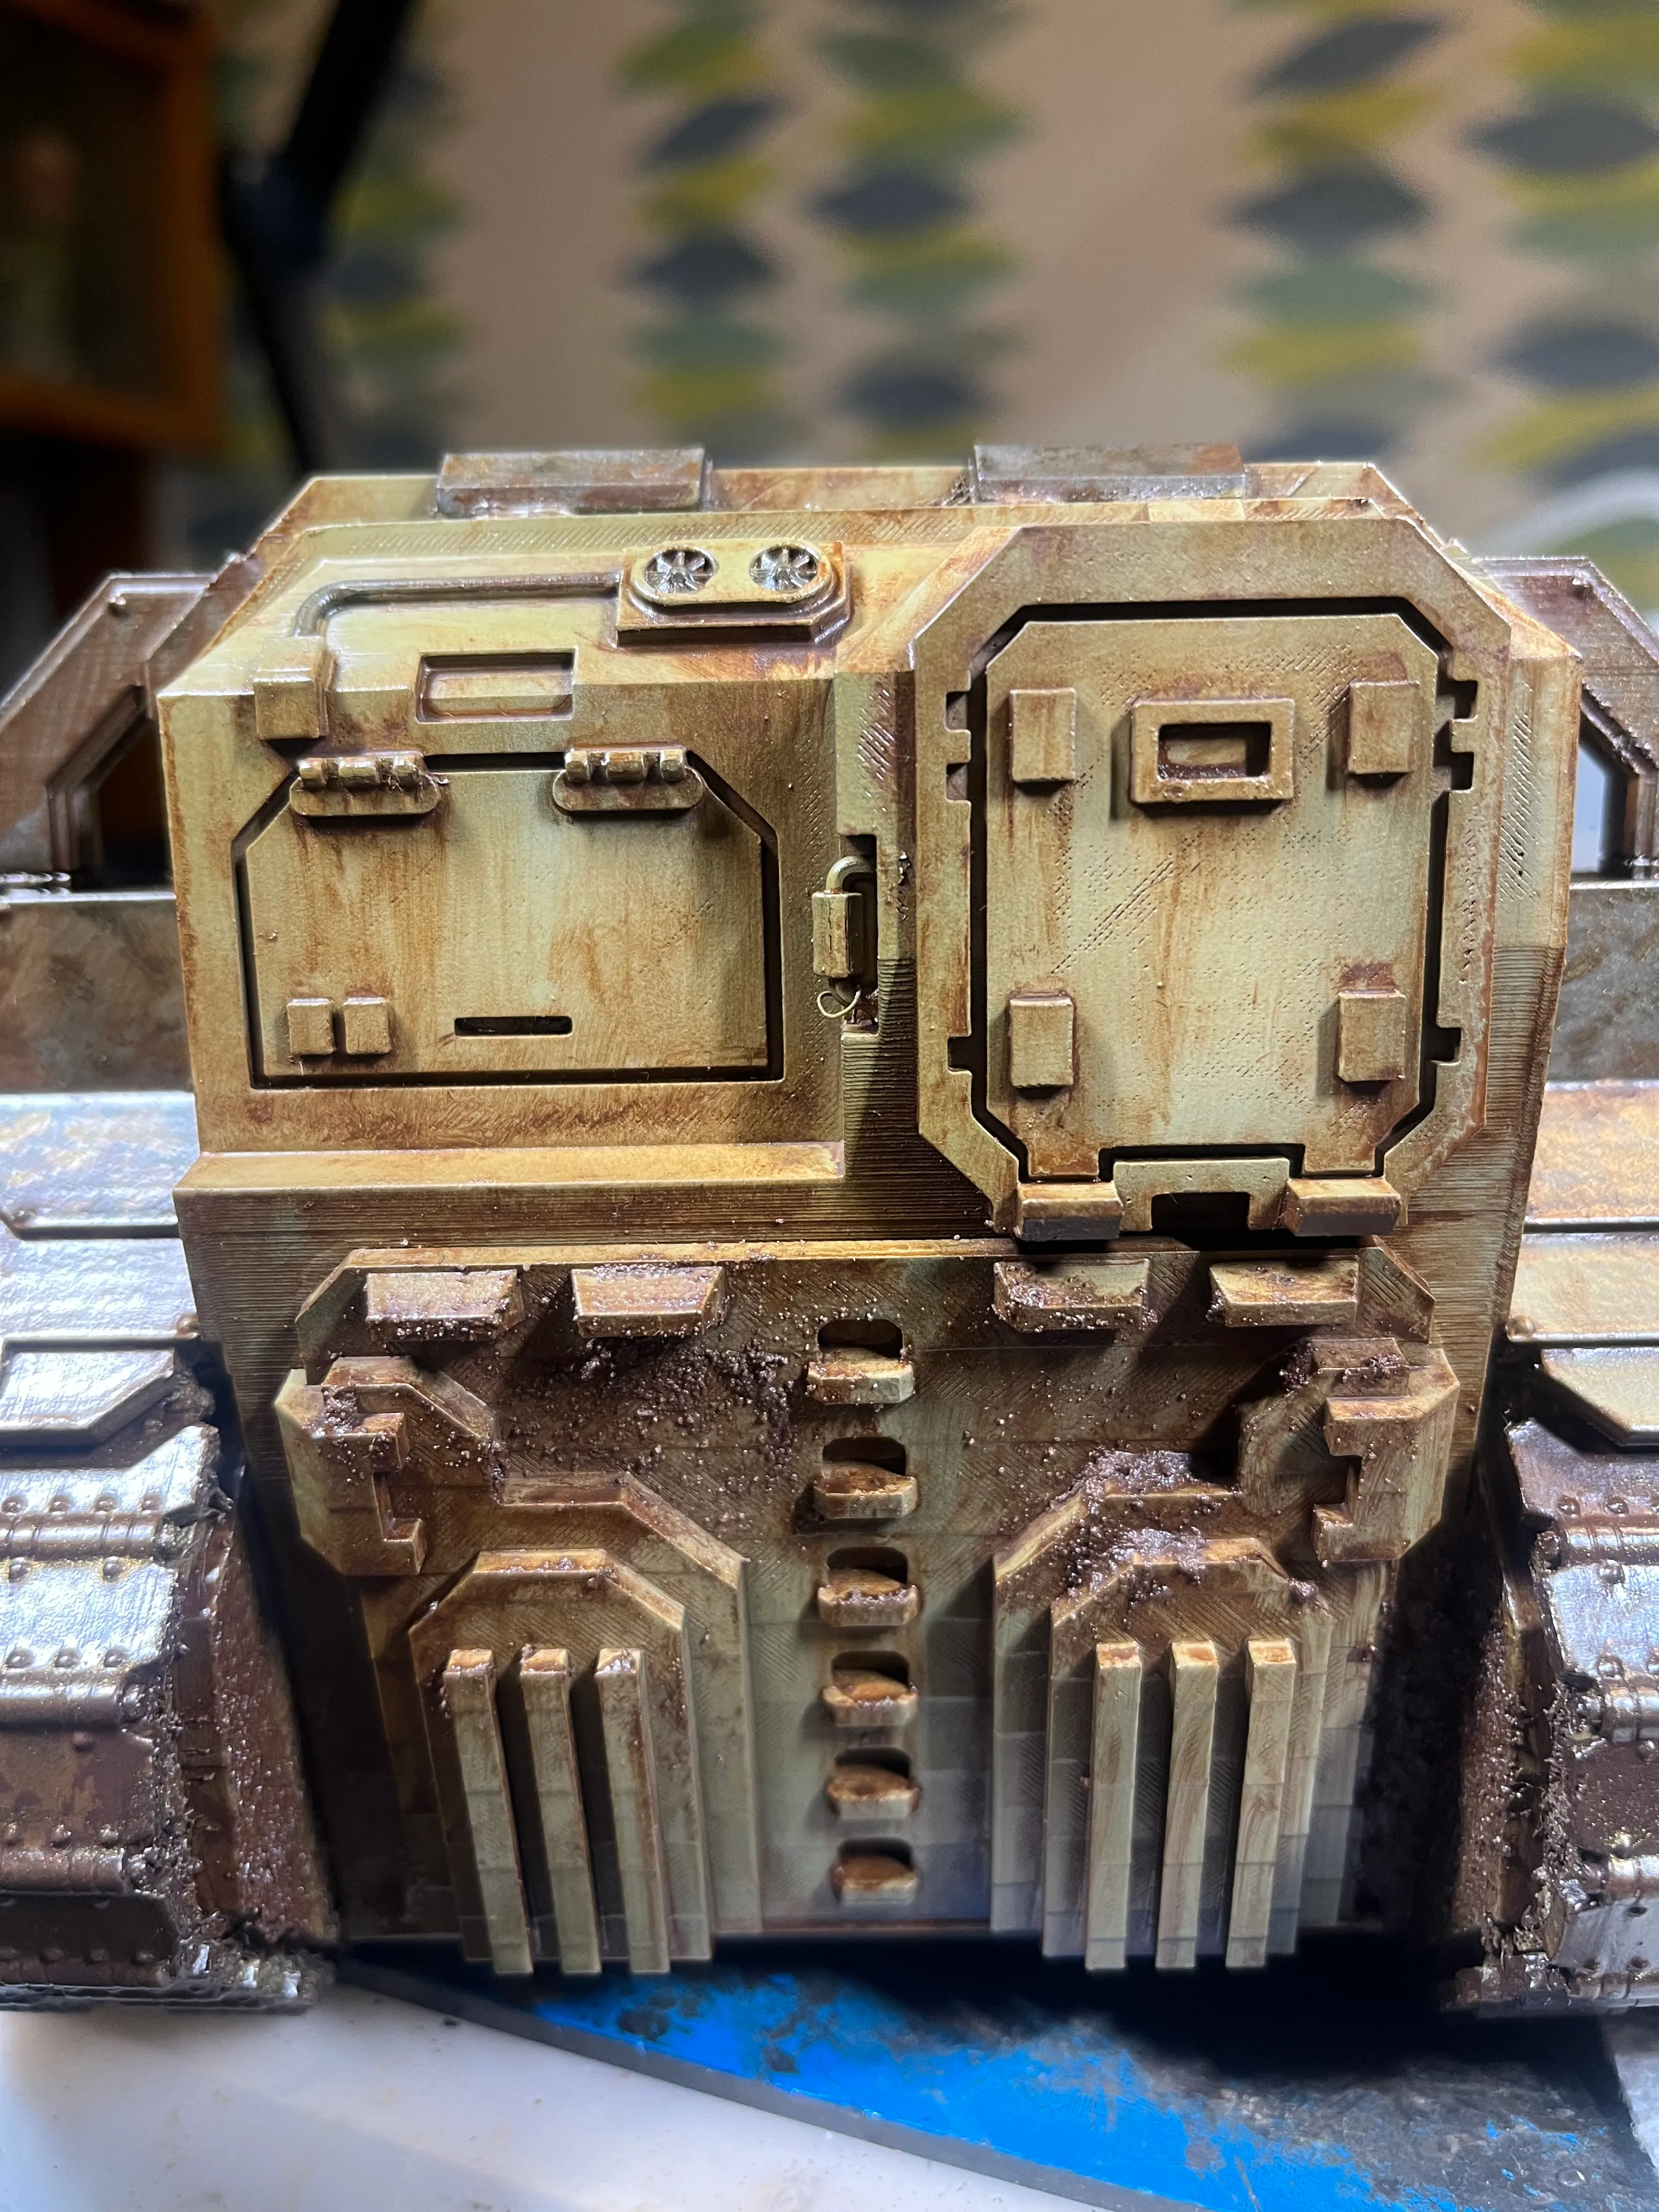
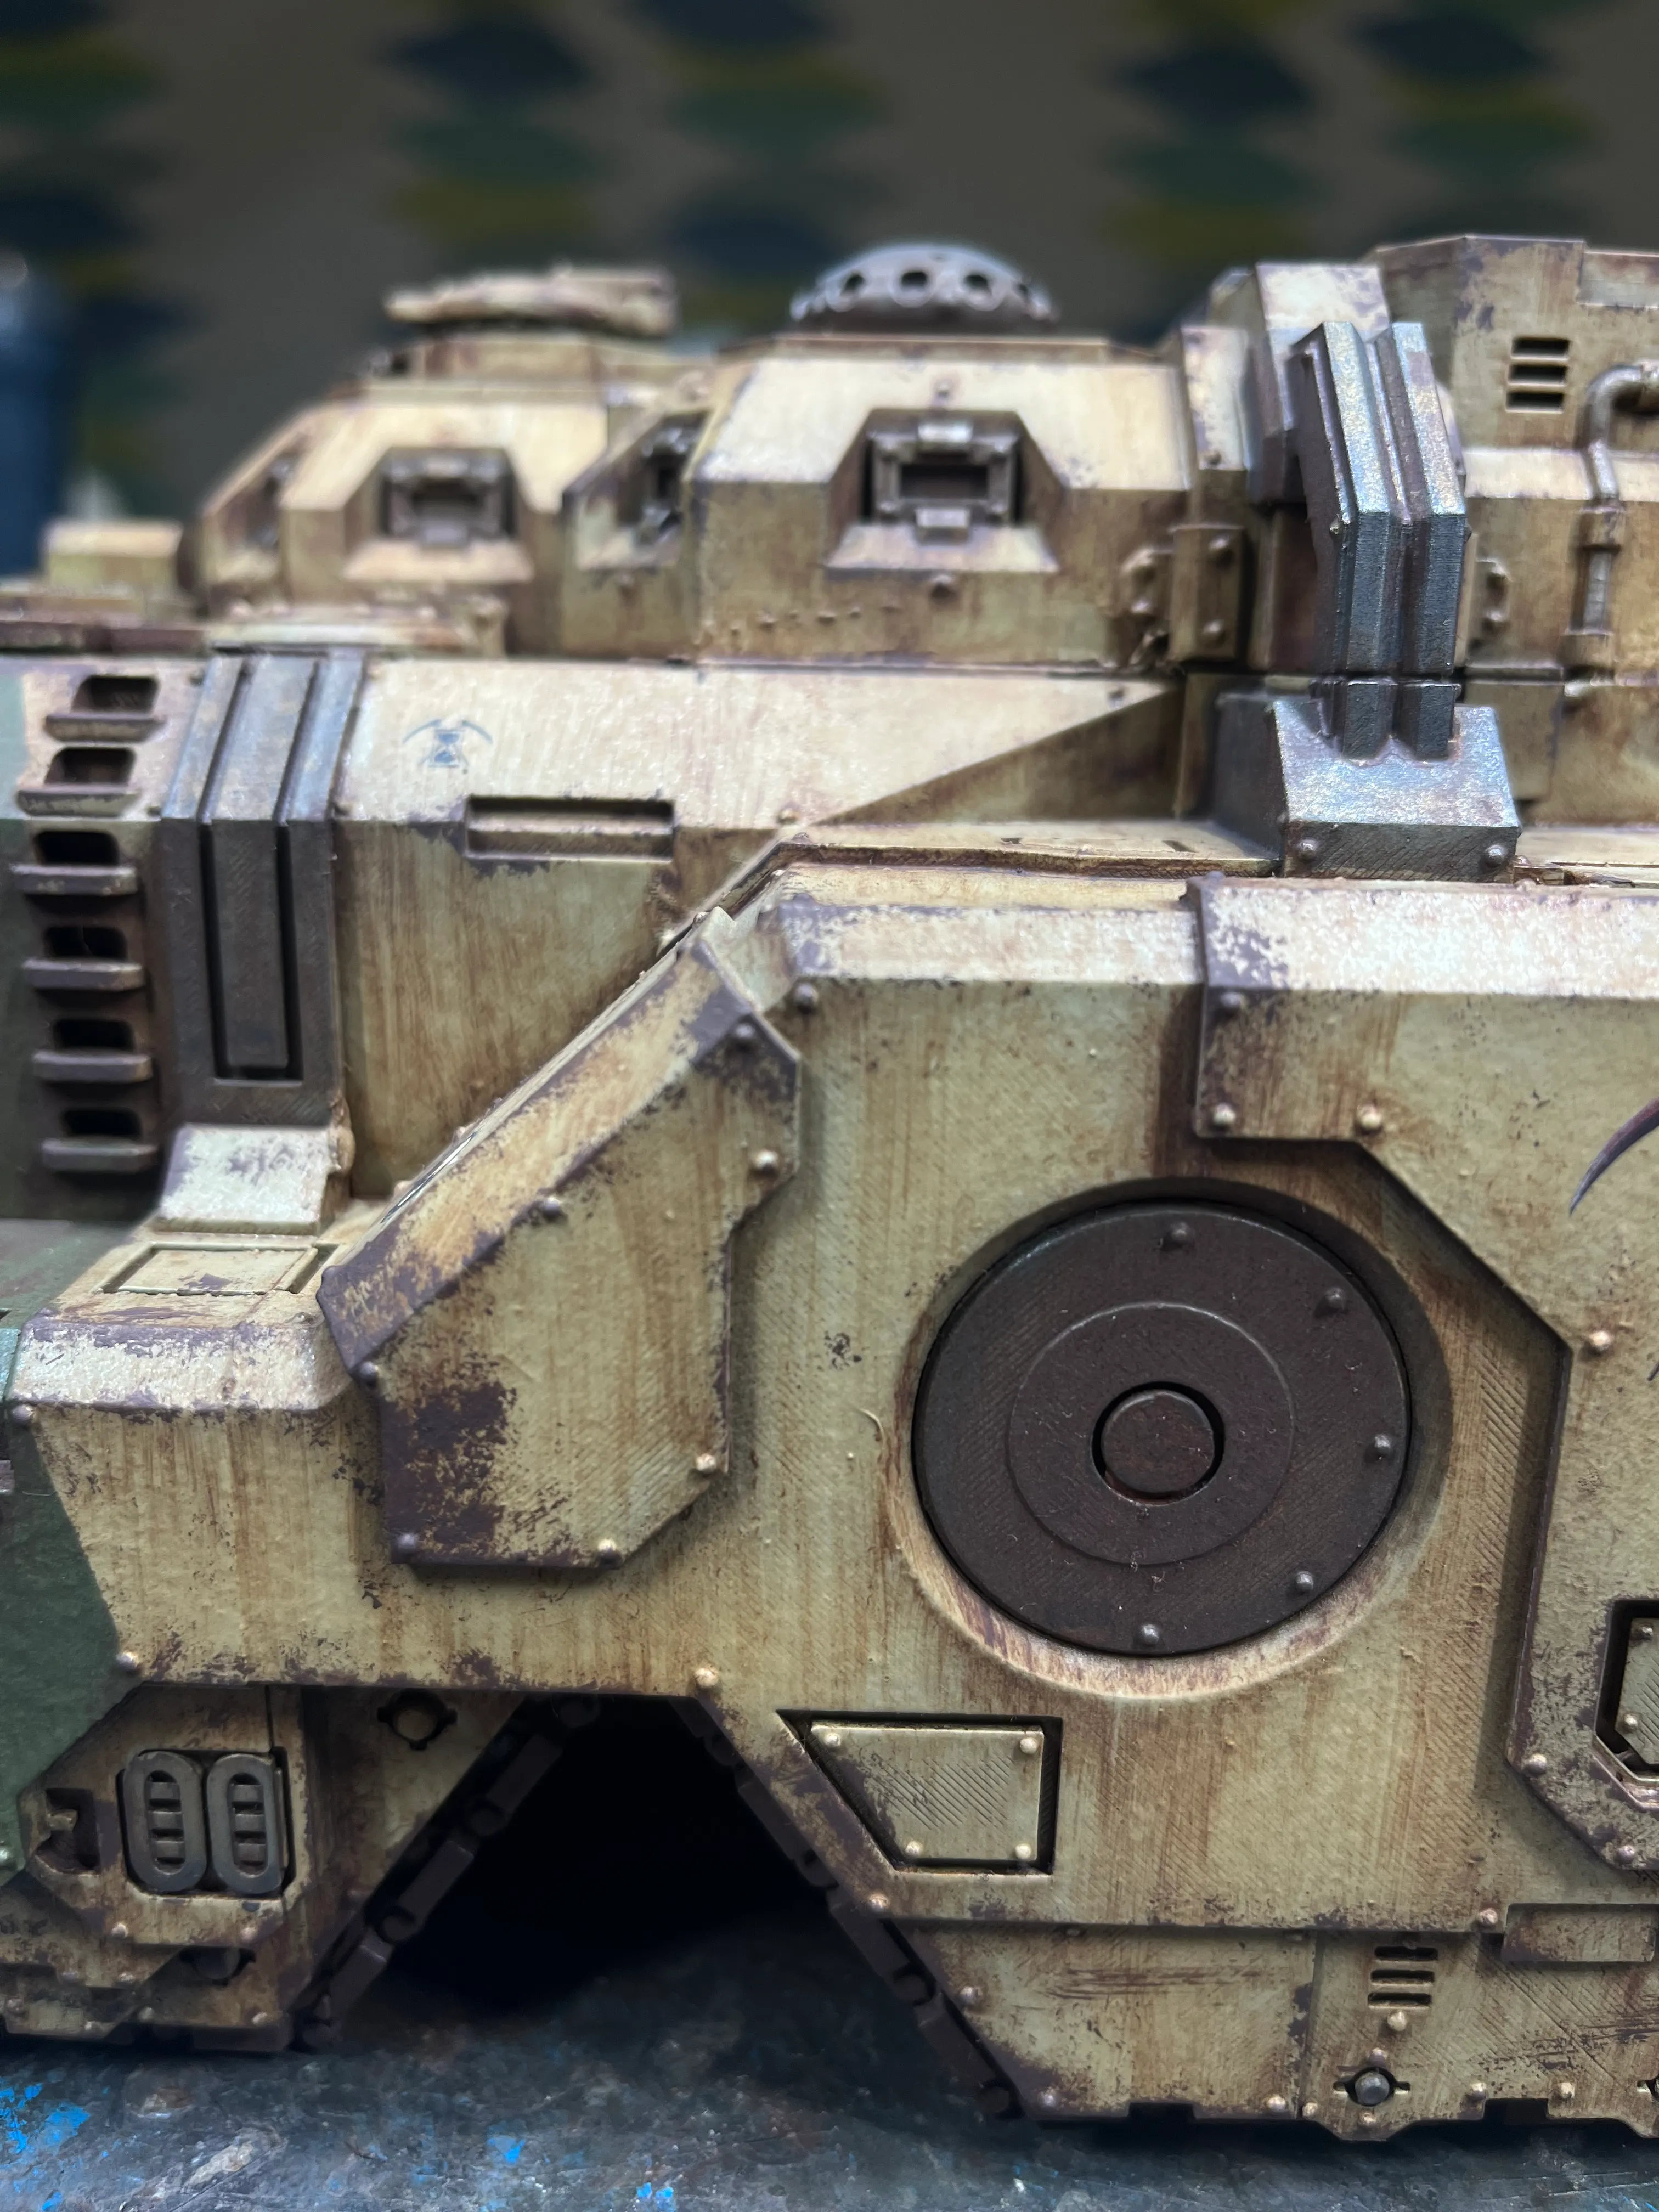
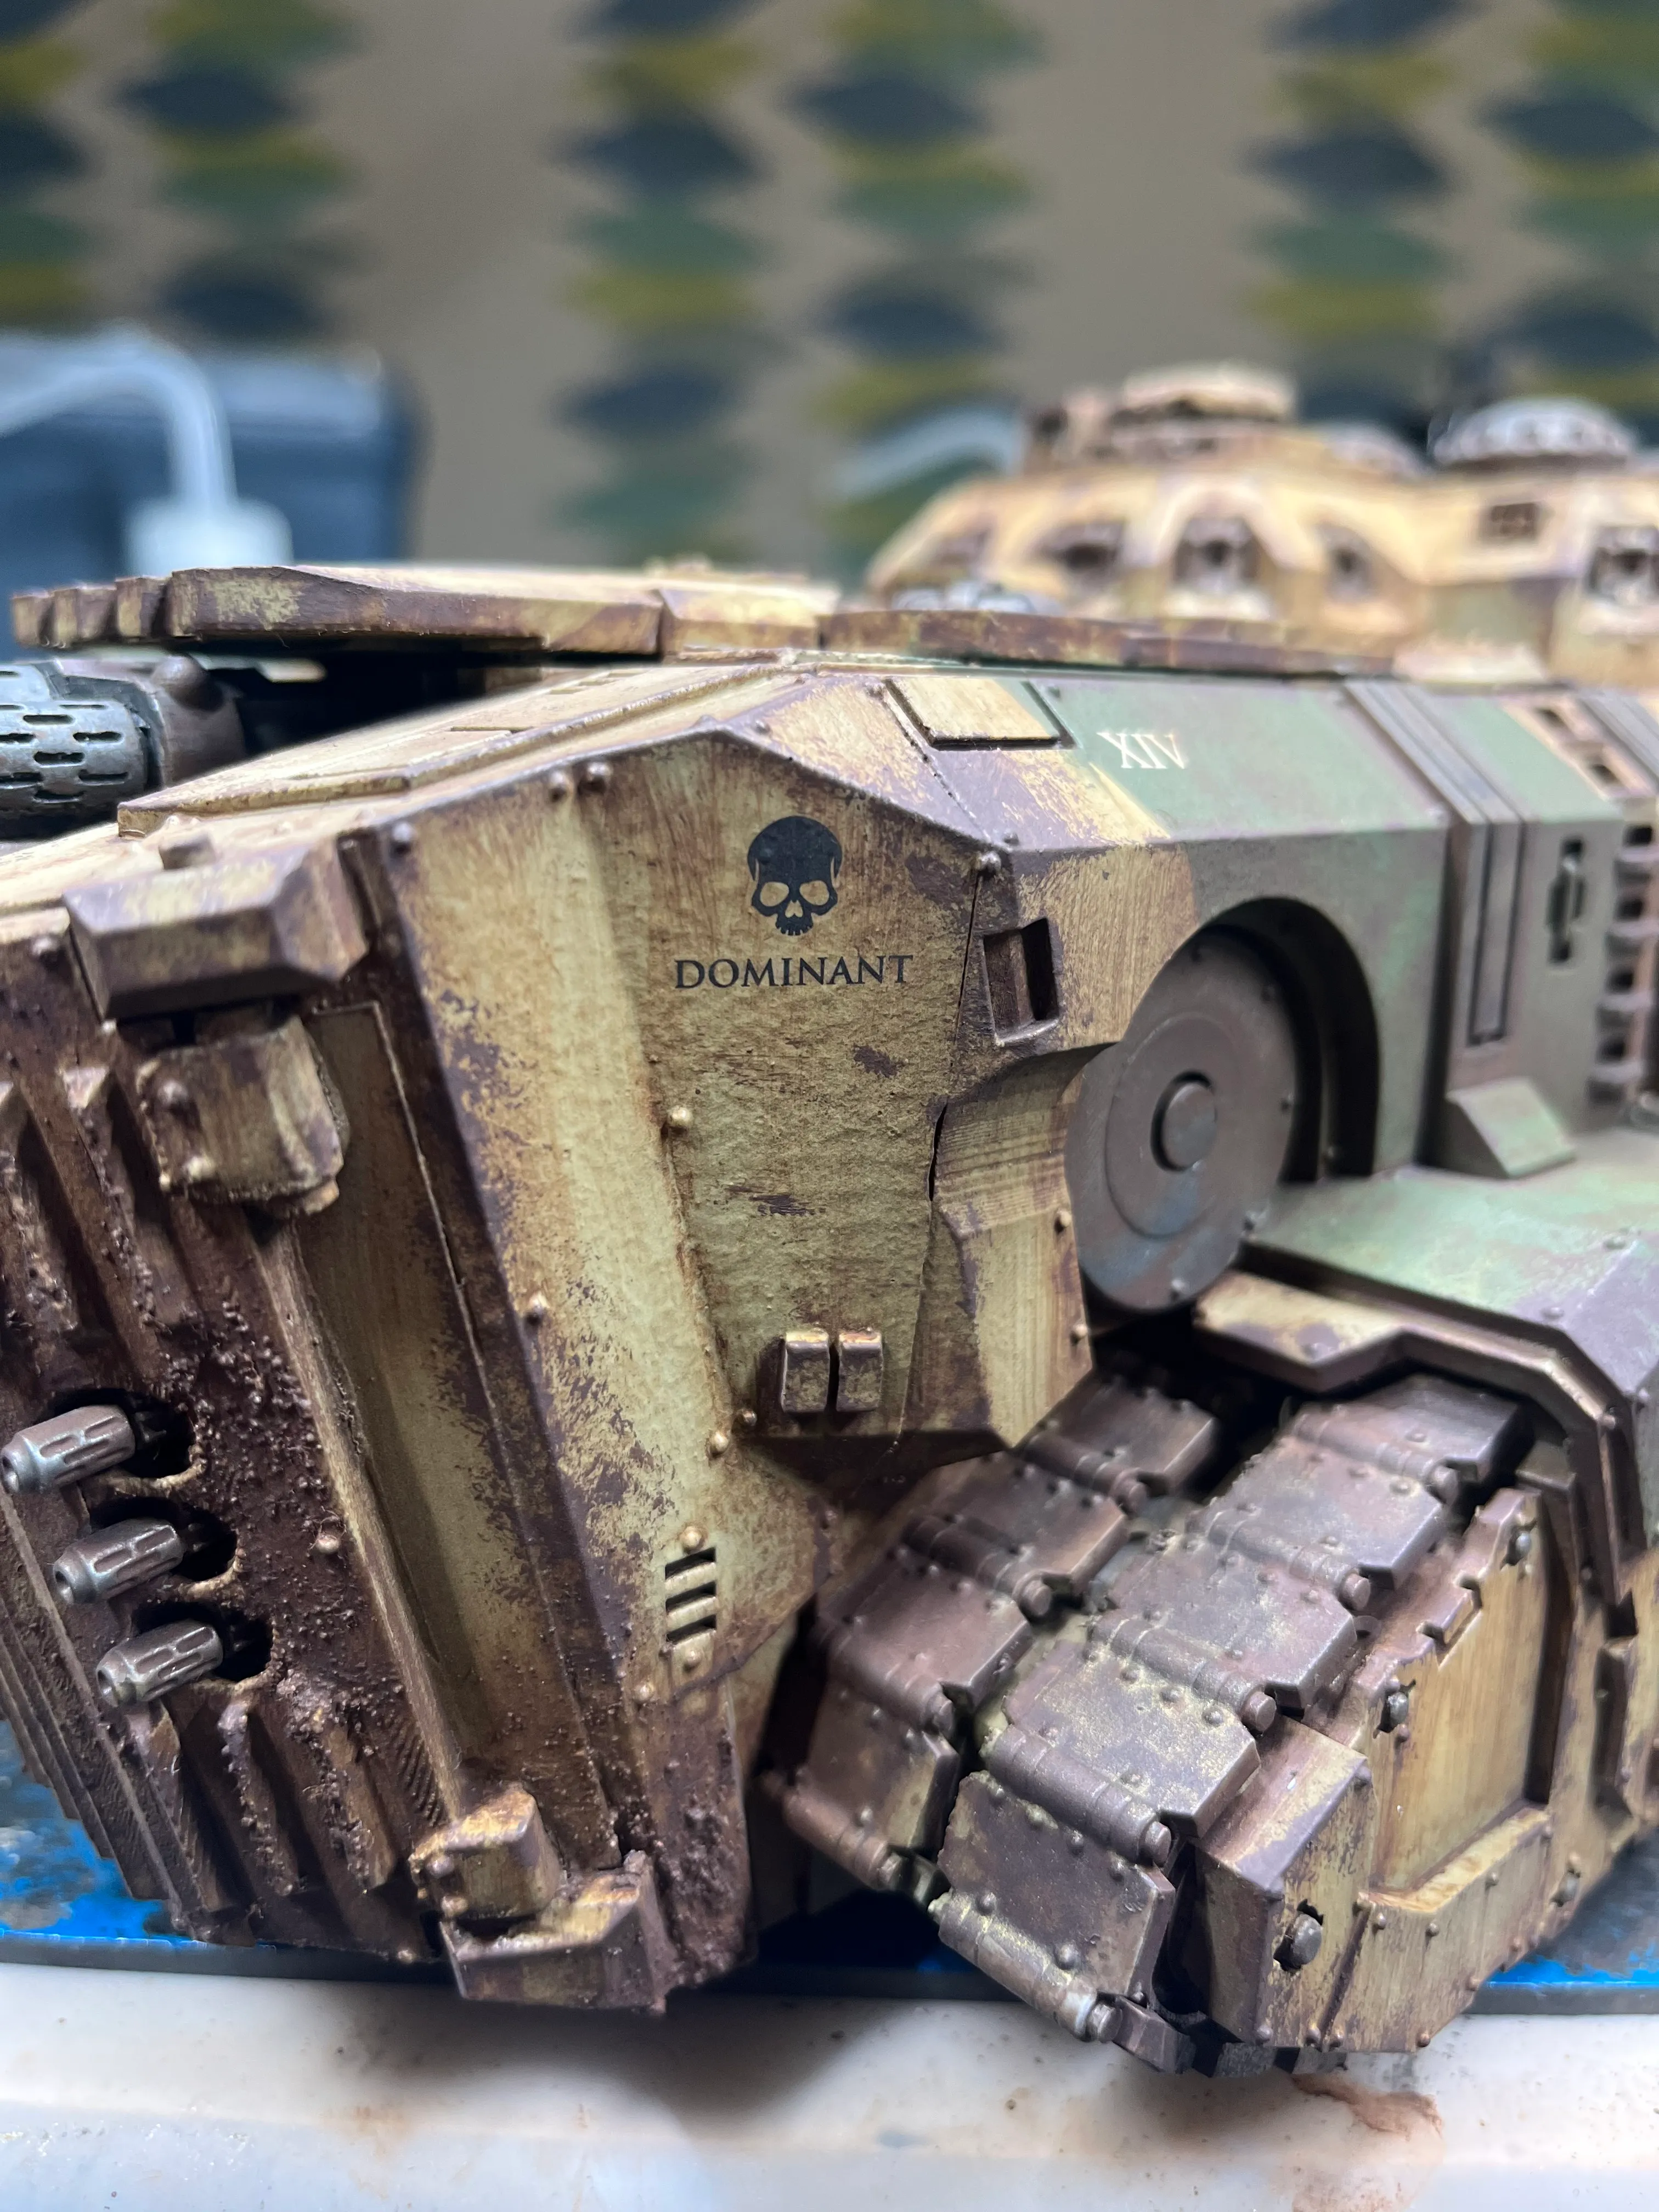
Chipping goes on after the enamel is totally dry. The tool is a torn piece of blister pack foam loaded lightly with Monument Hobbies Dark Umber and dabbed across edges and corners. The sponge produces marks that are irregular in shape and size in a way that a brush simply can’t replicate. No two chips read the same.
The placement matters as much as the marks themselves. Chips concentrate on raised edges where paint would genuinely take impacts, along corners, around hatches and joins, and on any surface that would see regular contact. Flat, protected areas get far less. The logic is that the paint is worn where wear would happen — not randomly distributed across the whole hull.

Highlights and tightening
The last pass is what makes the chips read as damage rather than texture. A small highlight — the base light tone — applied to the upper edge of each significant chip. Just a sliver, caught on the raised lip of the exposed area, implying that there’s a depression where the paint has gone and light is catching the edge of it. Without this step the chips flatten out and lose their three-dimensional quality.
This is also where you tighten up anything that went too far or landed in the wrong place. Small chips that don’t read well get subdued. Marks that hit an awkward area get a touch of base colour over them. The sponge is not a precise instrument — this pass is where precision comes back in and the result gets resolved.
Not pictured, but just as important is light glazes of reds and browns to slowly build up some of the rust chips and pull them together. Finally, a light touch of rusty-coloured oil paints which I dot filter on and then integrate into the base coat; modulating it further.